Asset Operations
Issuing an Asset to an Employee
Section titled “Issuing an Asset to an Employee”To transfer assets to an employee, go to the “Transfers” menu.
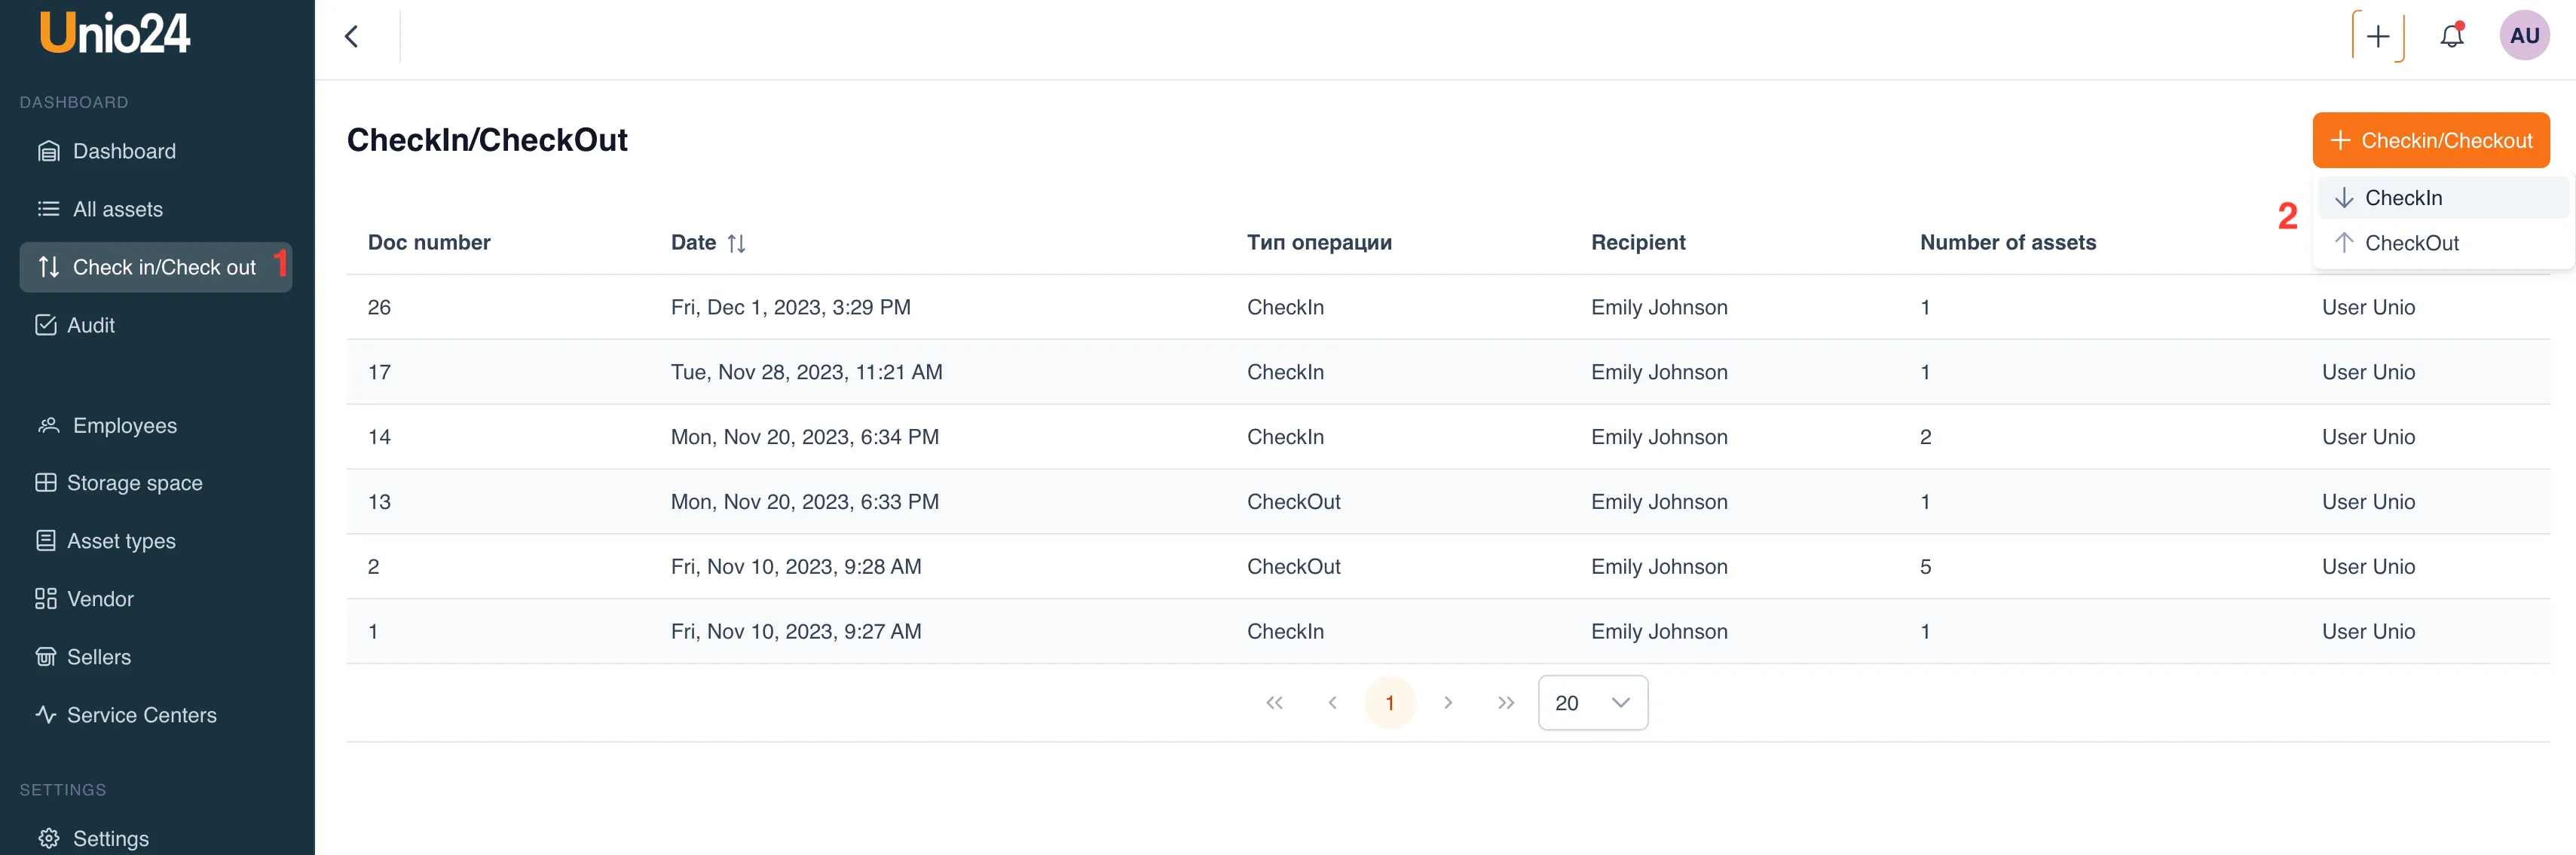
In the opened window, select the action “Issue an Asset.”
Select the employee to whom the asset needs to be transferred from the list. Choose one or more assets located in storage and click the “Save” button.
Receiving Assets from an Employee
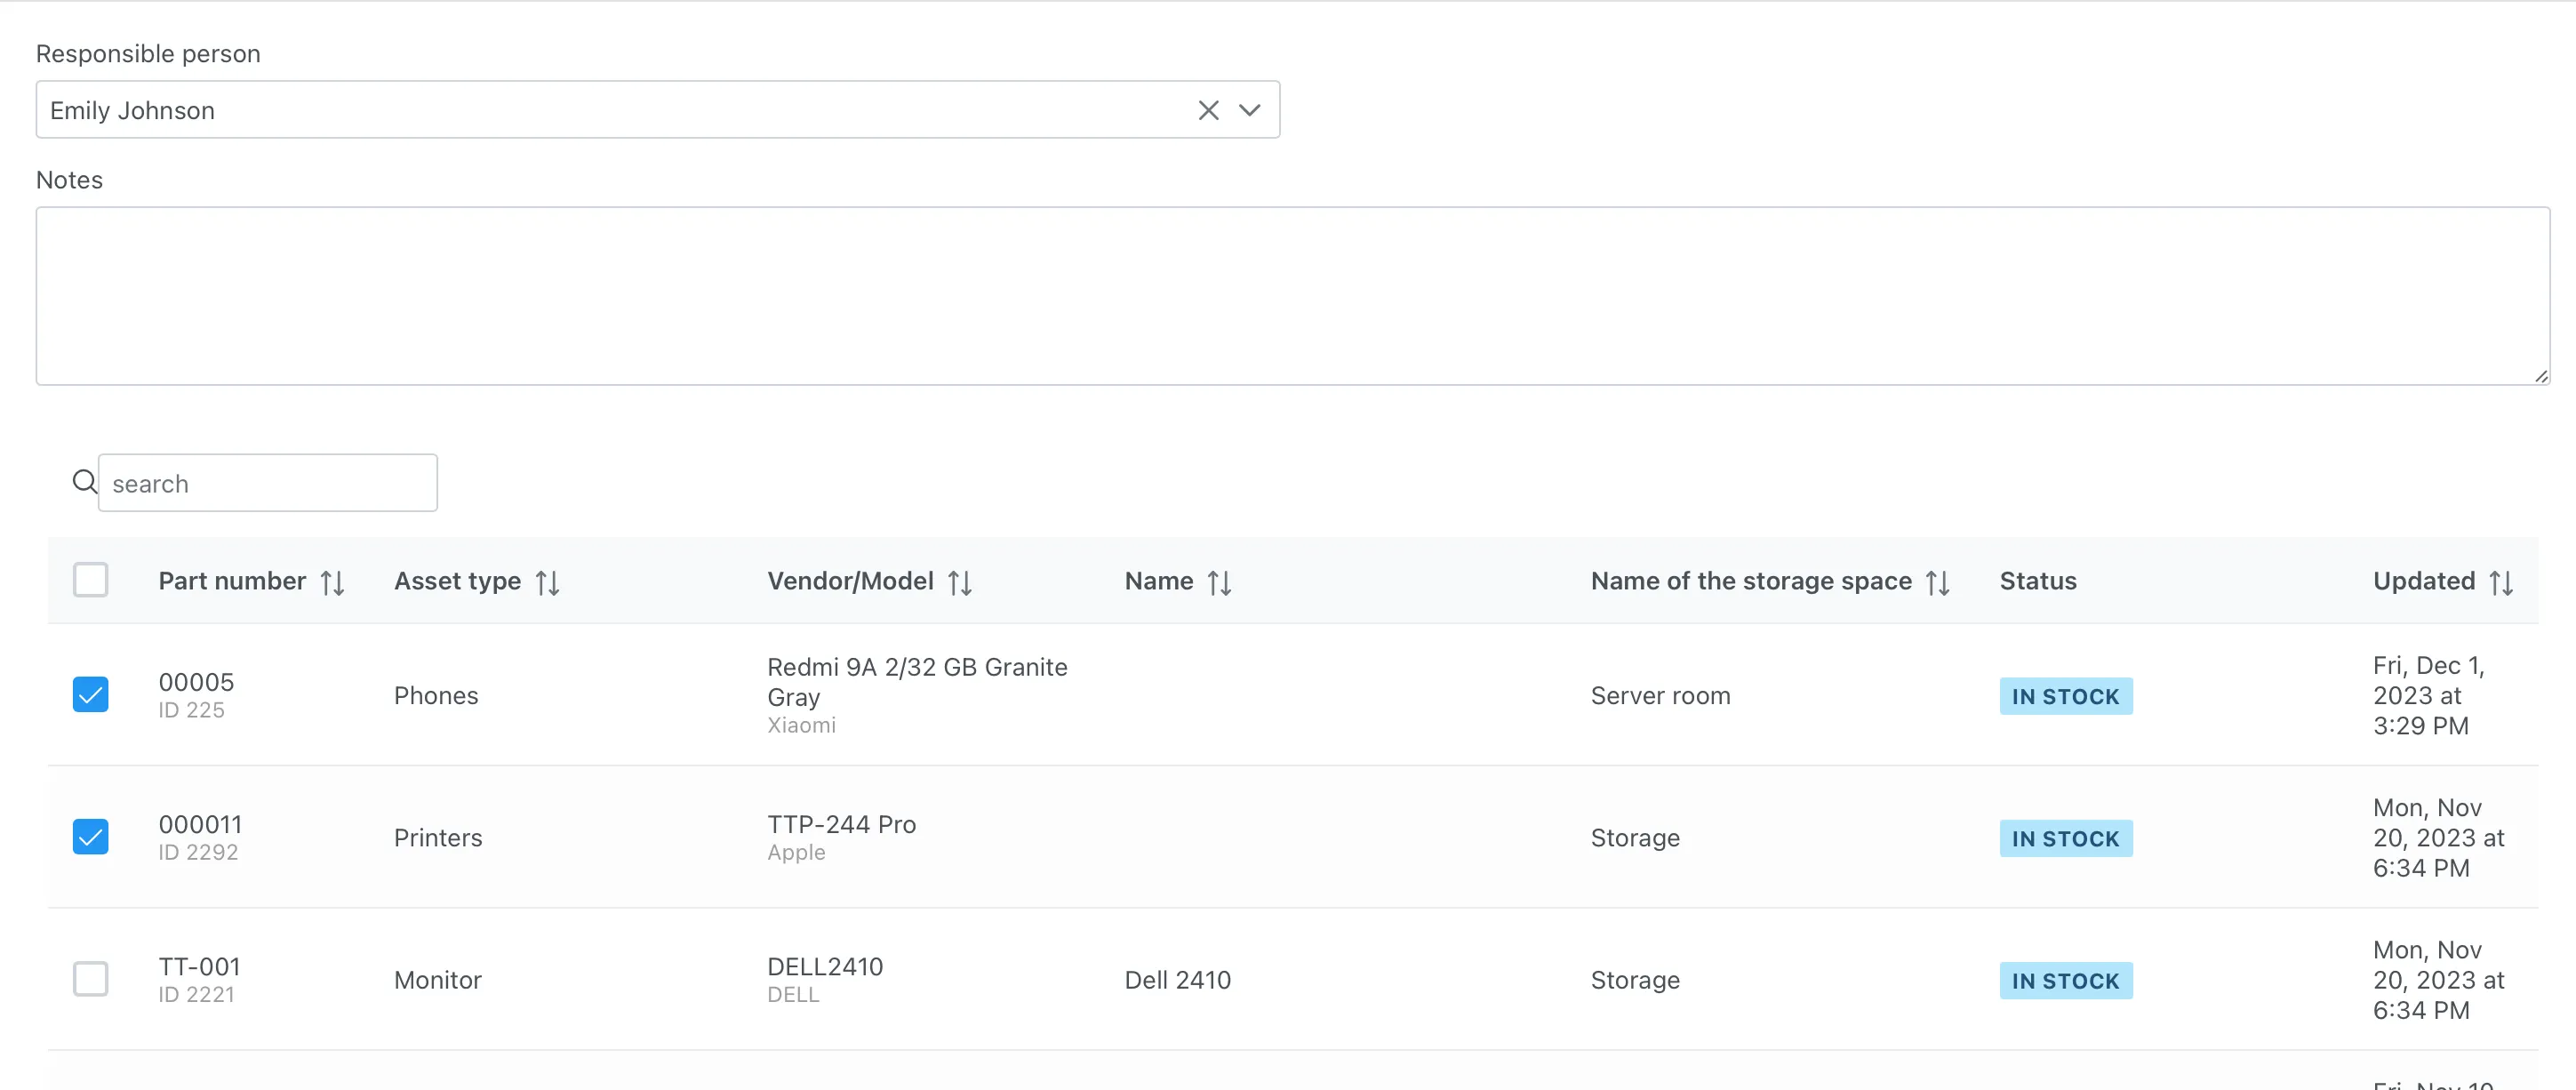
Section titled “Receiving Assets from an Employee”To receive assets from an employee, go to the “Transfers” menu.
In the opened window, select the action “Receive Asset.”
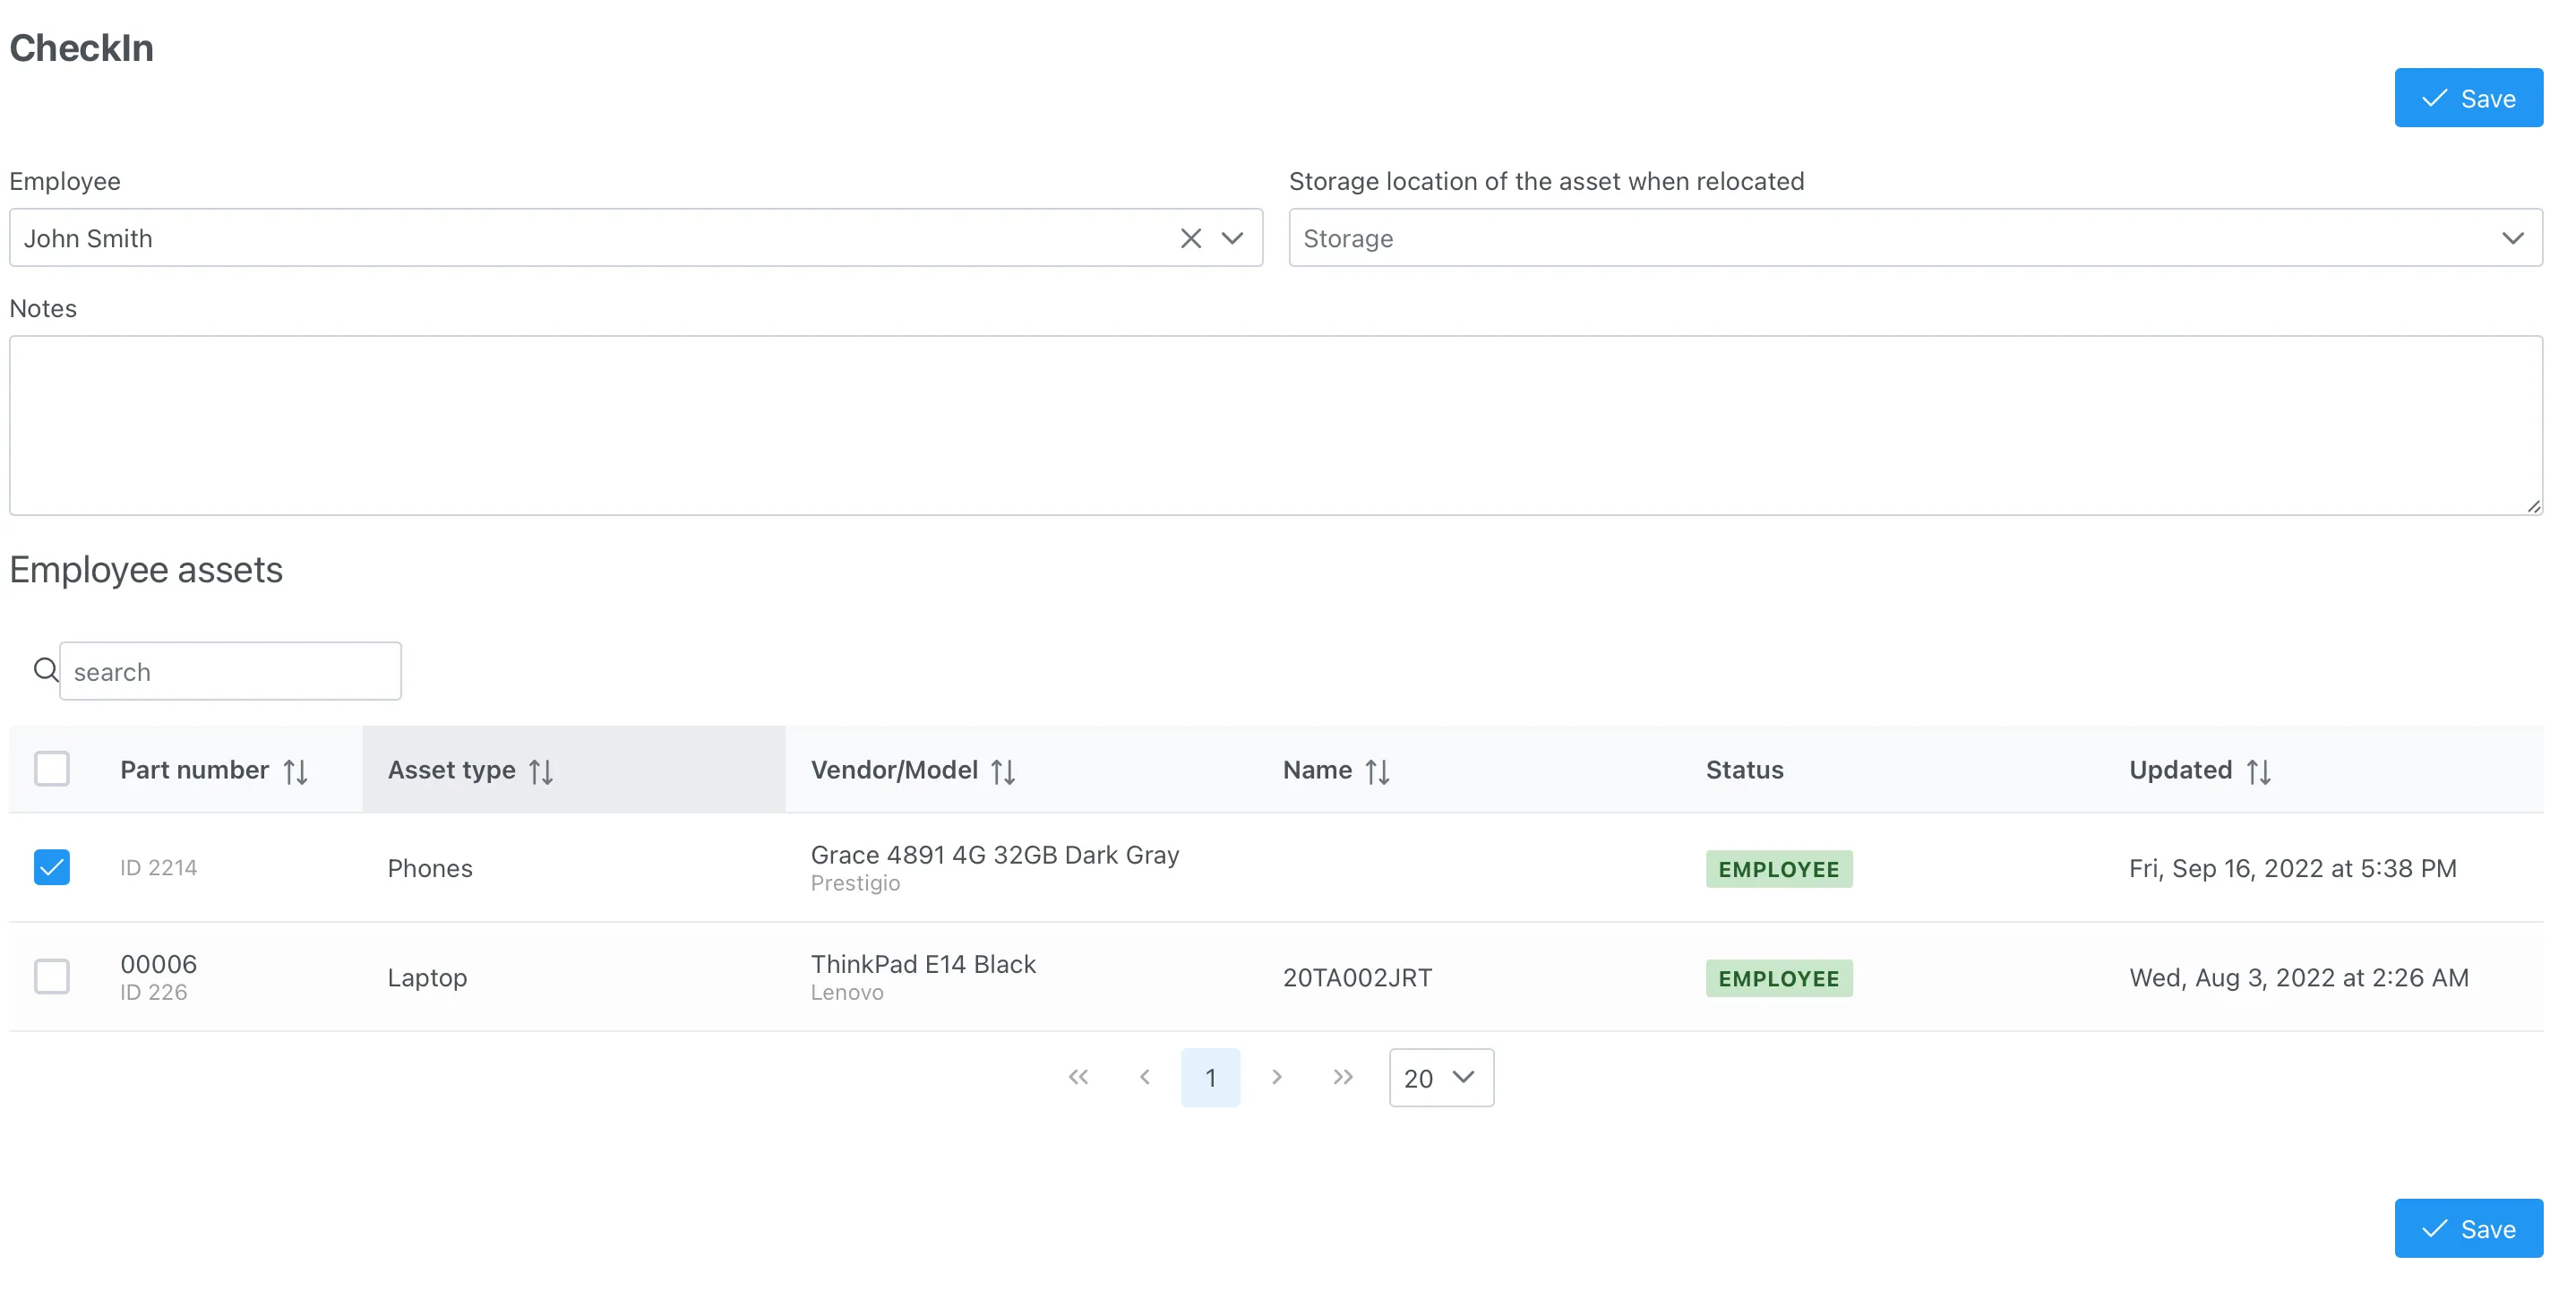
Select the employee from whom the asset needs to be transferred. Once the employee is selected, the system loads all the assets currently assigned to the employee. Choose the storage location to which the assets will be transferred and select the assets from the list to transfer. Click the “Save” button.
Transferring an Asset to Another Storage Space
Section titled “Transferring an Asset to Another Storage Space”If an asset is in storage, you can transfer it to another storage location. This operation can be performed from the asset card using the “Transfer Asset to Storage” action menu.

Select the storage location from the list to which you want to transfer the asset.
Sending an Asset to a Service Center
Section titled “Sending an Asset to a Service Center”To send an asset to a service center, use the “Send Asset to Service Center” action menu from the asset card.
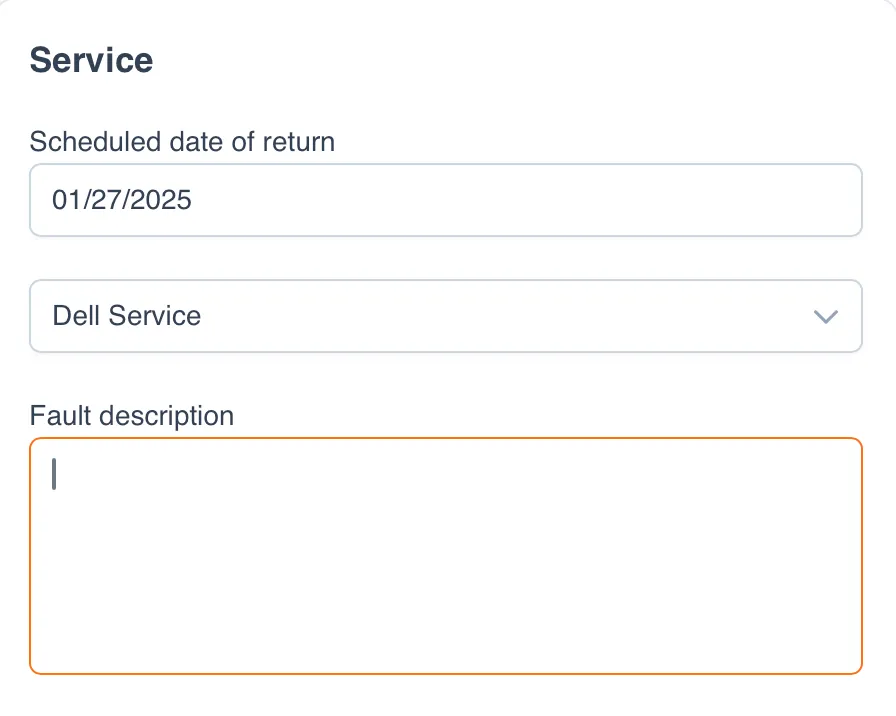
Enter the expected return date, the name of the service center, and describe the malfunction or any other information (e.g., maintenance).
After entering this action, the system will change the asset’s status to “in repair.”

Receiving an Asset from the Service Center
Section titled “Receiving an Asset from the Service Center”Once the asset returns from repair, enter the relevant information. This can be done from the asset card using the “Receive Asset from Service Center” action menu.
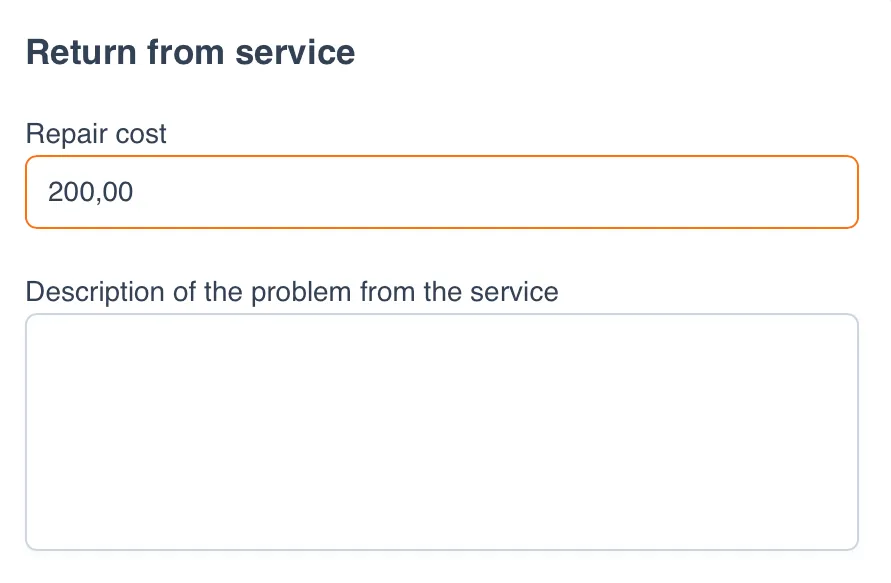
Enter the repair cost and the repair issue provided by the service.
Writing Off an Asset
Section titled “Writing Off an Asset”Writing off an asset can be done from the asset card using the “Write Off” action menu.
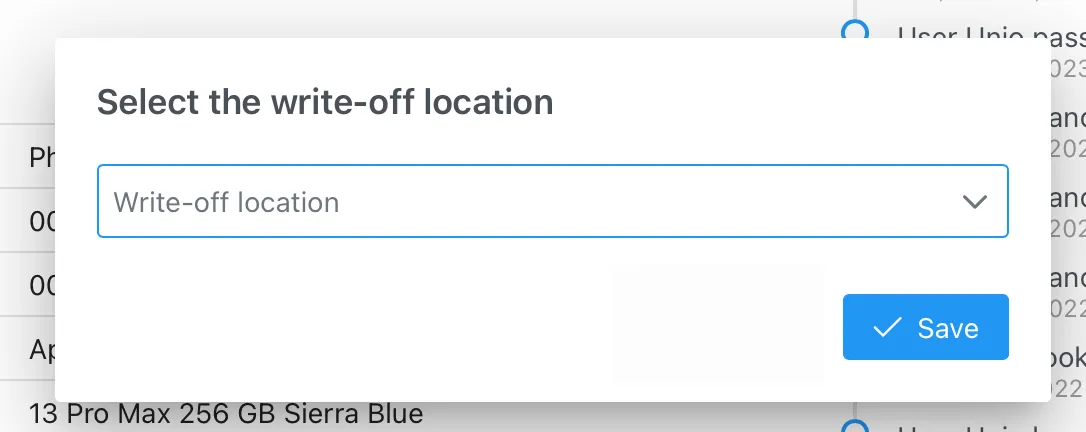
Writing off can only be done in storage locations marked with the setting “is a storage location for written-off assets”.
Deleting an Asset
Section titled “Deleting an Asset”Deleting an asset occurs after it has reached the end of its lifecycle in the system. To do this, you need to:
- Perform the “Write Off an Asset” operation and transfer the asset to the storage location for written-off assets.
- Go to the storage location for written-off assets and click the “Delete Asset” button.

- Confirm the asset deletion.
::: warning Attention The asset deletion operation is irreversible, and all related data (such as asset history, transfers, repairs, etc.) will also be deleted. :::