

Labels
For step-by-step instructions, see Working with labels and Setting up labels. For a full list of actions, fields, and settings, see the Labels reference.
A label assigns a record a short code that you can use to find it. The code is placed on the object: printed as a QR code on a sticker or written to an NFC tag. When the code is scanned, the person is taken back to the record — or, if they have no access, to your public lost & found page.
What a label and a code are
Section titled “What a label and a code are”A label is the link between a record in the system and a code. The code consists of 8 characters and is shown in XXXX-XXXX format. A single record can have several labels over its lifetime, but only one stays active at any moment. When you create a new code or enter someone else’s, the previous code becomes invalid (status Revoked) and no longer leads to the record.
The QR code encodes not the record itself but the code’s public address. From it, the system determines which record it is tied to and decides what to show the person scanning it.
Which records can be labeled
Section titled “Which records can be labeled”A label can be assigned to five types of record:
- Assets
- Inventories
- Employees
- Locations
- Licenses
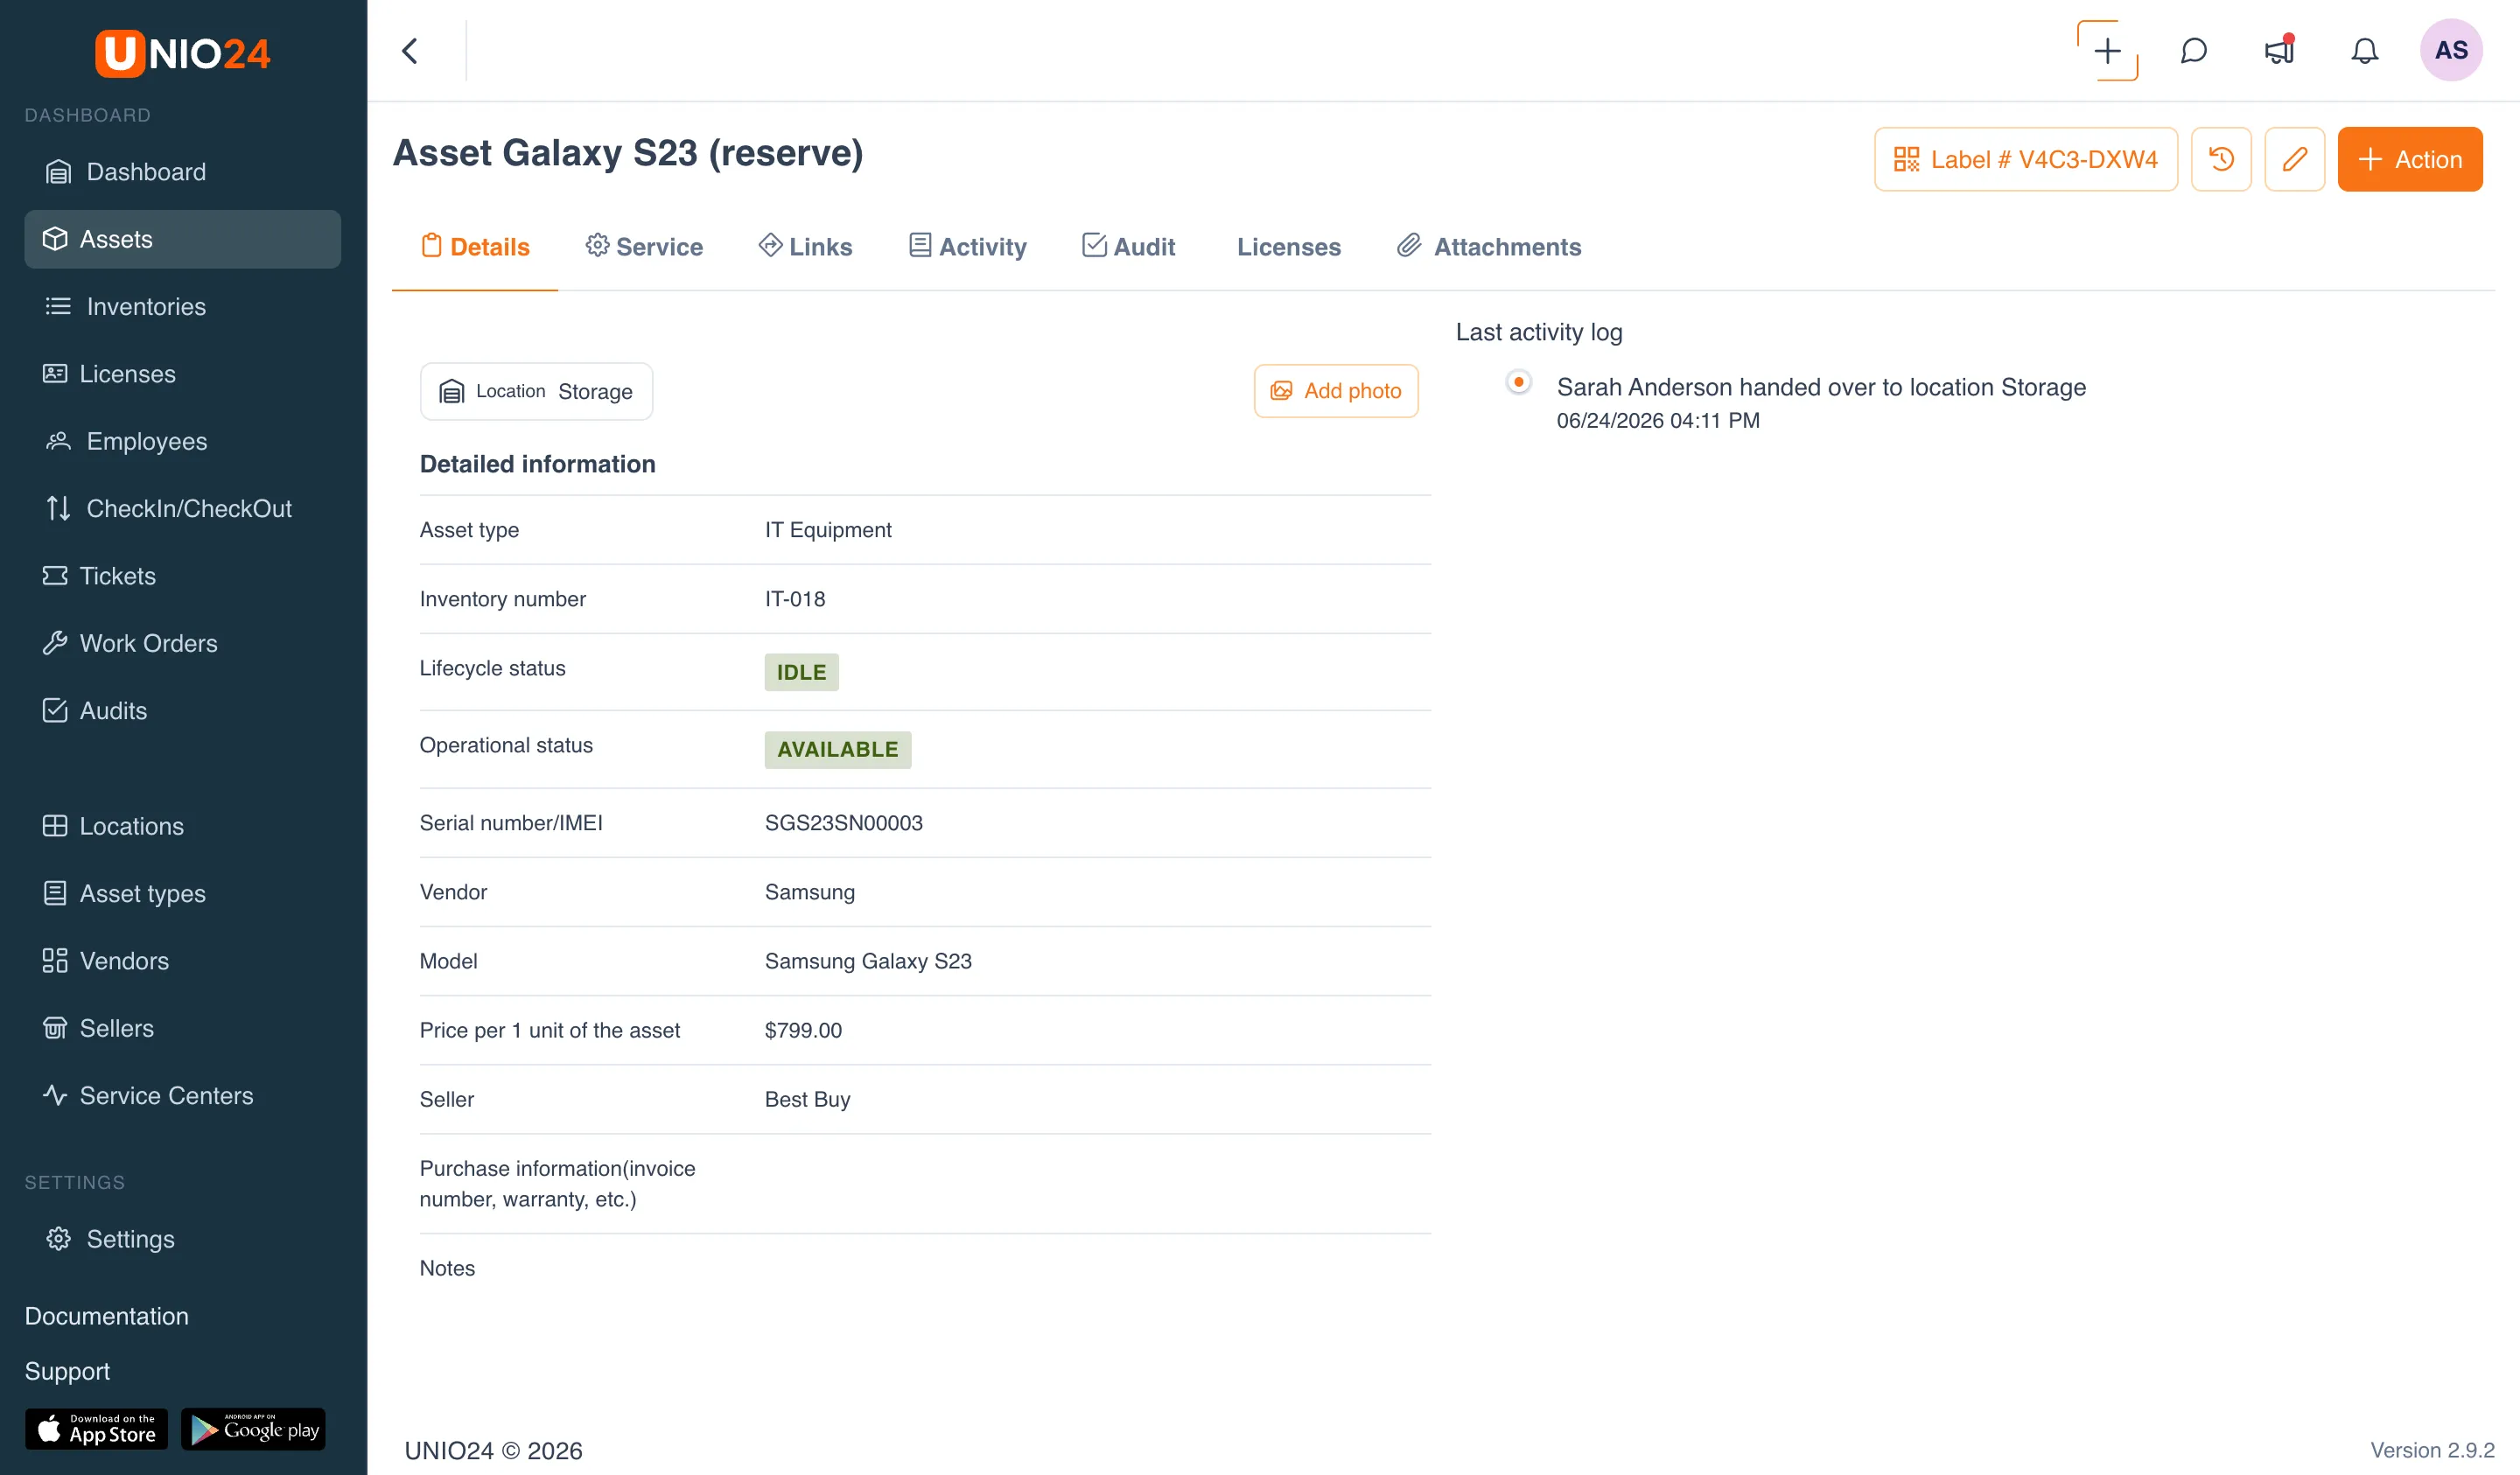
Each such record card has a label button. If no code has been assigned yet, it reads Generate Tag; if one has been assigned, it shows the label number.
Label actions
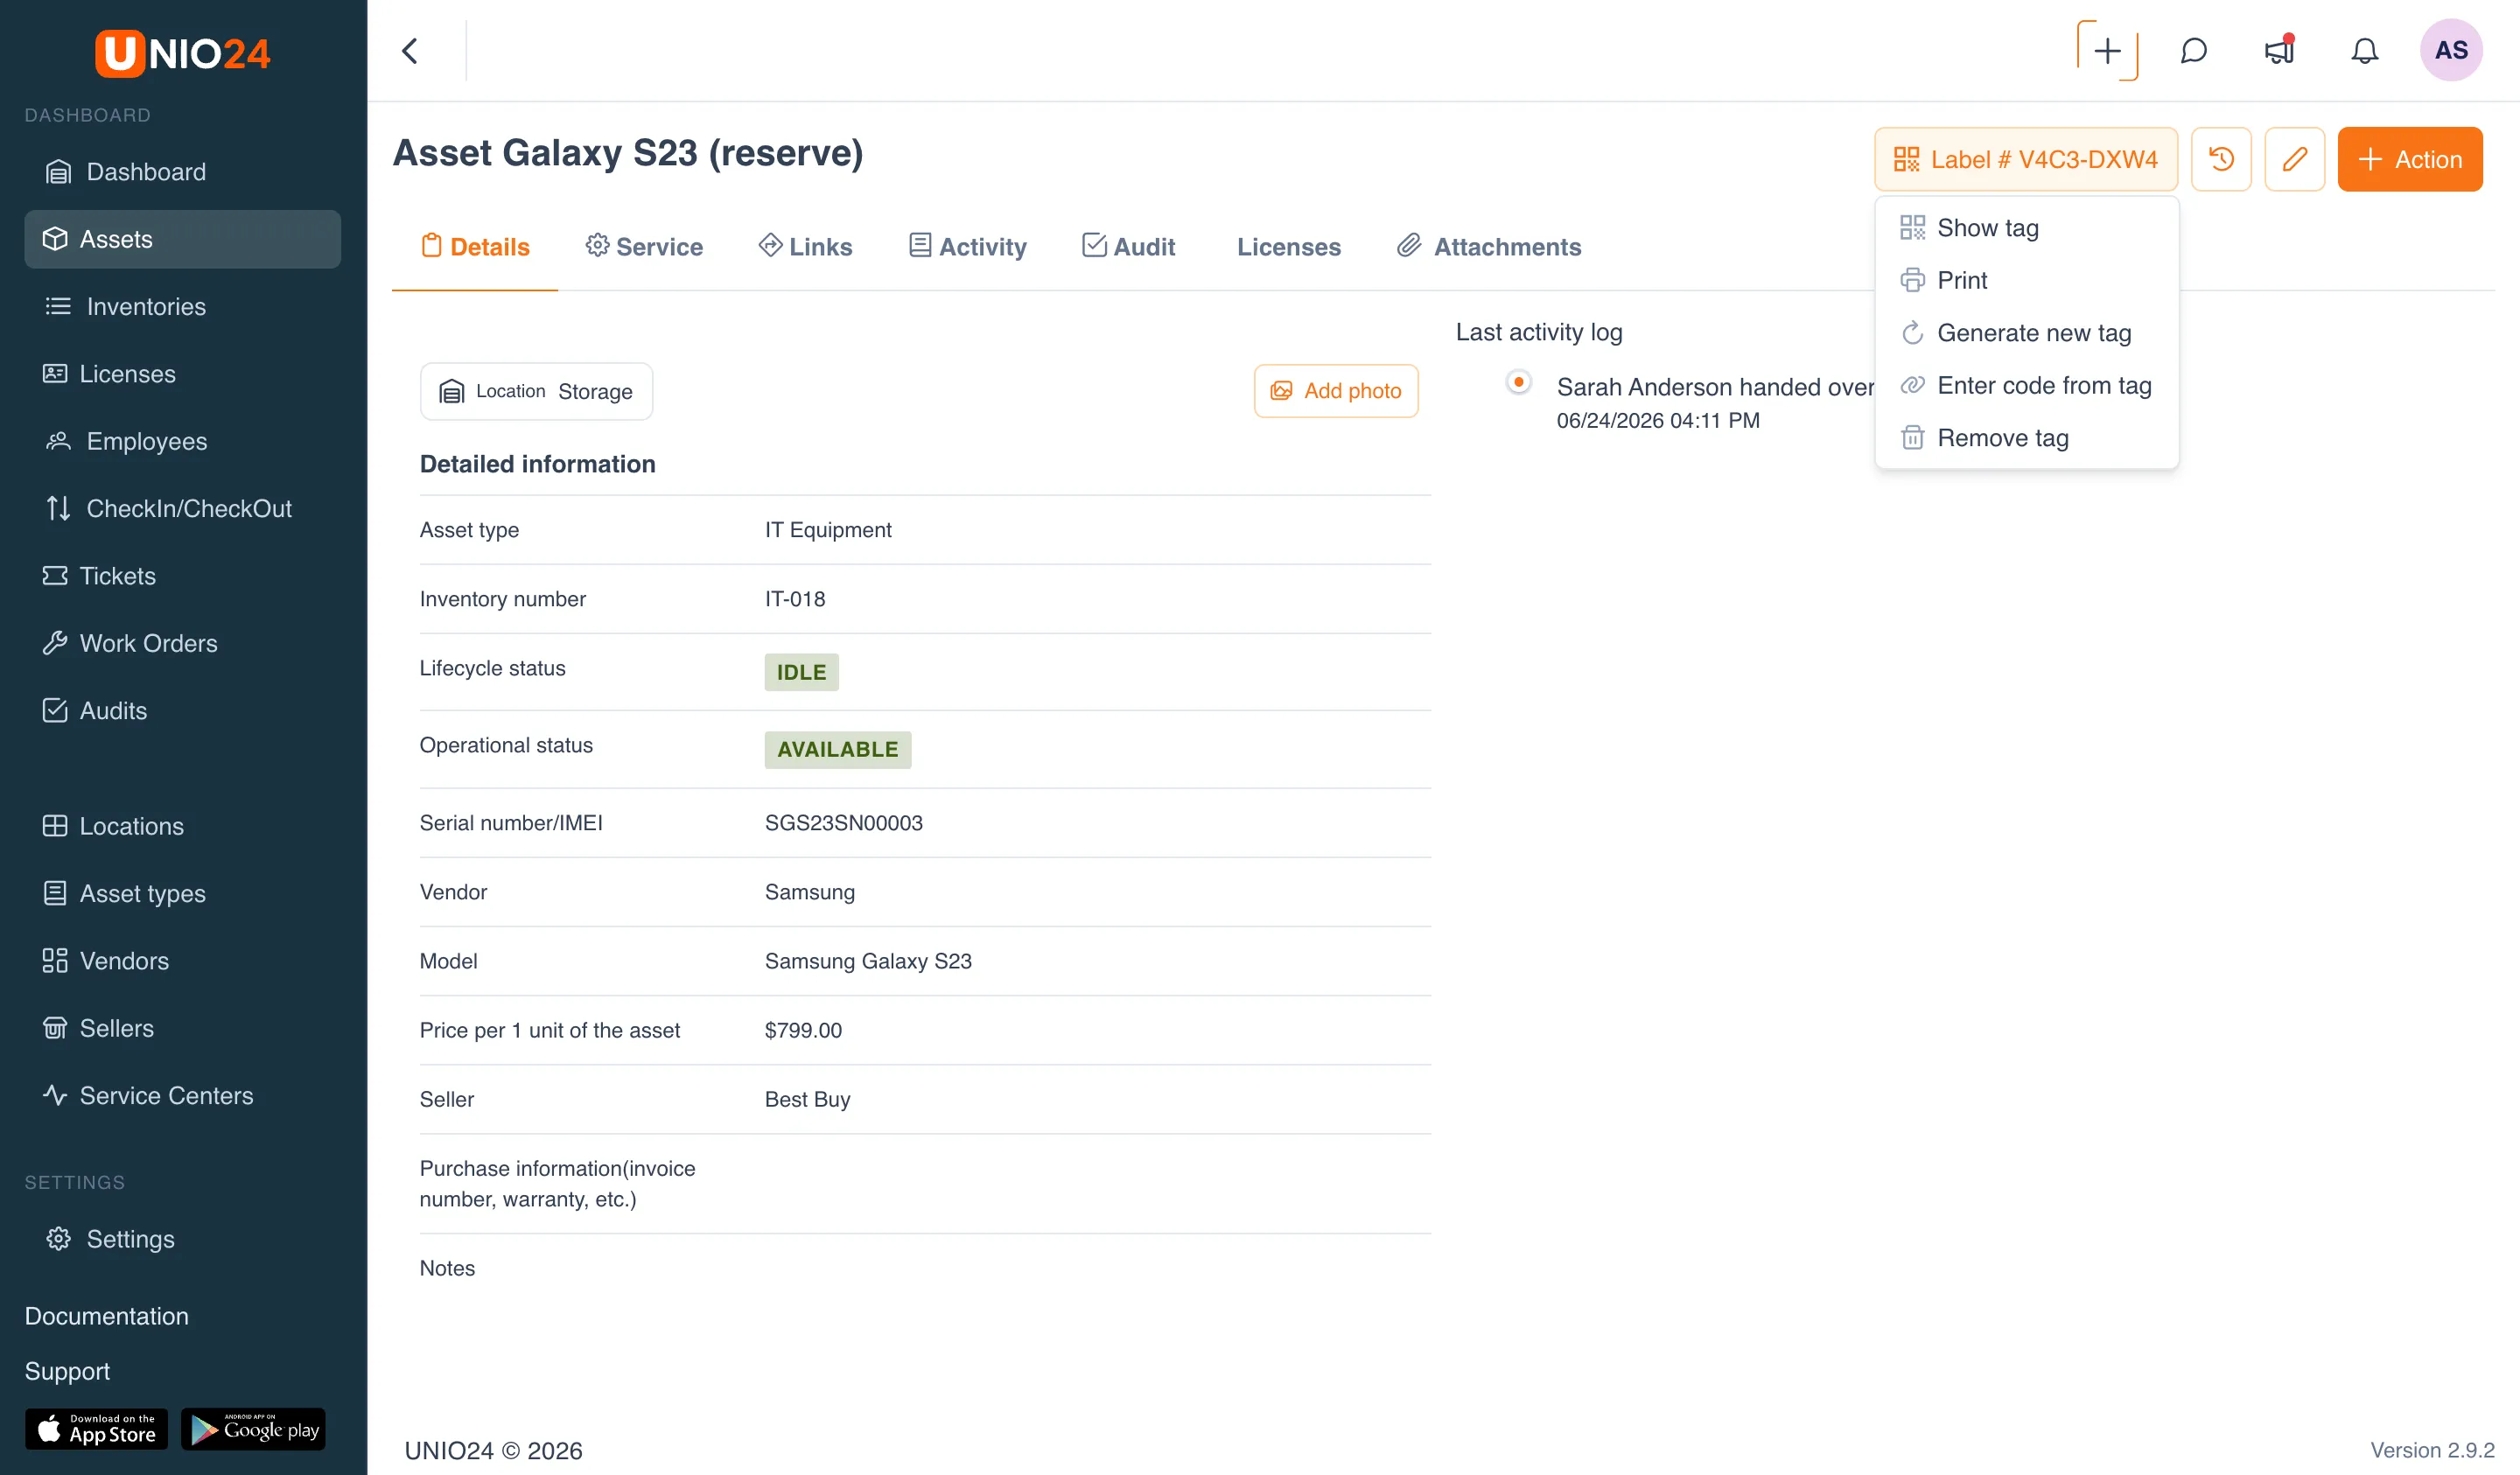
Section titled “Label actions”The label button on the card opens a menu. The set of items depends on whether the record has an active code:
- Show tag — opens the record’s QR code on screen so it can be scanned.
- Print — opens the sticker print dialog: template choice, number of copies, preview, print, or Download PDF.
- Generate new tag — generates a new code and ties it to the record. If a code already existed, it is replaced, and the previous sticker stops working.
- Enter code from tag — ties an existing code to the record, for example from a pre-printed sticker (by typing it or scanning it).
- Remove tag — detaches the code from the record. The previous sticker stops working, but the code can be assigned again.
While there is no code, the menu only has Generate new tag and Enter code from tag; the other items appear once a code is assigned. For step-by-step instructions on each action, see Working with labels.
This is the web interface menu. Writing a code to a physical NFC tag is done in the UNIO24 mobile app.
Labeling methods
Section titled “Labeling methods”A label code is just an identifier; it is placed on the object itself in one of two ways. UNIO24 supports two code carriers.
- QR sticker. The code is printed as a QR code and stuck on the object. Stickers are designed and printed right in the system (see Templates and presets and Printing) and are scanned with a smartphone camera in the mobile app.
- NFC tag. The same code is written to an NFC tag (sticker or key fob) through the UNIO24 mobile app. To open the card, just hold the phone to the tag — no camera and no direct line of sight needed.
How to label an asset
Section titled “How to label an asset”On the record card, create a code, then place it on the object — print a QR sticker or write the code to an NFC tag through the UNIO24 mobile app. After that the asset opens by scanning the QR code or tapping the NFC tag in the mobile app.
Stickers or NFC: which to choose
Section titled “Stickers or NFC: which to choose”Both methods lead to the same card — choose the carrier based on operating conditions.
QR stickers are cheaper and more universal: any printer and any smartphone camera will do, and it is easy to print many at once. But a sticker needs a direct line of sight and a clean, flat surface, and over time it can wear off, get dirty, or peel away. A good choice for office equipment, furniture, tools, and bulk labeling in normal conditions.
NFC tags are sturdier and more durable: they are read with a tap and without line of sight (the tag can be hidden under a surface), they are harder to accidentally damage or forge, and the record can be password-protected against accidental rewriting. But they cost more, are written one at a time through the app, and require a smartphone with NFC. A good choice for valuable assets, harsh or dirty conditions (warehouse, workshop, outdoors), and places where an ordinary sticker will not hold.
When needed, the methods are combined: the same asset can carry both a QR sticker and an NFC tag.
How a code leads to a record
Section titled “How a code leads to a record”A label code encodes a public address. You can open it with an ordinary scan: point a smartphone camera at the QR code or hold the phone to the NFC tag. You do not need to install the UNIO24 app or log in — the address opens in an ordinary browser. What the system shows depends on whether the person has access to the record.
- Has access. If the person is logged in to UNIO24 and their role has rights to the record, the record itself opens — for example, the asset card.
- No access. If the person is not logged in or has no rights (for example, a stranger who found the item), a public lost & found page opens instead of the record.
Returning a lost asset
Section titled “Returning a lost asset”The lost & found page is meant for one case: a labeled item is lost and the finder wants to return it to the owner. So it does not reveal the record’s data but only shows how to contact the company. Since the page opens with an ordinary scan — by camera or NFC — anyone with a smartphone can return a found item, with no app and no account in the system.
You set the page’s content yourself (see Setting up labels):
- a title with the company name (it can be hidden);
- Message for finder — free text, for example asking the finder to get in touch;
- contacts: Contact email and Contact phone.
If the public lost & found page is turned off or the code is inactive (revoked), the finder sees only a general message without contacts.
Templates and presets
Section titled “Templates and presets”How a sticker looks and prints is defined by two entities.
- Preset — the physical sticker format: Roll (thermal printer) or Sheet (Letter/A4), sticker dimensions, and for a sheet, the number of rows and columns, margins, and gaps. Presets are split into system (built-in) and custom, grouped by region (US and Intl).
- Template — the sticker design on top of a preset: which elements are placed on it and where. A template is created in the visual Template designer and is always tied to one preset.
A sticker holds elements of four types: QR code, Text, Logo, and Shape. A text element can be static or take its value from the record through a binding — for example, the label code, object name, asset ID, serial number, model, or company name. When printing, bindings substitute the real data of the specific record.
One template is chosen as the default template (Settings → Labels → General) — it is offered first in print dialogs.
Printing
Section titled “Printing”Printing goes through PDF and the browser’s ordinary print dialog: the system builds a PDF with the sticker and either opens the print dialog or saves the file. No special driver or direct printer connection is needed — any printer that can print PDF will do. You can print a single sticker from the record card or several at once from a list (see Working with labels).
The print method is chosen by the preset: Sheet (Letter/A4) for ordinary printers, Roll (thermal printer) for label printers.
What to print on
Section titled “What to print on”- Ordinary printer and label sheets. A laser or inkjet printer and sheets of self-adhesive labels in A4 or Letter format (several labels per sheet) will work. This is convenient for small volumes and when there is no separate label printer. Laser printing is preferable to inkjet: toner does not smear, is more resistant to moisture, and the QR code comes out with more contrast.
- Label printer (thermal printer). Prints on a roll of self-adhesive labels one at a time. Convenient for large volumes and regular labeling. Thermal printing comes in two kinds: direct (without ribbon) — the label fades over time and is sensitive to heat and light; thermal transfer (with ribbon) — the image is durable and suitable for long-term labeling.
Which labels to choose
Section titled “Which labels to choose”- For an office and normal conditions, paper self-adhesive labels are enough.
- For a warehouse, workshop, outdoors, and a long service life, use synthetic labels (polypropylene or polyester): they do not tear and are not afraid of moisture. If needed, protect the QR code with lamination or a clear film.
- The surface is better matte — glossy surfaces can produce glare that interferes with scanning.
- Choose the label size so that the QR code is not too small, otherwise it is harder for the camera to read.
If operating conditions are harsh or maximum durability is needed, use an NFC tag instead of a printed sticker: it is not printed, the code is written through the app.