

Company settings
These tasks are performed by an administrator. For what the settings section is overall, see Settings. For the full list of pages with access conditions, see the Settings reference.
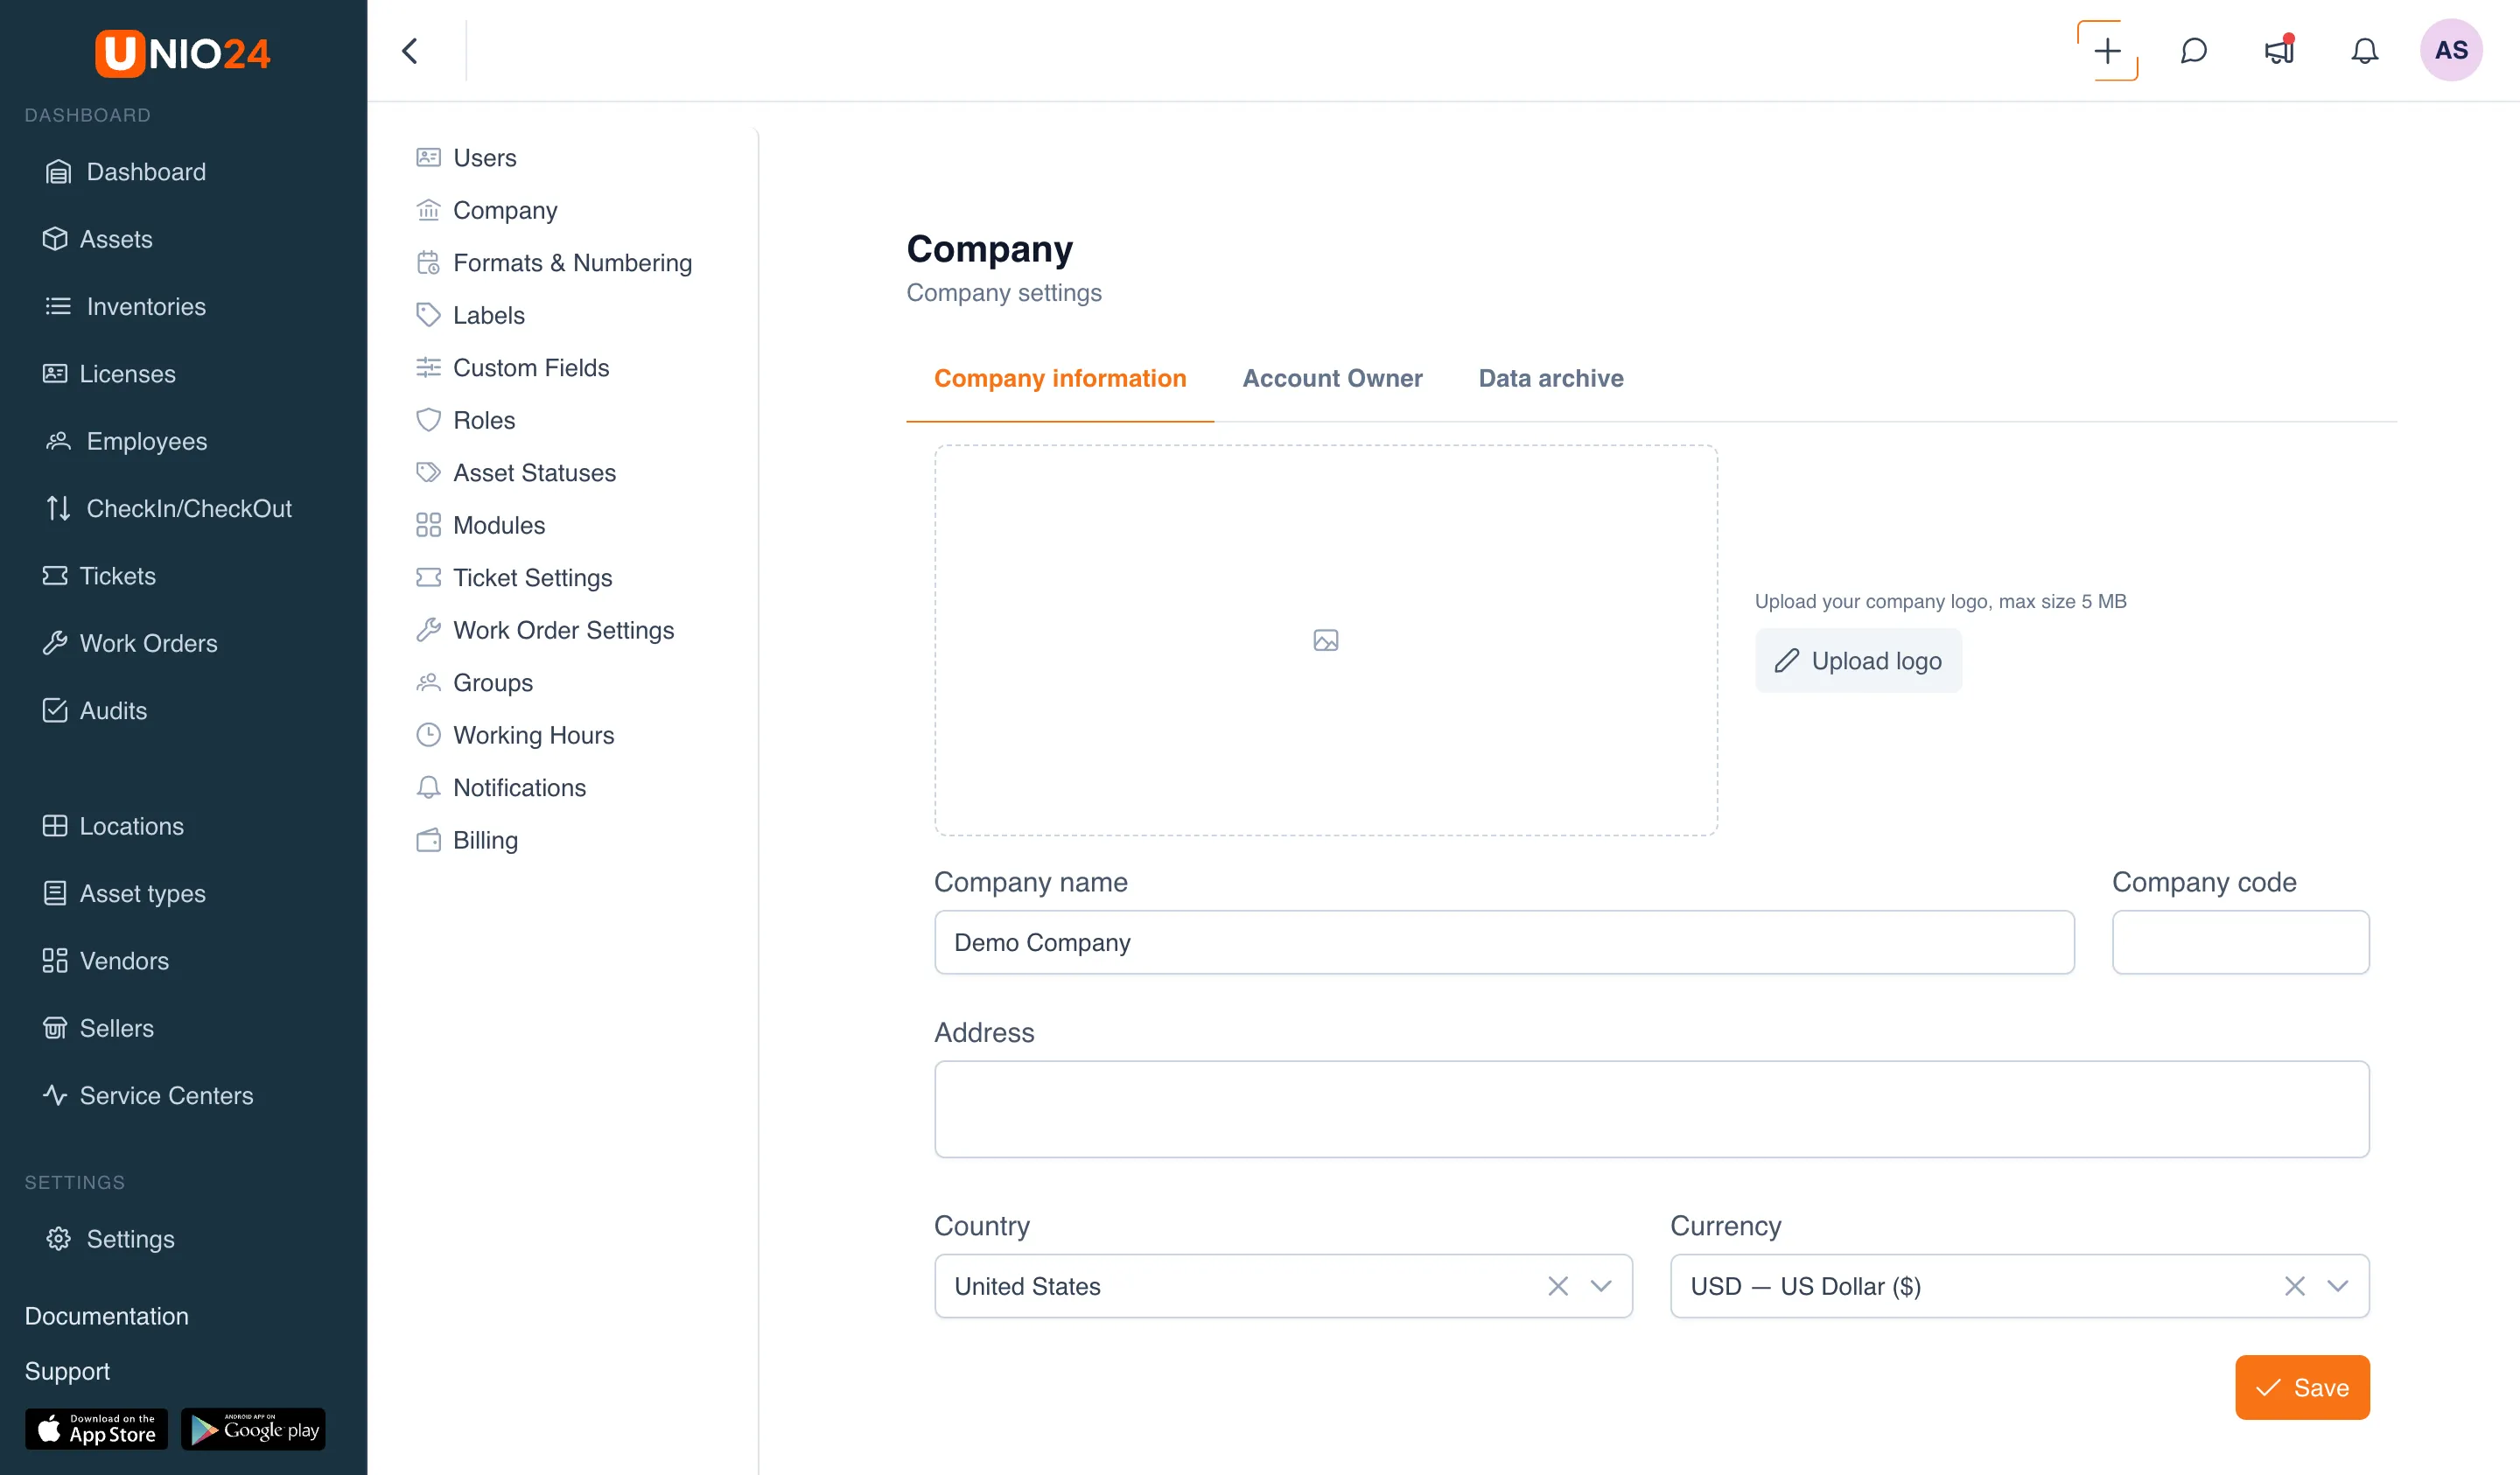
The Company page in the settings menu (its heading is Company settings) is split into three tabs:
- Company information — organization details.
- Account Owner — who owns the company account and ownership transfer (see below).
- Data archive — exporting a full archive of the company’s data. See Data export.
Company data
Section titled “Company data”- In the left main menu, open the Settings section.
- In the settings menu, select Company.
- Open the Company information tab and fill in the fields:
- Company name — what the organization is called.
- Company code — the organization’s registration code.
- Address — the company address.
- Country — chosen from a list.
- Currency — chosen from a list; all amounts in the system are shown in it.
- Click Save.
Account Owner
Section titled “Account Owner”The account owner is the user who owns the company account. There is only one owner in a company; the first owner is whoever registered the company. Who it is now is shown on the Account Owner tab of the Company page — the owner’s name and email are visible there.
The owner has two capabilities that even an administrator with full permissions does not have: transferring ownership to another user and exporting a full archive of the company’s data. These actions are tied not to a role but specifically to owner status, so an administrator without that status cannot perform them.
When to transfer ownership
Section titled “When to transfer ownership”Ownership is tied to a specific account: as long as a person remains the owner, they cannot be offboarded, and if their account is removed, the company is left without the only user who can export the data. So before an owner leaves, ownership is transferred to another user in advance.
How to transfer ownership
Section titled “How to transfer ownership”Only the owner themselves can transfer ownership. If you are not the owner, the tab shows the message Only the company owner can transfer ownership instead of the button.
- Open Settings → Company → the Account Owner tab.
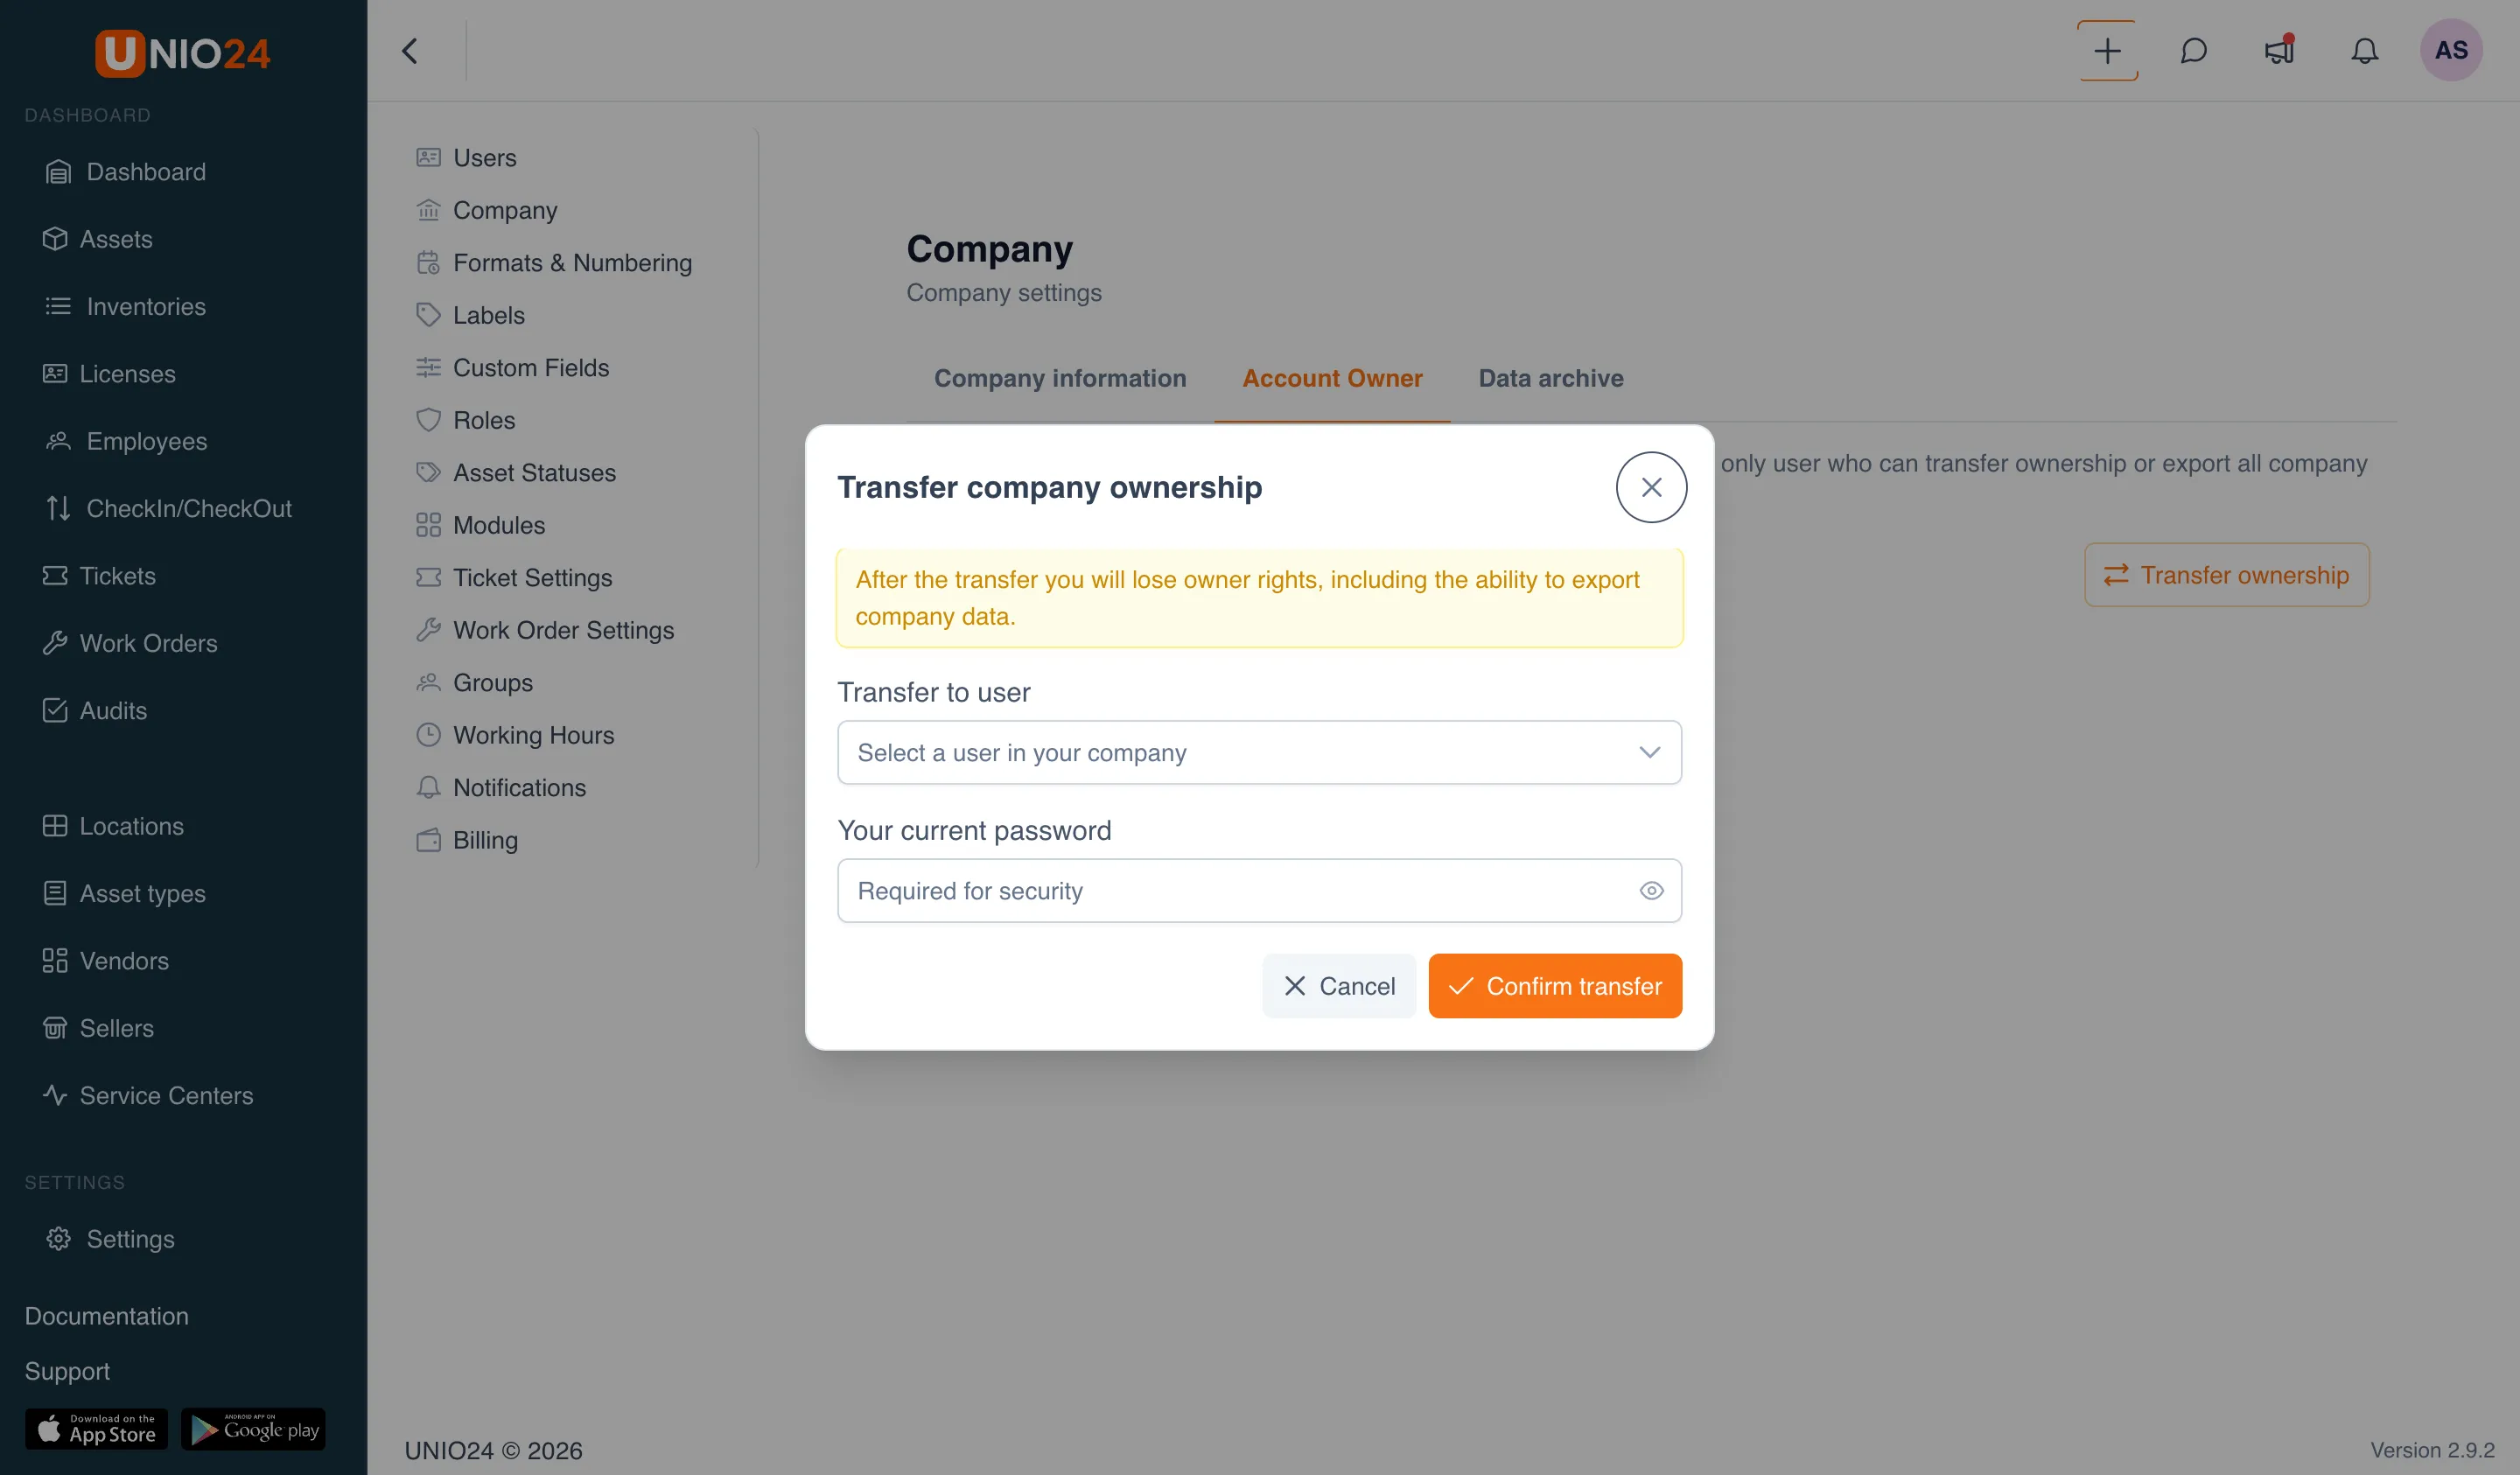
- Click Transfer ownership.
- In the Transfer company ownership window that opens, in the Transfer to user field, select a user in your company. You are not in the list — you cannot transfer ownership to yourself.
- In the Your current password field, enter your password — it is required for confirmation.
- Click Confirm transfer.
After the transfer:
- the selected user becomes the new account owner;
- you lose owner rights, including the ability to export the company’s data; your role and access to the system stay the same;
- both the previous and the new owner receive an email notification.
Formats and numbering
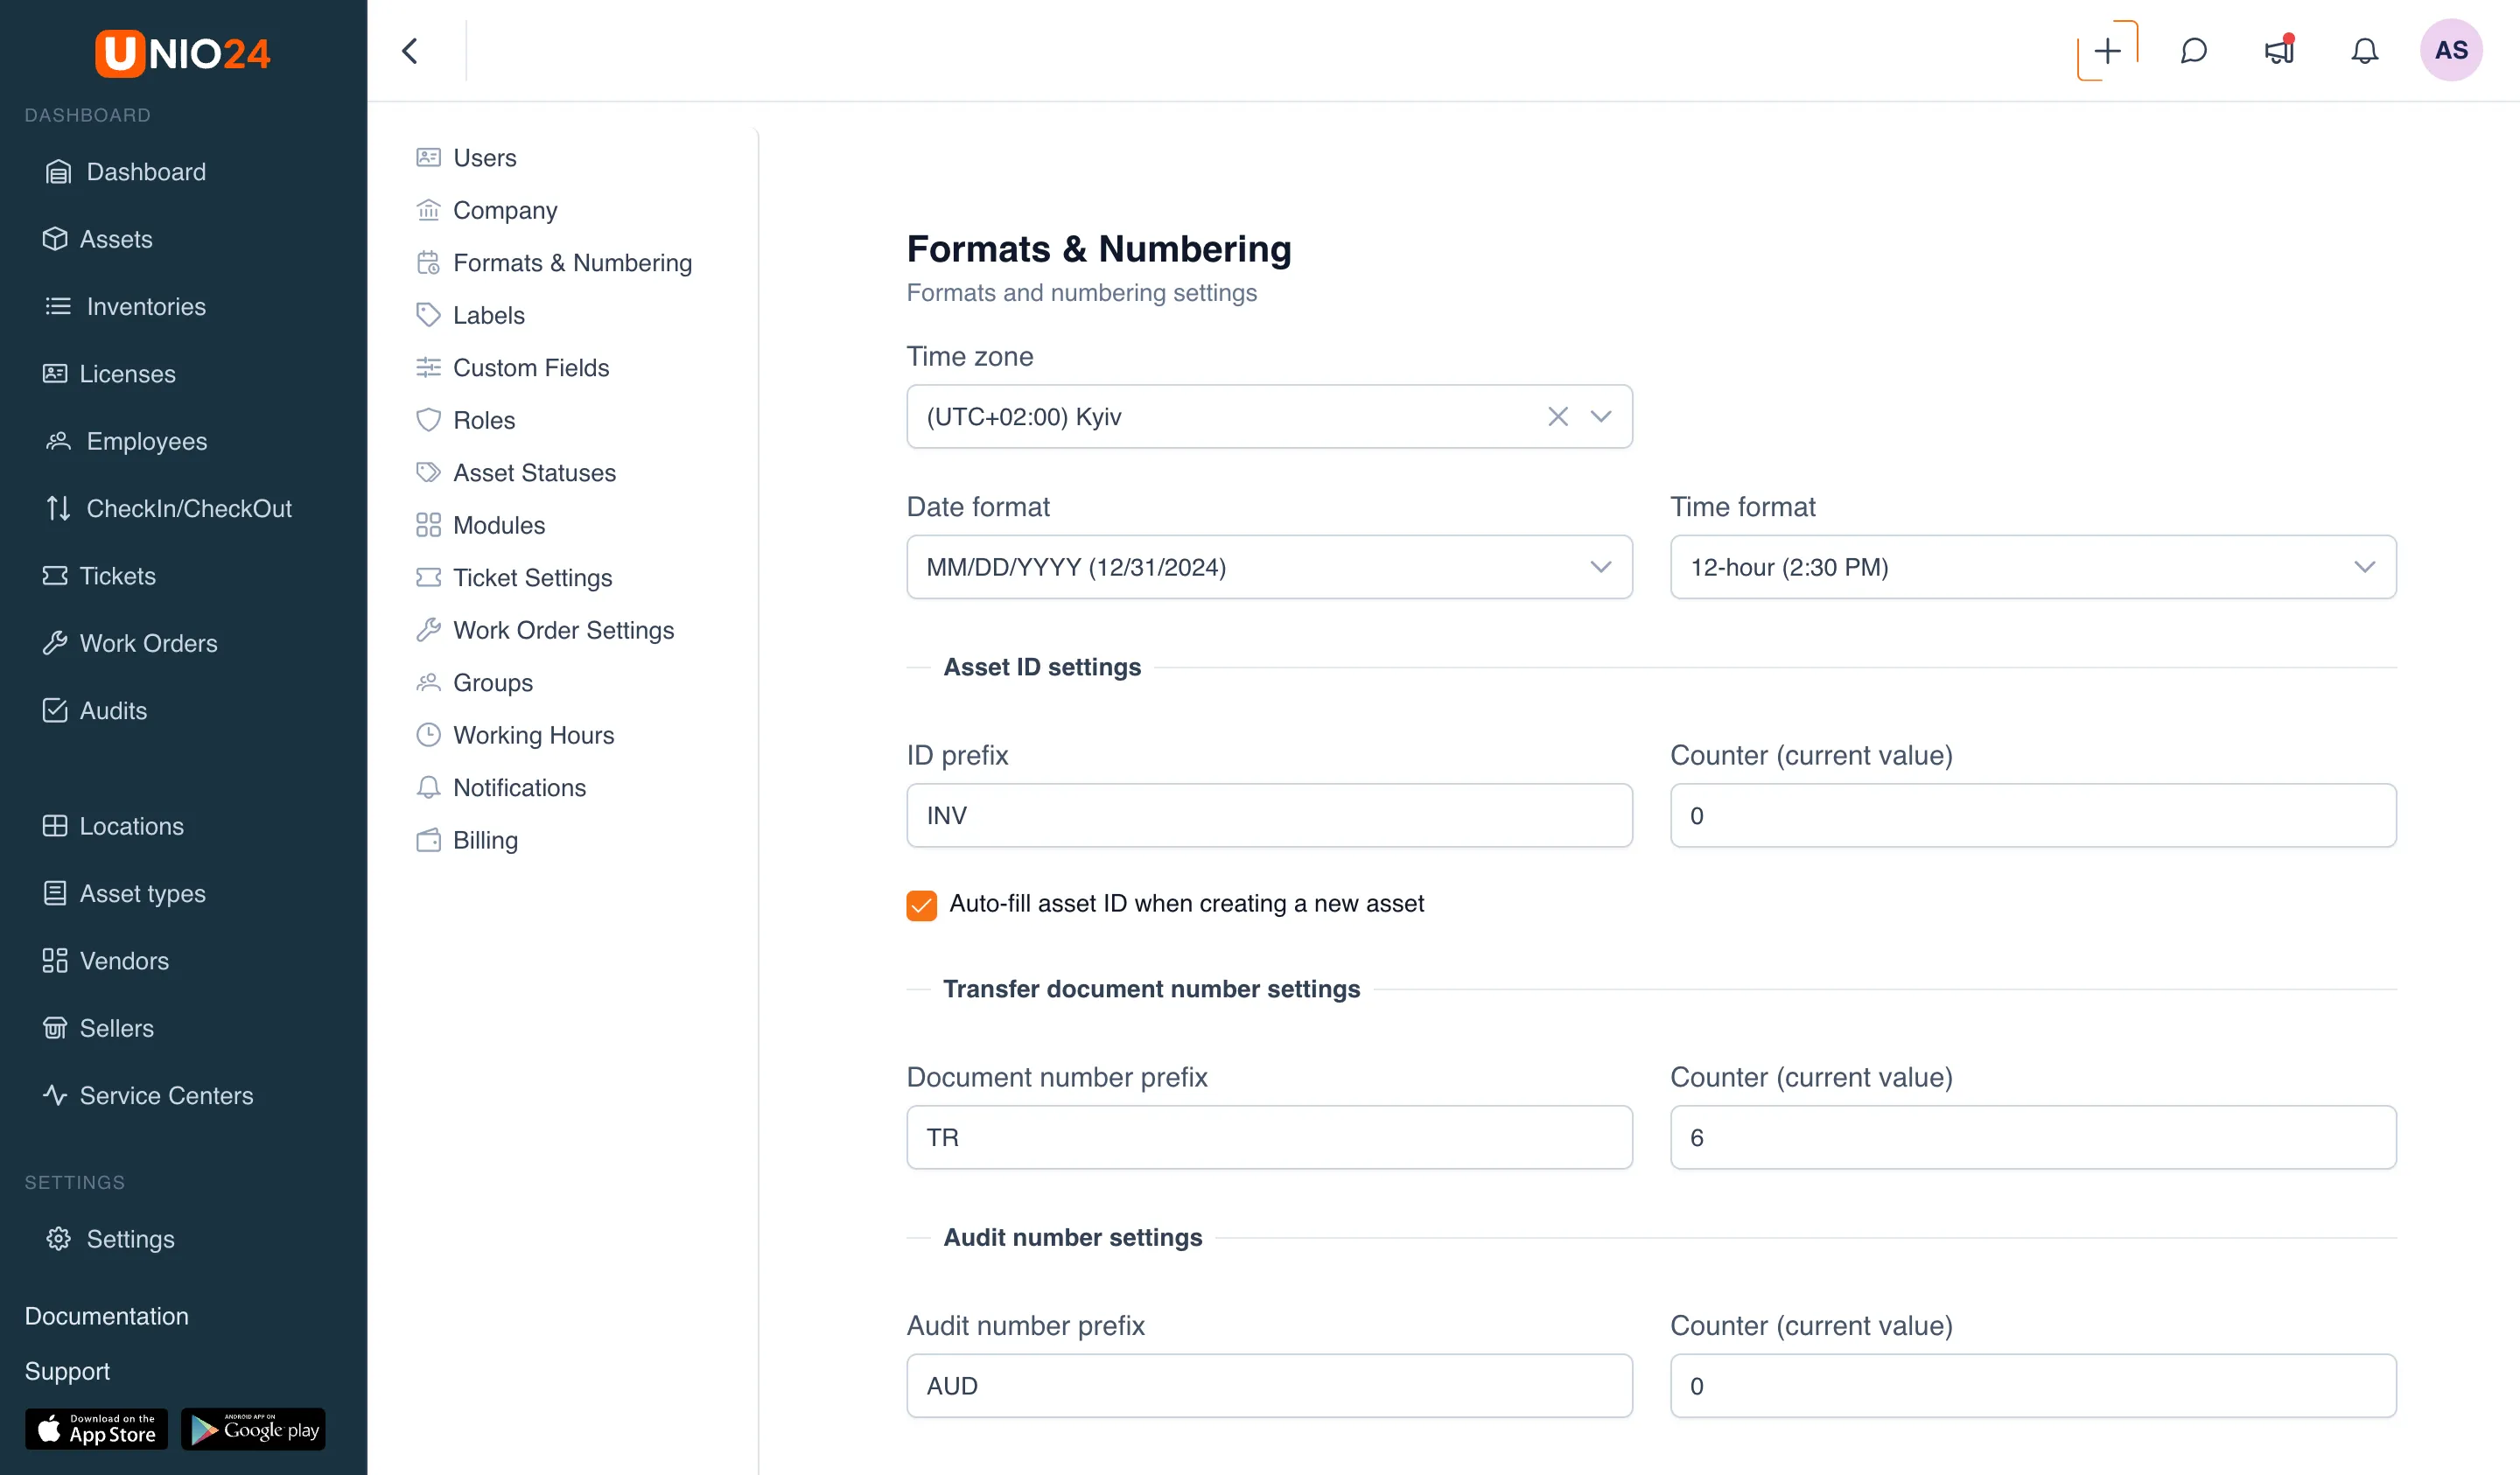
Section titled “Formats and numbering”On the Formats & Numbering page, you set how date and time are displayed and how the system automatically numbers assets, transfer documents, audits, and inventory items.
- Open the Settings section in the left menu.
- Select the Formats & Numbering page.
Time zone, date, and time
Section titled “Time zone, date, and time”At the top of the page, set the regional display:
- Time zone — chosen from a list (with search).
- Date format — chosen from a list.
- Time format — 24-hour (14:30) or 12-hour (2:30 PM).
These settings apply to all dates and times in the interface. Click Save at the bottom of the page to apply the changes.
Asset ID numbering
Section titled “Asset ID numbering”In the Asset ID settings block:
- In the ID prefix field, specify a prefix (for example,
INV). - In the Counter (current value) field, specify the number to continue counting from.
- To have the system fill in the next number when creating an asset, enable Auto-fill asset ID when creating a new asset. If the checkbox is off, the number is filled in with a button in the asset form.
- Click Save.
Transfer document numbering
Section titled “Transfer document numbering”In the Transfer document number settings block:
- In the Document number prefix field, specify a prefix (for example,
TR). - In the Counter (current value) field, specify the current counter value.
- Click Save.
Audit numbering
Section titled “Audit numbering”In the Audit number settings block:
- In the Audit number prefix field, specify a prefix (for example,
AUD). - In the Counter (current value) field, specify the current counter value.
- Click Save.
Inventory item numbering
Section titled “Inventory item numbering”In the Inventory item number settings block:
- In the ID prefix field, specify a prefix (for example,
STK). - In the Counter (current value) field, specify the current counter value.
- To have the number filled in automatically, enable Auto-fill inventory number when creating a new item.
- Click Save.