Setting up labels
These tasks are done by an administrator. For what a code, template, preset, and lost & found page are, see Labels: how it works. For the full list of fields and settings, see the Labels reference.
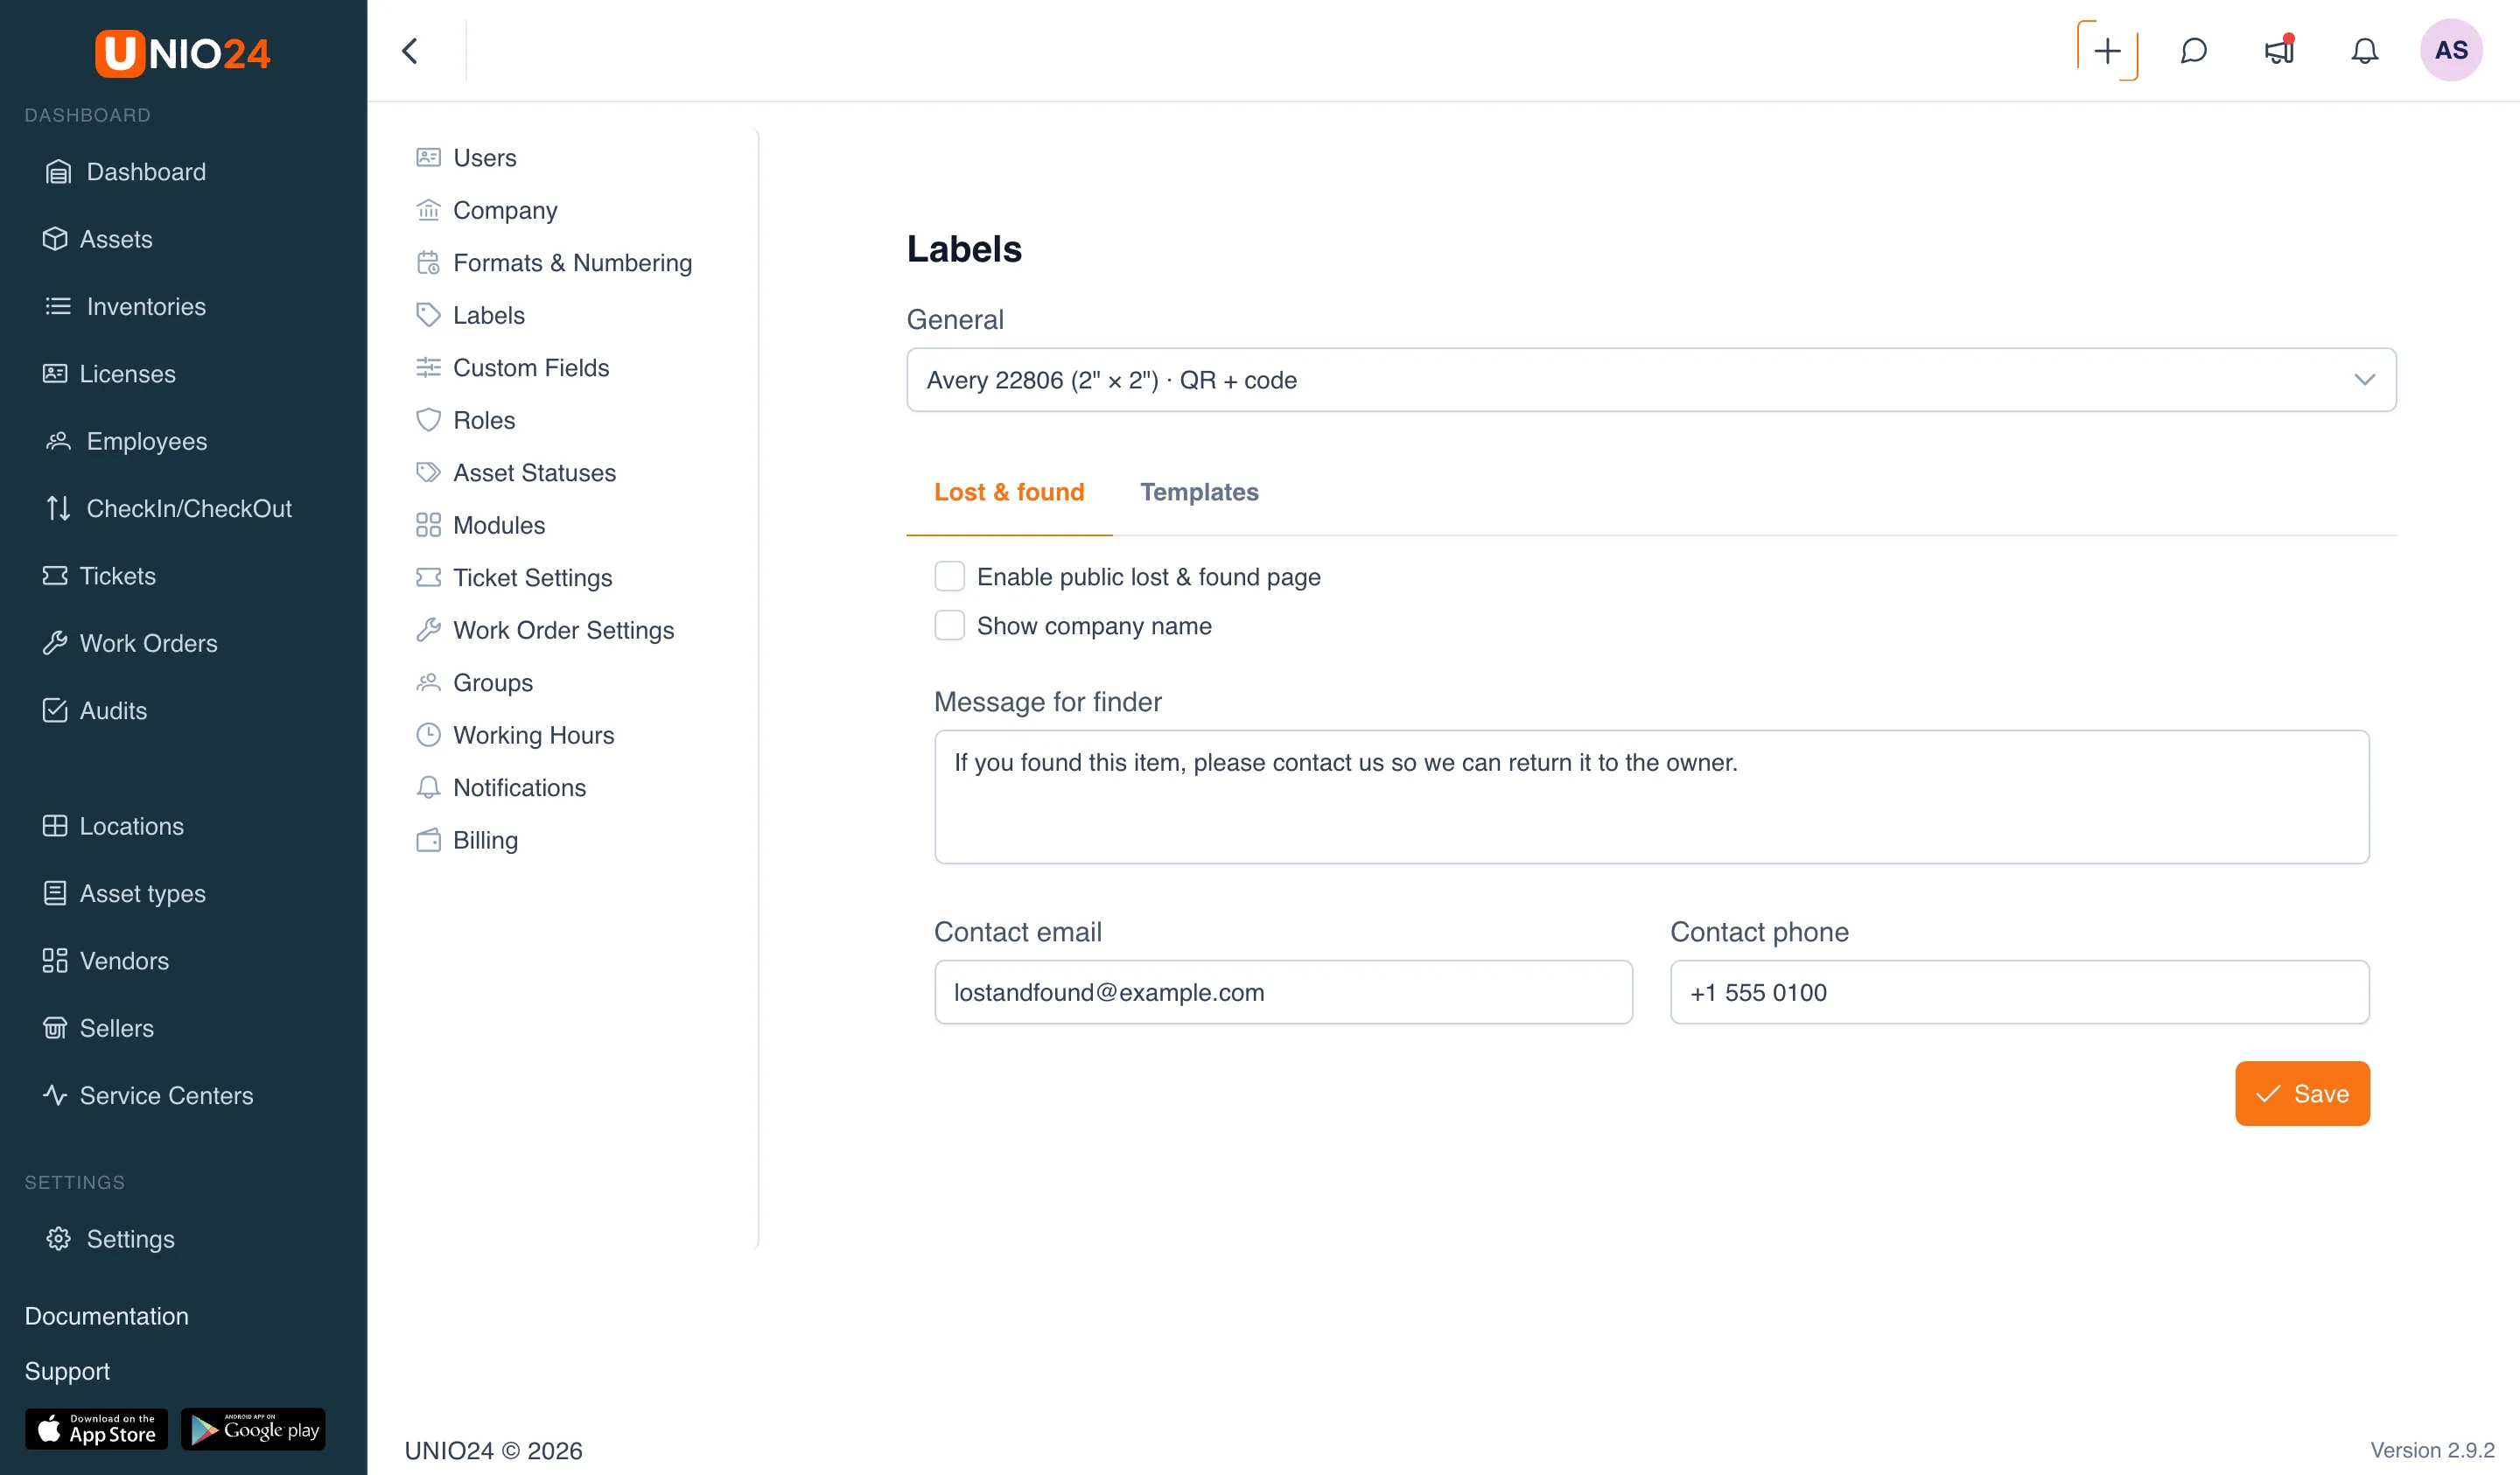
All label settings are in Settings → Labels. Access to them requires settings-edit permissions.
How to open label settings
Section titled “How to open label settings”- In the left main menu, open Settings.
- Choose the Labels page.
- The page has a General block (at the top) and two tabs: Lost & found and Templates.
General settings
Section titled “General settings”The default template is set in the General block at the top of the page.
- On the Settings → Labels page, open the template list in the General block.
- Choose the template to be offered first in print dialogs.
- The choice is saved immediately — a “Default template saved” notification appears.
Create a template
Section titled “Create a template”A template sets the label design and is tied to one preset.
- Open Settings → Labels and go to the Templates tab.
- Click New template.
- Enter a Name.
- In the Preset field, choose the physical label format. Presets are grouped by region (US and Intl), and the size is shown next to the name.
- Save — the Template designer opens with the new template (it already has a QR code placed in the center).
Design a template in the Template designer
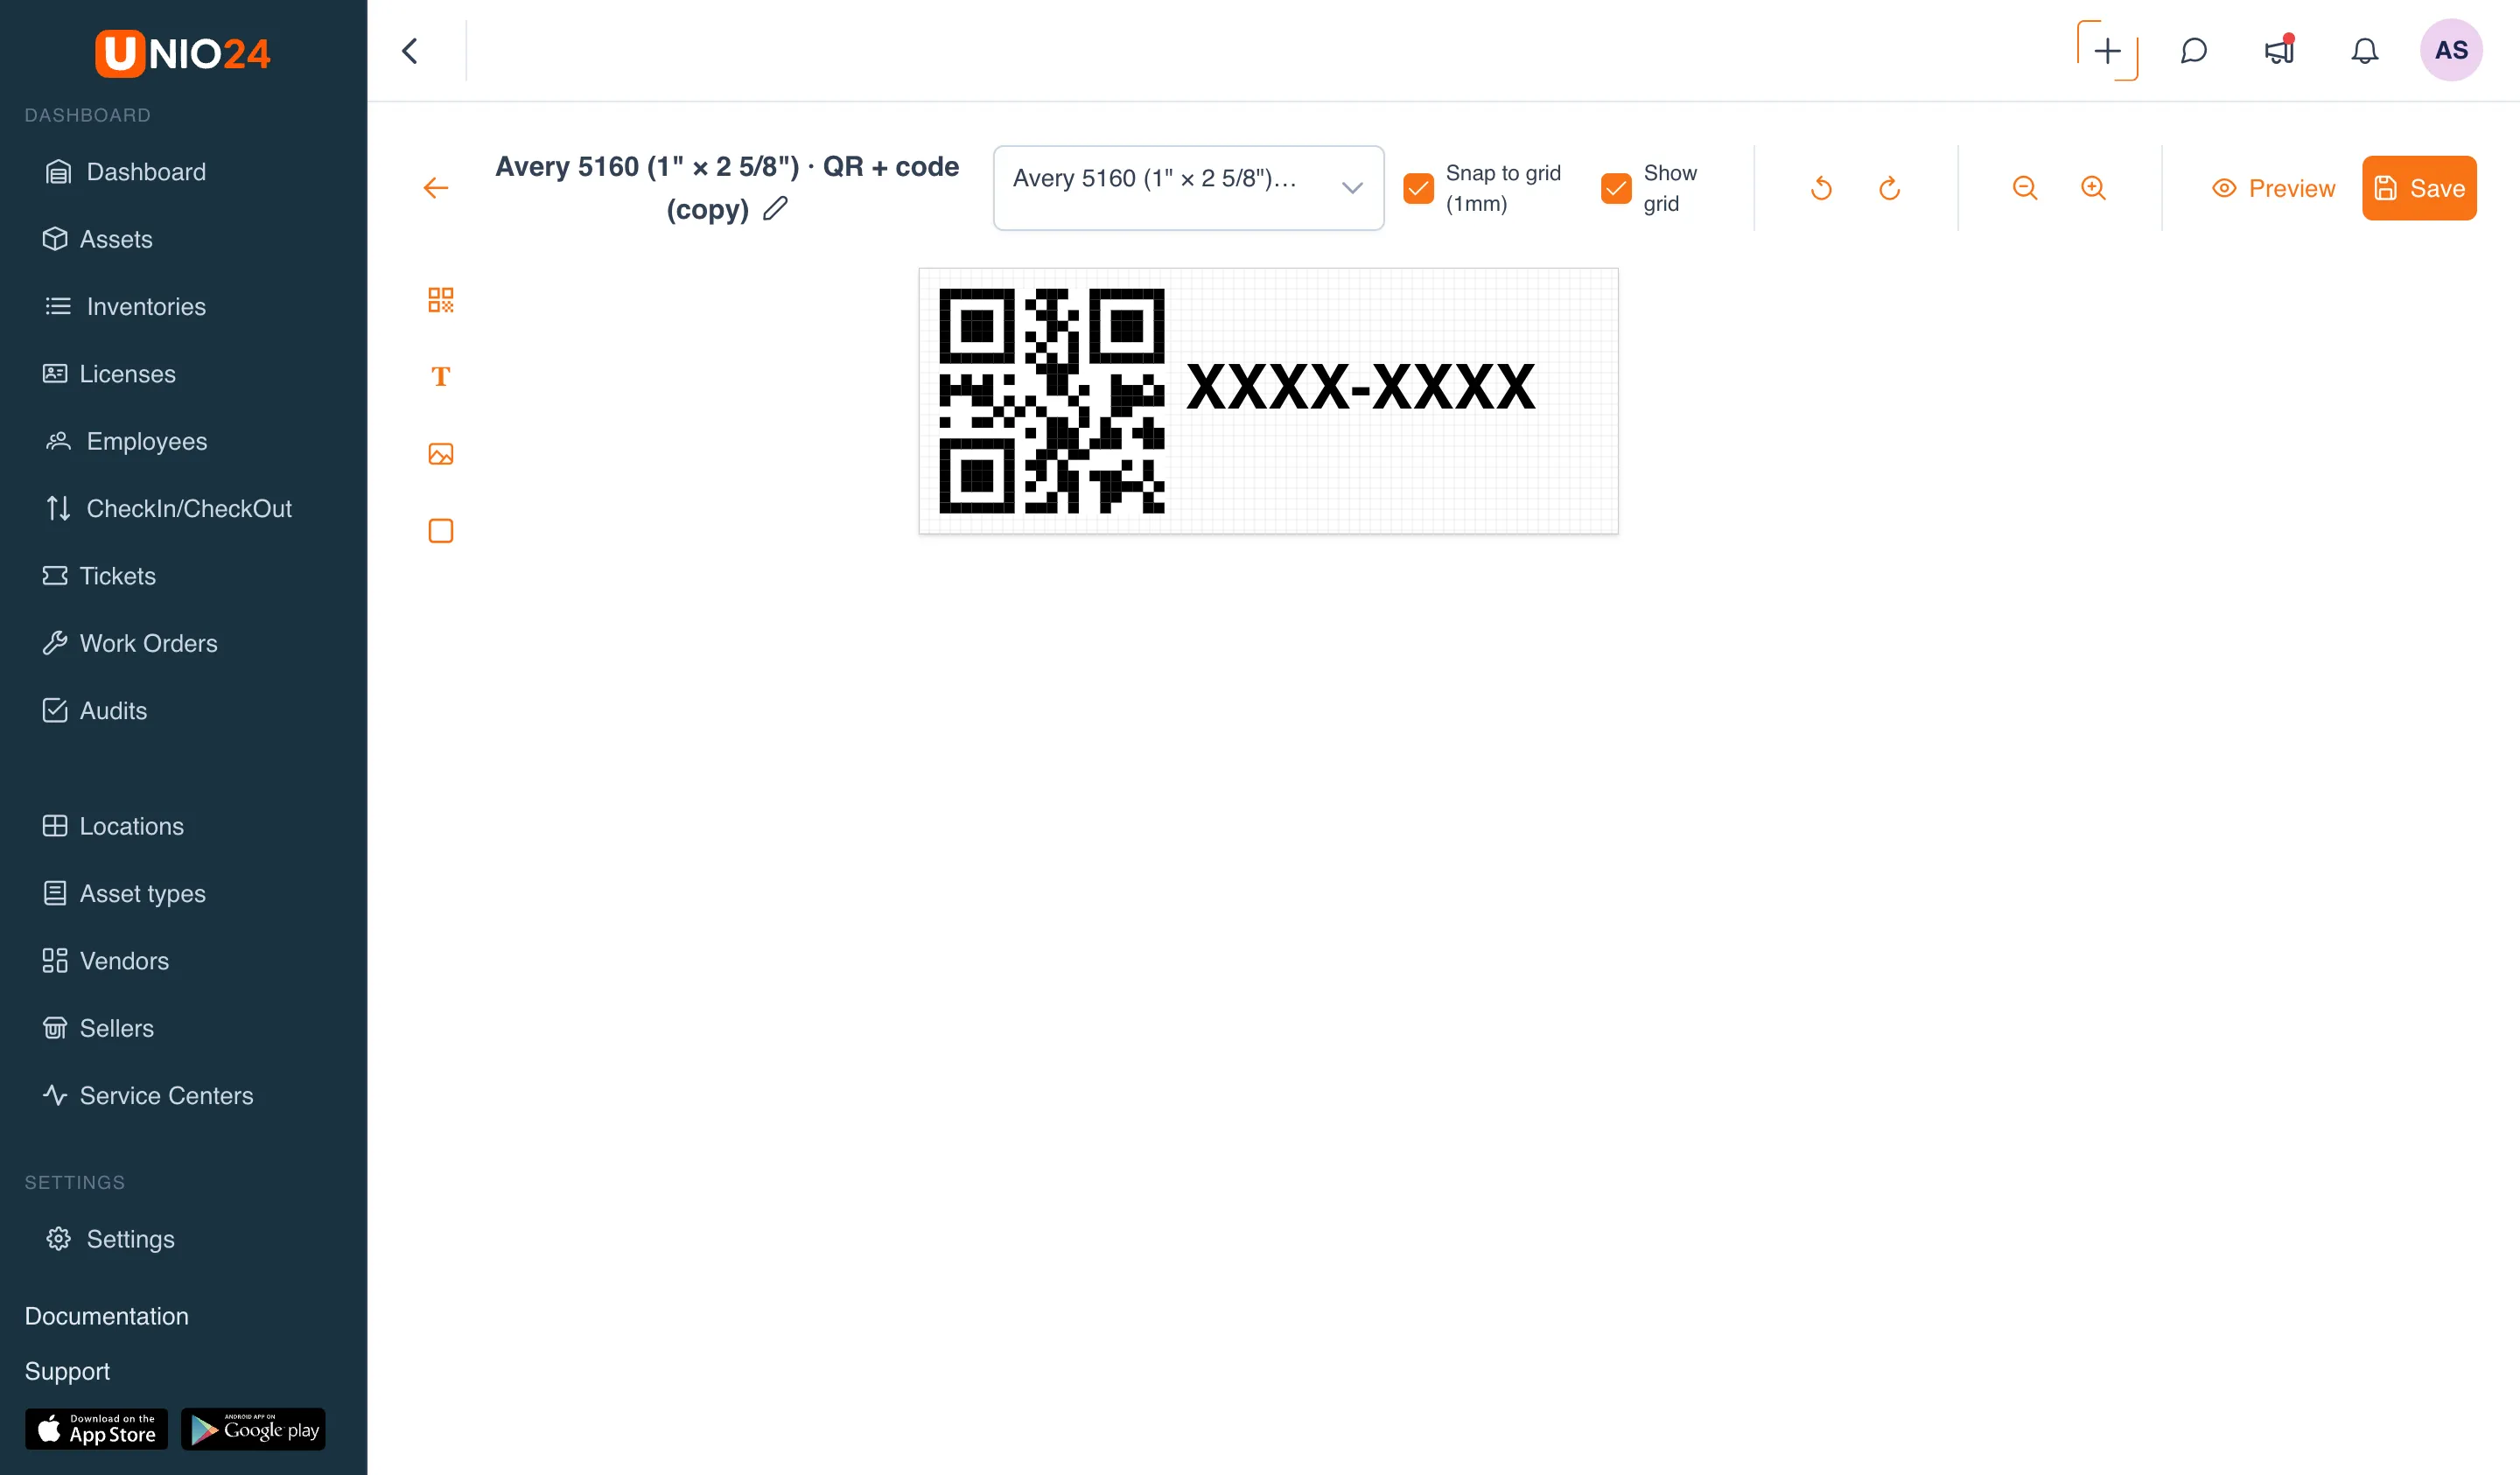
Section titled “Design a template in the Template designer”The designer opens when you create a template or click the edit button (pencil) on a custom template on the Templates tab. On the left is the toolbar, in the center is the label, and on the right are the properties of the selected element.
Add an element
Section titled “Add an element”- On the toolbar on the left, choose the element type: QR code, Text, Logo, or Shape. The element appears on the label.
- Drag the element with the mouse to where you want it and resize it by the edges. Turning on Snap to grid (1 mm step) and Show grid helps align elements.
- Exact values can be set in the properties panel on the right: Position (X, Y), sizes (W, H), Rotation, and Layer (stacking order).
Set up a text element
Section titled “Set up a text element”- Select a text element on the label.
- In the properties panel on the right, in the Binding field, choose what to substitute when printing:
- Static text — then enter the unchanging text in the Static text field.
- or one of the bindings: Label code, Code (raw), Label URL, Company name, Object name, Asset ID, Serial number, Model.
- Set the Font size (pt), Font weight, Align, and Color.
Set up a shape
Section titled “Set up a shape”- Select a shape element.
- In the Shape type field, choose Line or Rectangle.
- Set the Color and Stroke width (mm).
- If needed, change the preset in the list at the top of the designer (the elements automatically fit into the new sizes).
- Click Preview to see the label with sample data.
- Click Save. The Undo and Redo buttons revert and reapply changes.
If the layout goes beyond the page, the system shows the error “The layout goes beyond the page” — shrink the elements or change the preset.
Presets
Section titled “Presets”A preset sets the physical label format (roll or sheet, dimensions, and for a sheet — rows, columns, margins, and gaps). The system has ready-made system presets grouped by region, and you choose one of them when creating a template.
Lost & found
Section titled “Lost & found”The lost & found page is what a person without access sees after scanning a code (see How a code leads to a record). Configure it on the Lost & found tab.
- Open Settings → Labels and go to the Lost & found tab.
- Turn on Enable public lost & found page so the page is shown to the finder. Without this, a code scanned by a person without access shows only a general message without contacts.
- Check Show company name if you want the owner listed on the page.
- In the Message for finder field, enter the text the finder will see.
- Fill in Contact email and Contact phone — they become contact buttons on the page.
- Click Save. A “Lost & found settings saved” notification appears.