

First steps
After signing up, on your first login, the system offers to load demo data so you can explore UNIO24’s capabilities before creating your own. Once you have explored the system, you remove the demo data and start your own records.
Demo data
Section titled “Demo data”Demo data is a ready-made set of assets, employees, and locations. With it you can see how cards are arranged, how check-out and move operations, the audit, and other features work, without having to create anything by hand.
While demo data is loaded, the top of the Analytics section shows a Demo data is loaded in the system warning with a Delete demo data button. When you are done exploring the system, click it and choose one of two removal options:
- Smart delete — removes the demo data but keeps reference records (for example, asset types or statuses) that your own data already uses.
- Full reset — removes all data except the default warehouse. The action is irreversible.
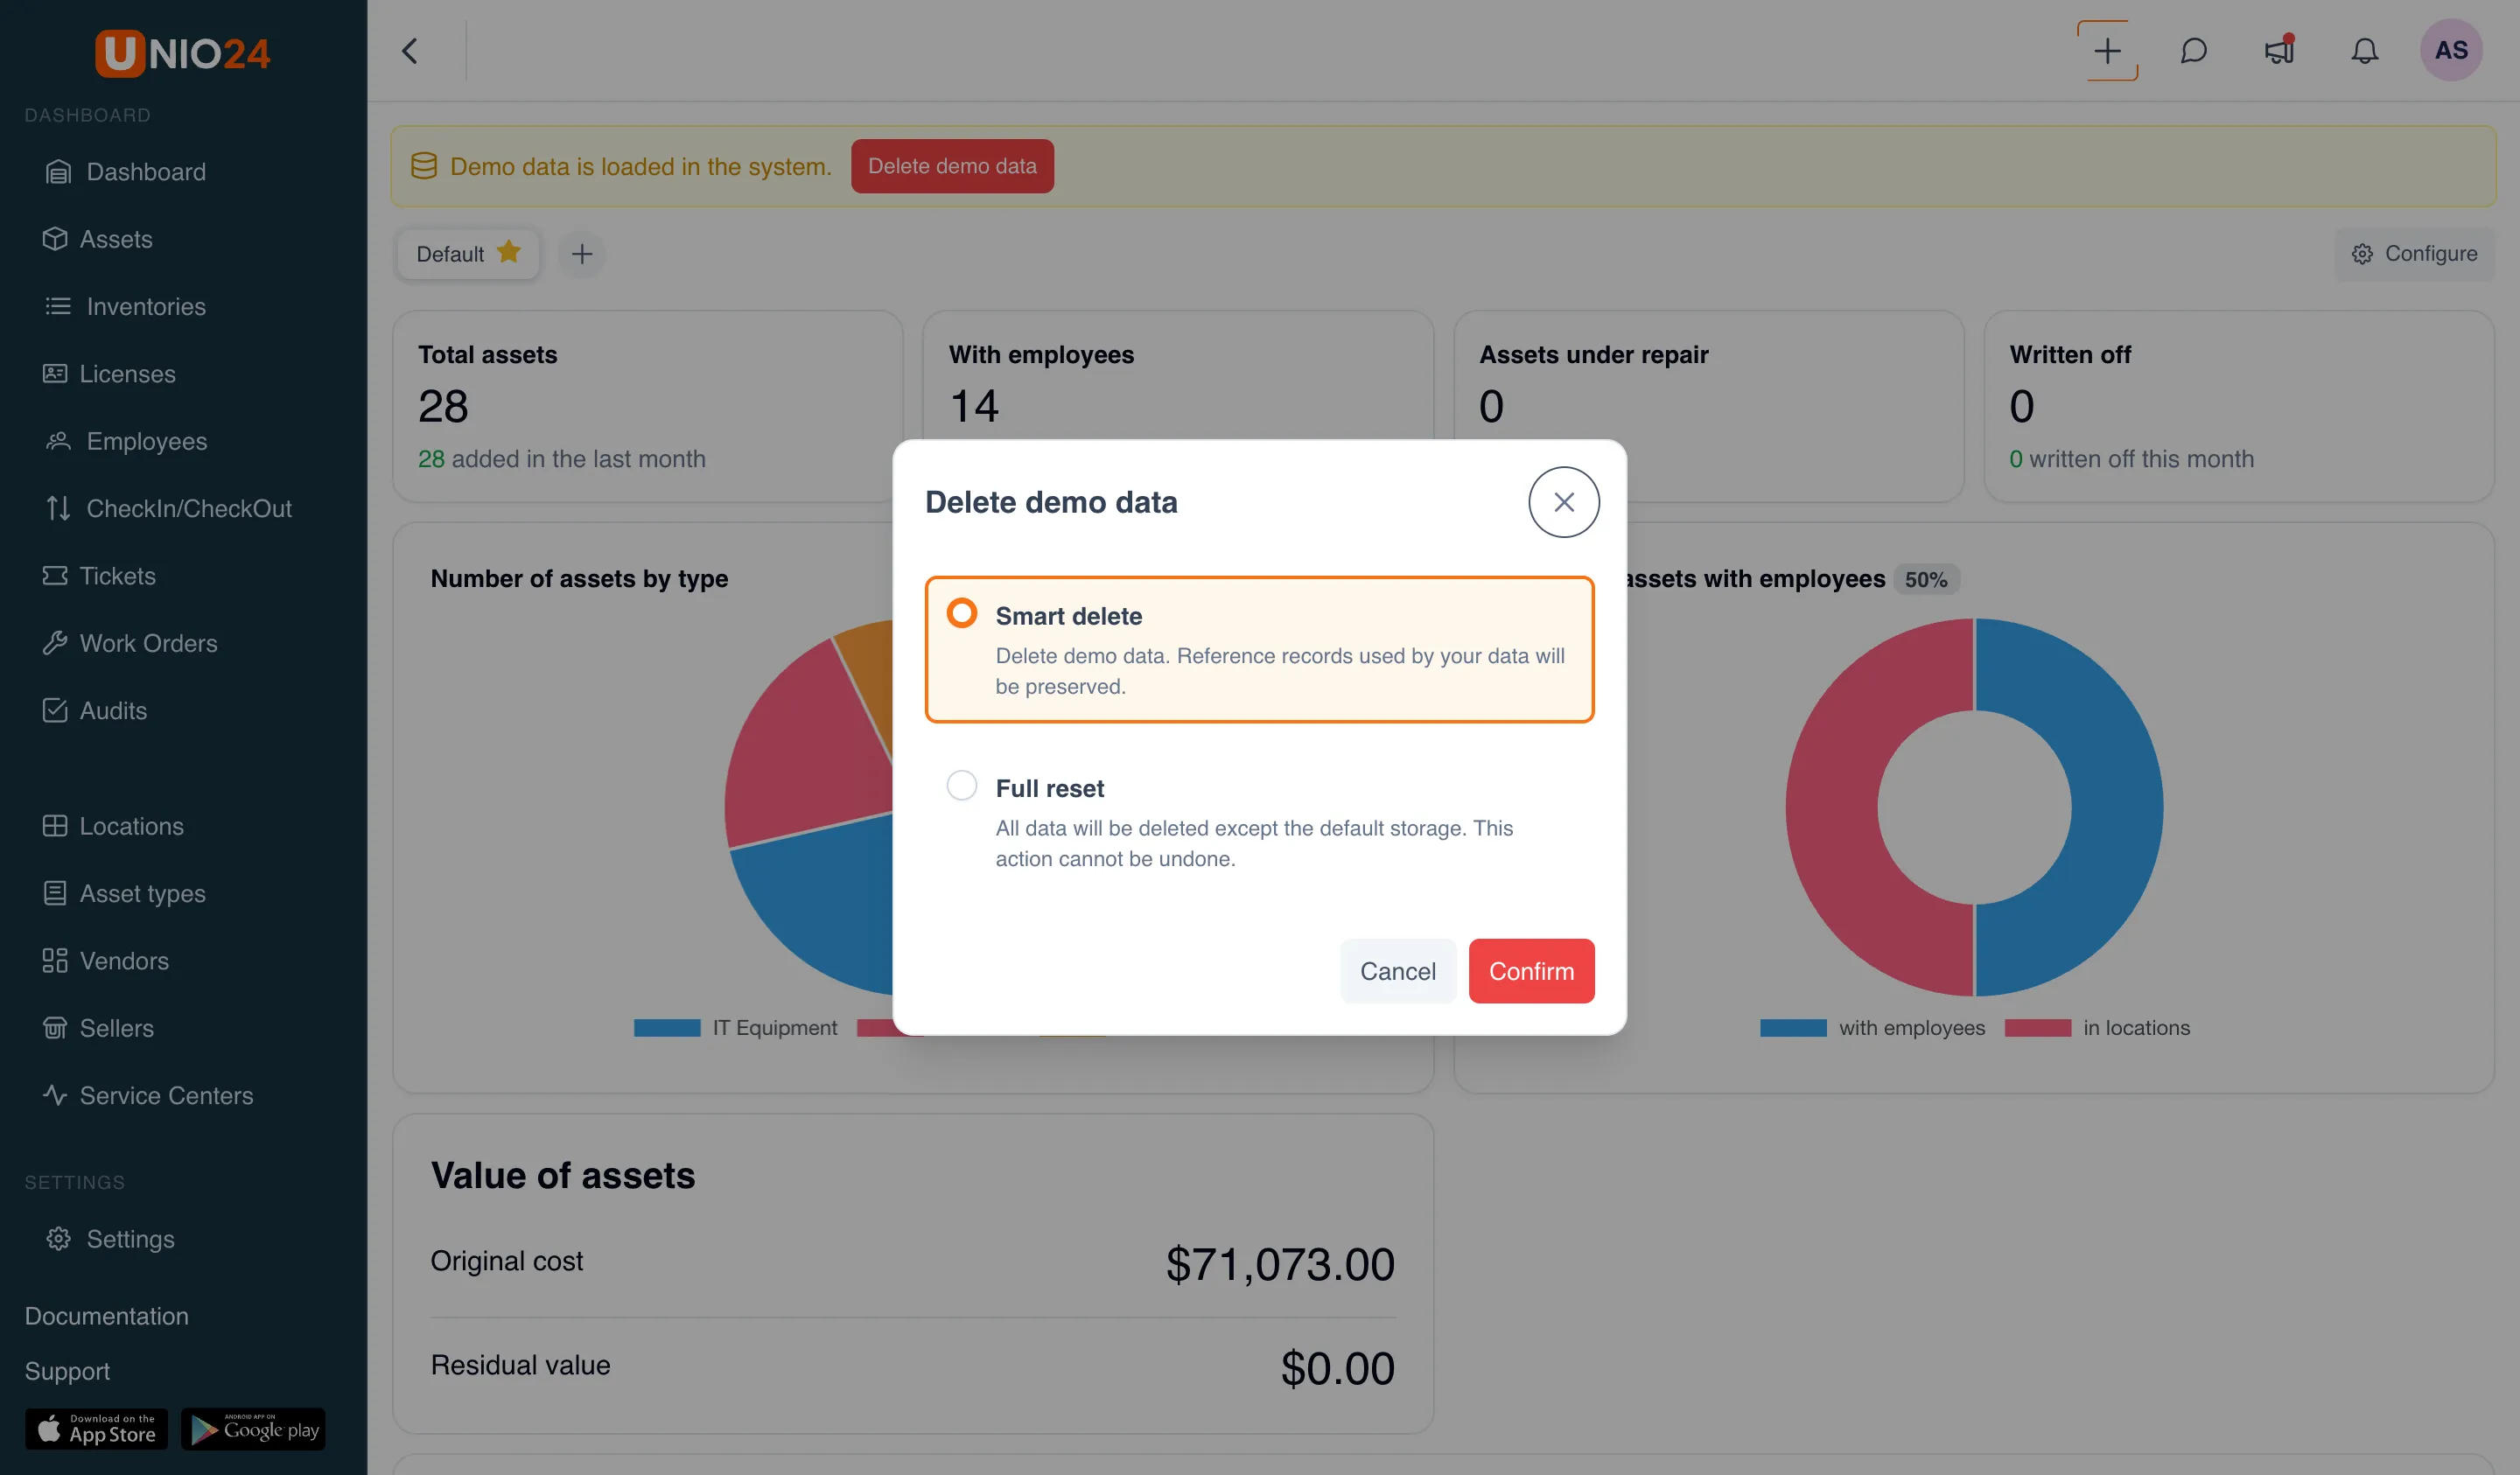
After the demo data is removed, the system is ready to work with your data. For more on managing data, see Data export.
Where to start
Section titled “Where to start”To start keeping records, you first fill in the directories, then create and check out assets, and after that configure the system for the company.
Fill in the directories
Section titled “Fill in the directories”- Asset types — define the categories of tracked objects (for example, “Laptop”, “Desk”, “Car”) and the set of fields that assets of each type will have. See Asset types.
- Locations — add locations and storage places where assets are kept. See Locations.
- Employees — create the people that assets will be assigned to. See Employees.
If needed, set up additional directories: asset statuses and conditions, custom fields, and labels.
Create and check out assets
Section titled “Create and check out assets”- Add assets — one at a time by hand or by bulk import from Excel or CSV.
- Assign assets to employees or locations — see Asset operations.
Configure the system for the company
Section titled “Configure the system for the company”- Company settings — country, currency, time zone, date and time formats, document numbering. See Company settings.
- Modules — enable optional modules (Licenses, Tickets, Work Orders) if your company needs them. See Managing modules.
- Users and roles — invite colleagues and set their access rights. See System users and Roles and access rights.