

Configuring work orders
These tasks are done by an administrator. For what the statuses, reasons, timer, and SLA mean, see the Work orders: how it works section. For the list of settings, see the Work orders reference.
Enabling the module
Section titled “Enabling the module”Work orders is an add-on module, and until it is enabled its settings are not in the system.
- In the left main menu, open the Settings section.
- Select the Modules page.
- Find Work Orders in the list and turn the toggle on.
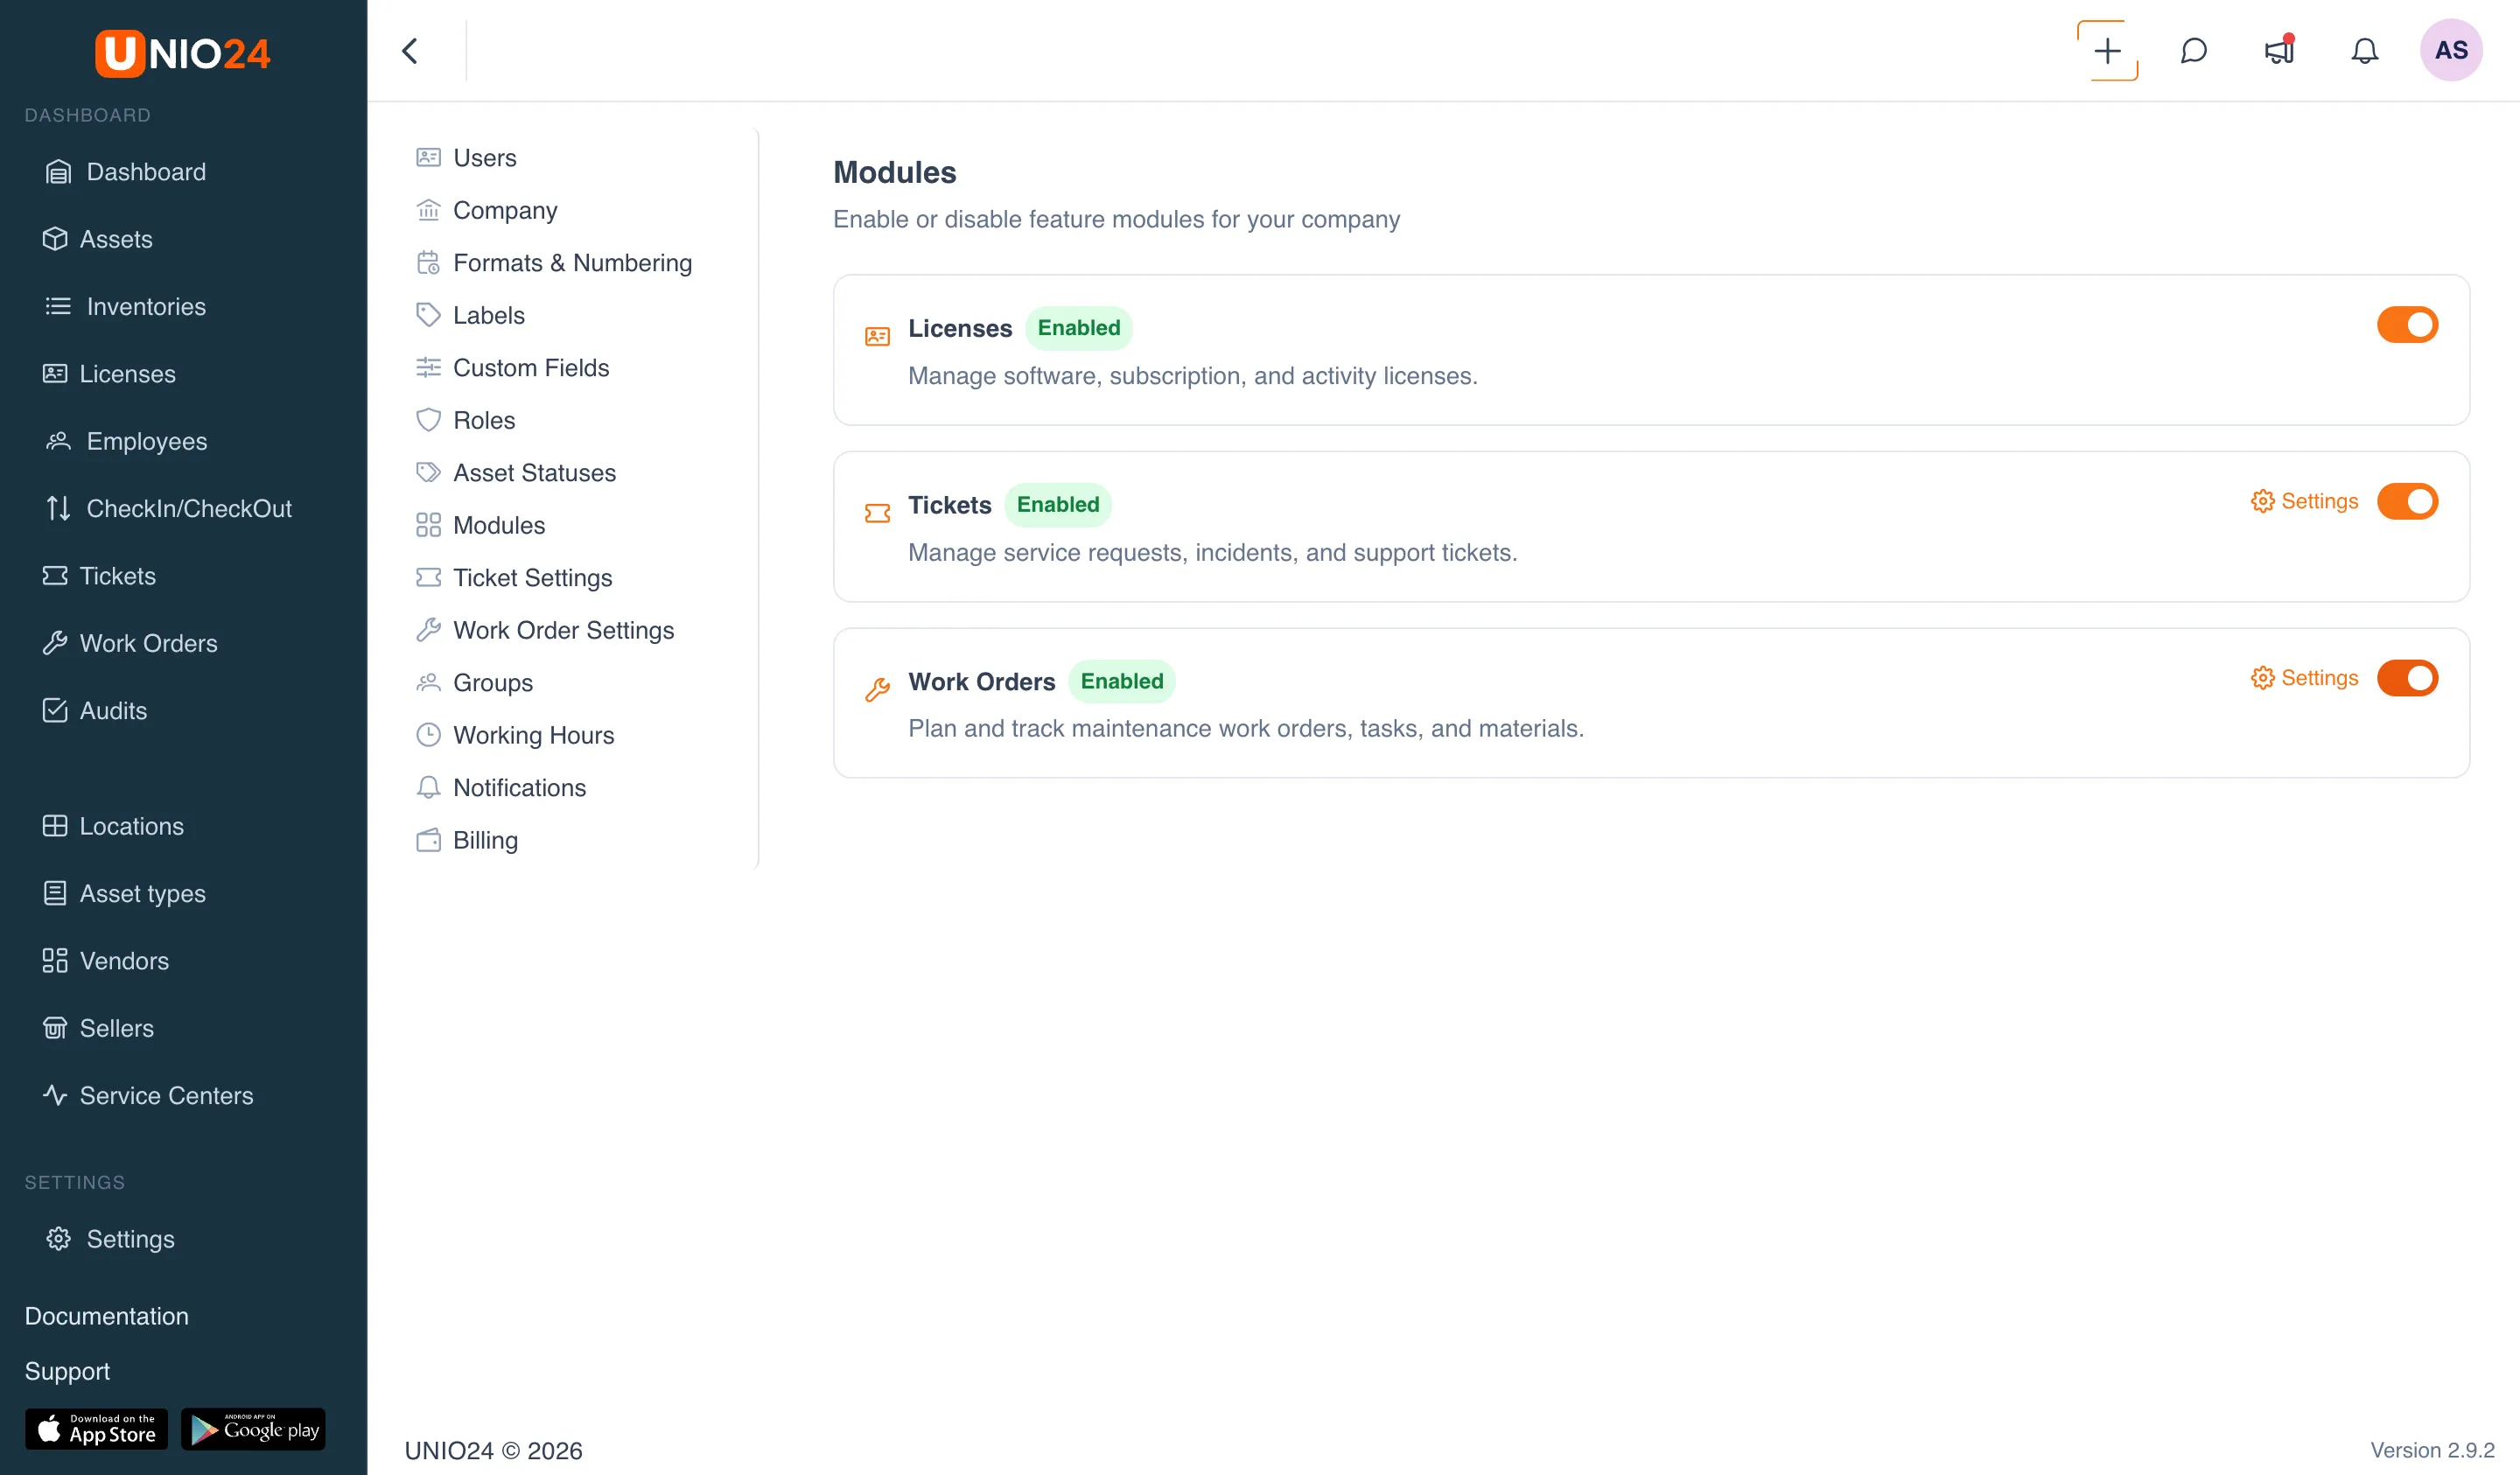
After that, a Work Orders section appears in the menu and a Work Order Settings page appears in the settings. For more on modules, see the Modules section.
How to open the work order settings
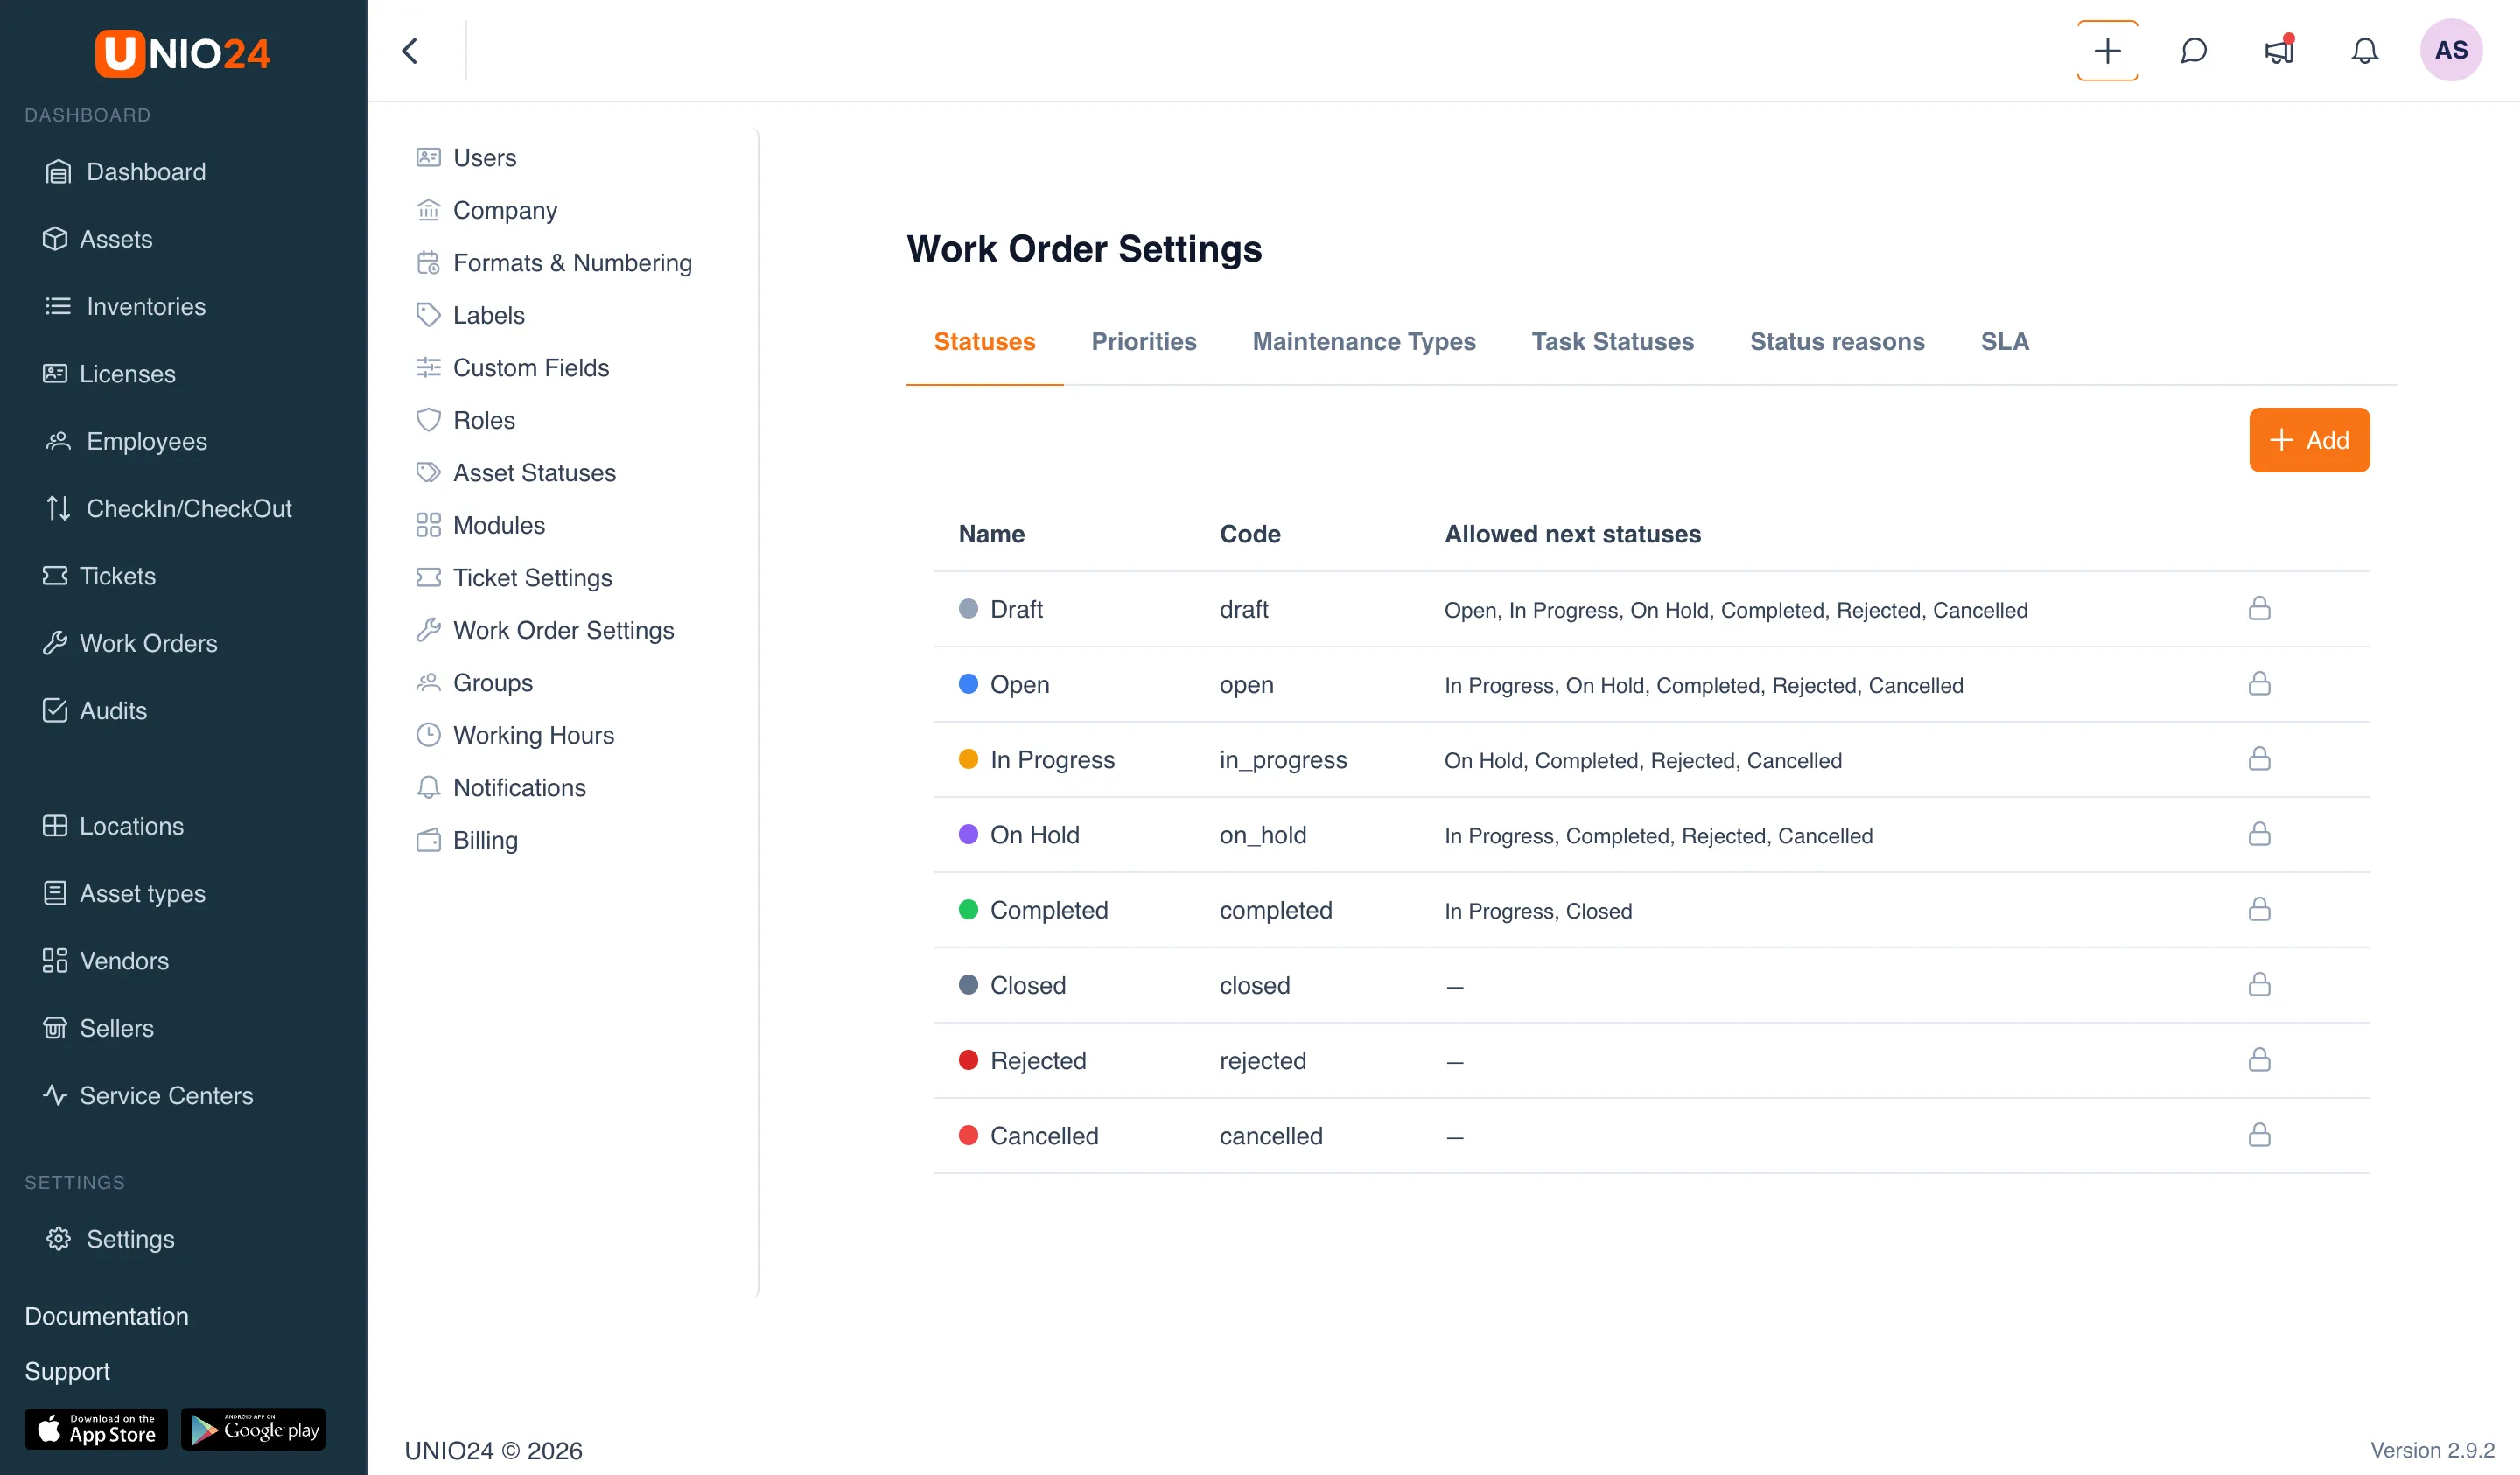
Section titled “How to open the work order settings”Most of the settings below are on a single page.
- Open the Settings section in the left menu.
- Select the Work Order Settings page.
- At the top of the page are tabs: Statuses, Priorities, Maintenance Types, Task Statuses, Status reasons, and SLA. Later instructions will refer to these tabs.
Statuses and allowed transitions
Section titled “Statuses and allowed transitions”Each work order moves through statuses, for example: Open → In Progress → Completed → Closed. The workflow sets which status can transition into which. This keeps work orders moving in order — for example, so that from Open you cannot jump straight to Closed, skipping the work.
When a staff member changes a work order’s status, the system offers not all statuses in a row but only those it is allowed to transition to from the current one. This is the list you define.
How to set the allowed transitions
Section titled “How to set the allowed transitions”- Open Settings (left menu) → Work Order Settings → the Statuses tab.
- In the status list, click the pencil on the status you need to open its settings. For system statuses, a lock icon is shown instead of buttons — they cannot be edited.
- The status form has fields:
- Name — what the status is called (for example, “In Progress”).
- Code — the internal code; you cannot change it for an existing status.
- Color — the color the status is shown in on a work order.
- Allowed next statuses — the main field: check here all the statuses the current one can transition to.
- Enabled — whether to show this status or not.
- Click Save.
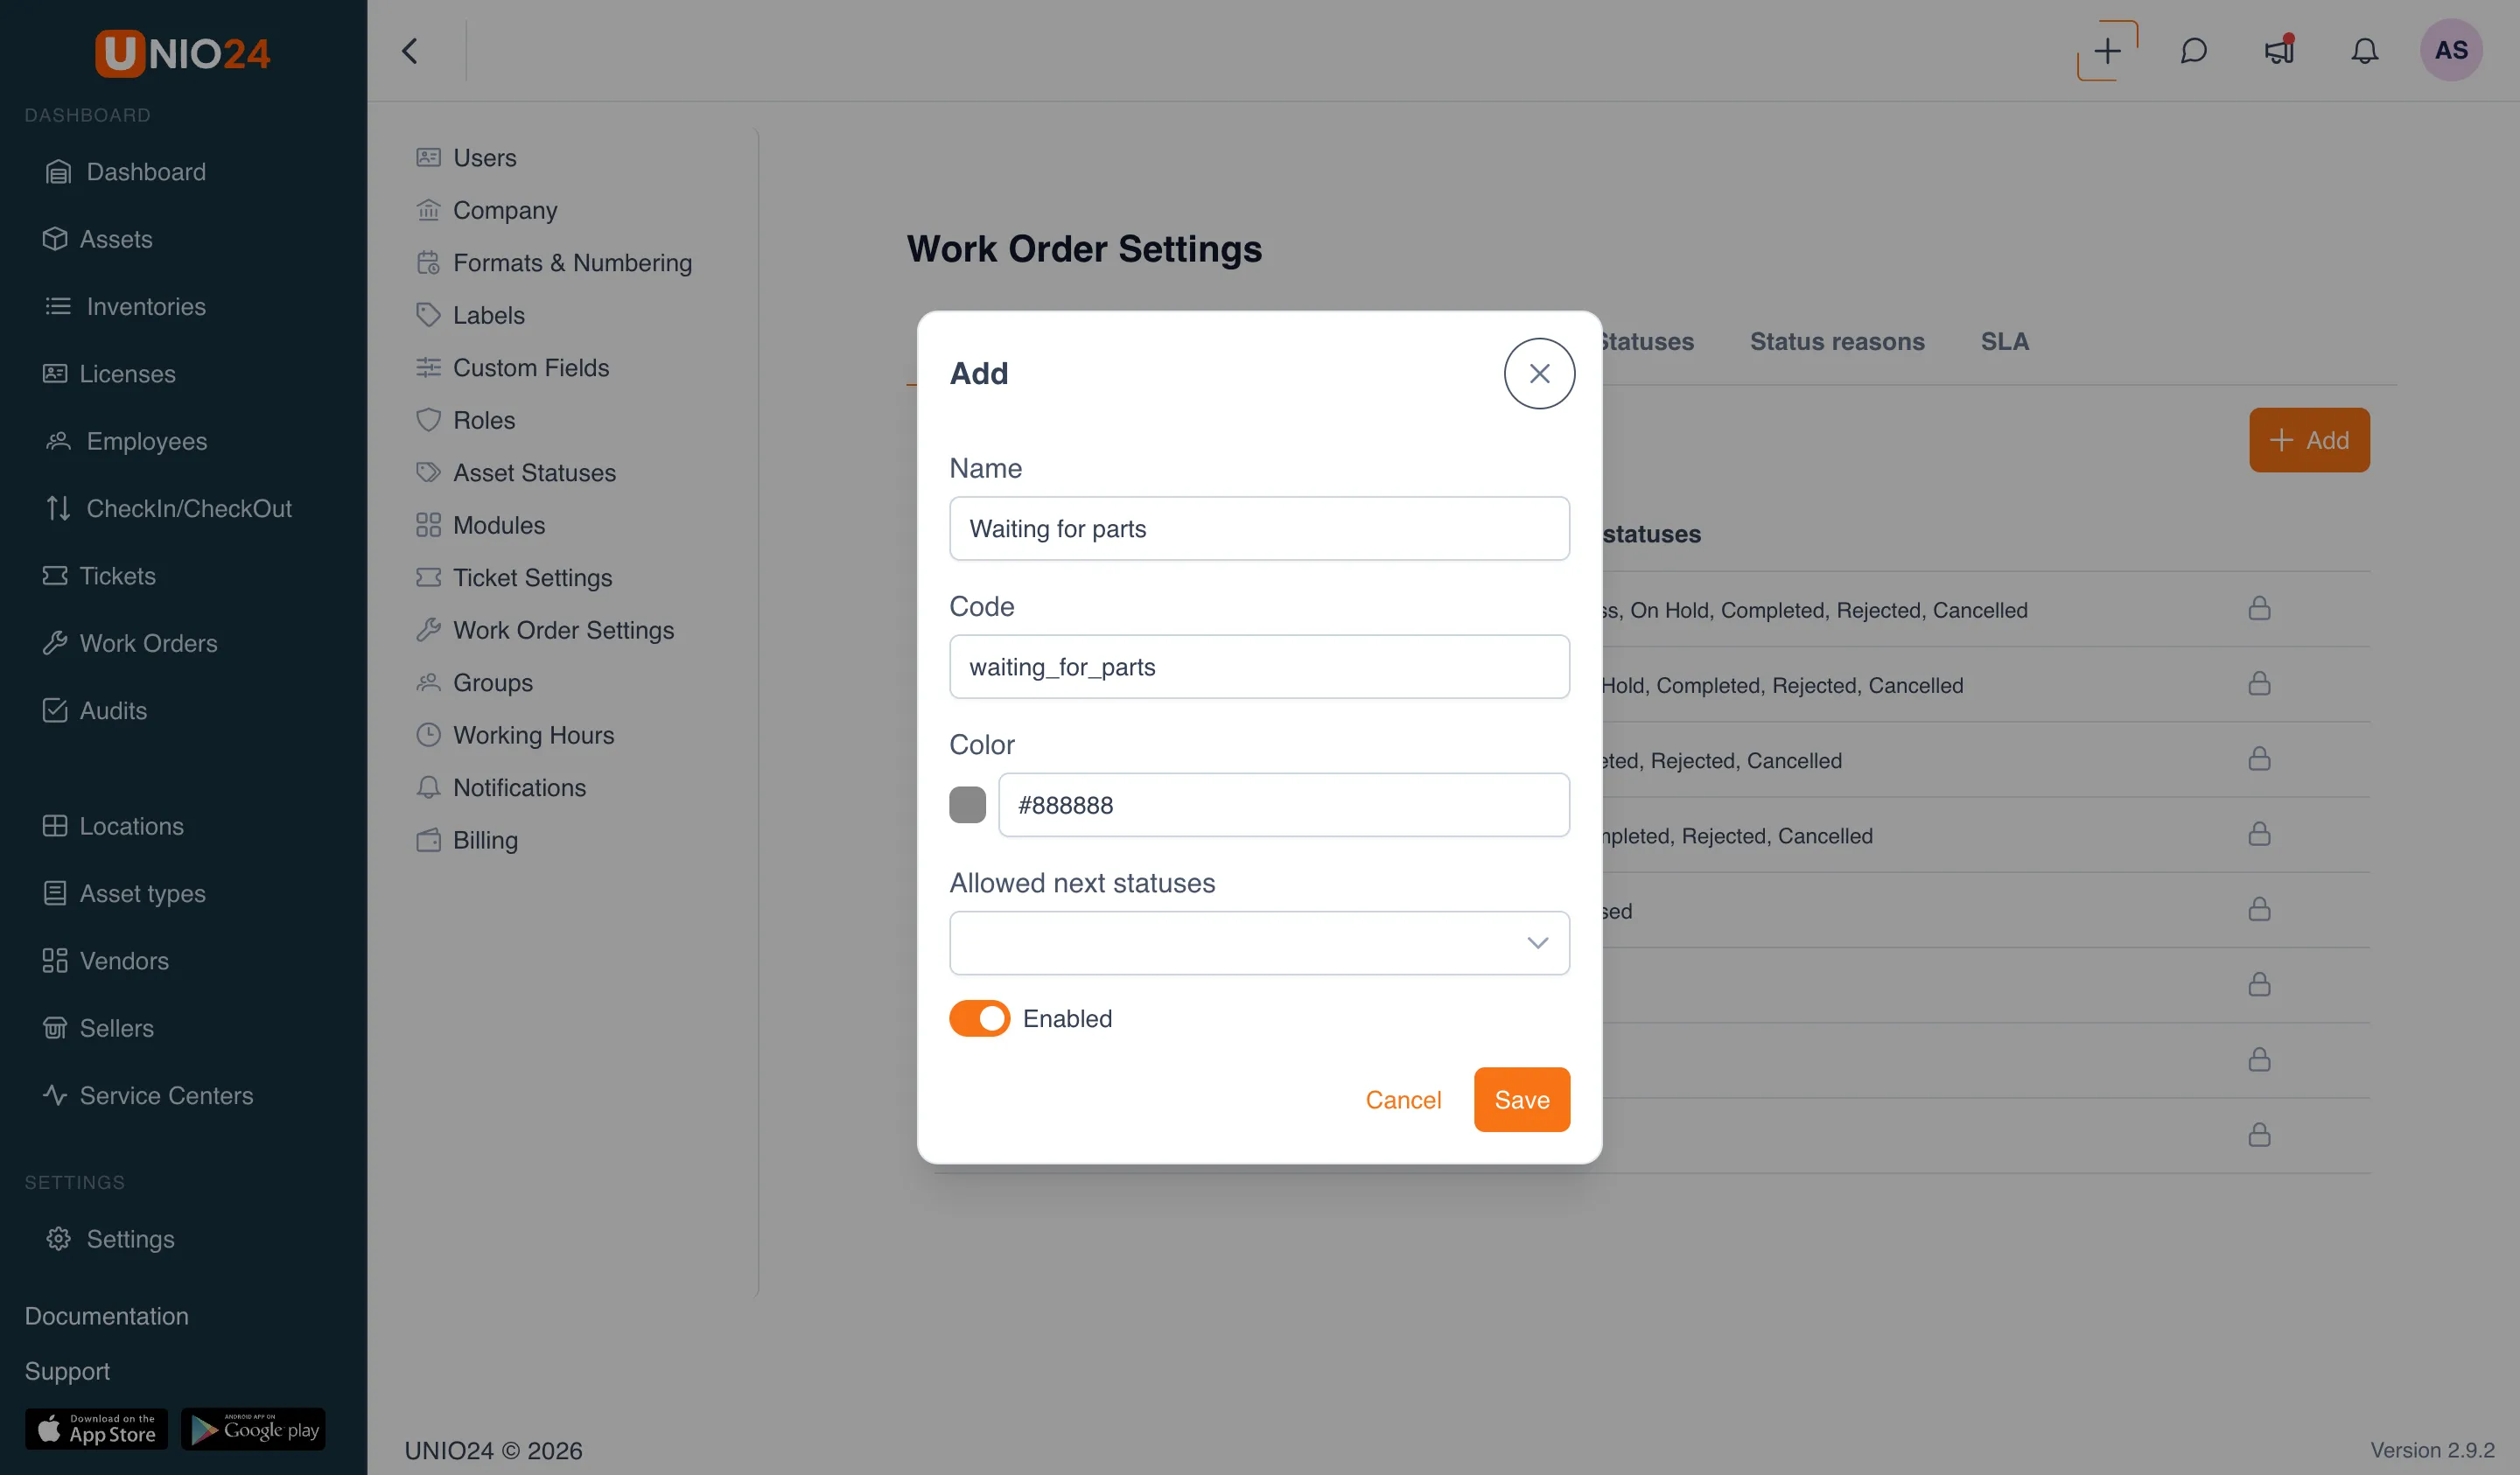
To create your own status, click Add on the Statuses tab and fill in the same fields.
Priorities
Section titled “Priorities”- Open Settings → Work Order Settings → the Priorities tab.
- To add a priority, click Add and fill in Name, Code, and Color, then Save.
- An existing priority is edited with the pencil, disabled with the toggle, and deleted with the trash icon.
System priorities: Low, Medium, High, Critical.
Maintenance types
Section titled “Maintenance types”A maintenance type describes the nature of the work and takes part in selecting the SLA policy.
- Open Settings → Work Order Settings → the Maintenance Types tab.
- Click Add, fill in Name, Code, and Color, then Save.
System types: Preventive, Corrective, Inspection, Emergency.
Task statuses
Section titled “Task statuses”These statuses mark the tasks inside a work order (the Tasks tab).
- Open Settings → Work Order Settings → the Task Statuses tab.
- Click Add, fill in Name and Code, then Save.
System task statuses: Pending, In Progress, Completed, Cancelled.
Status reasons
Section titled “Status reasons”Sometimes you need to record why a work order was moved to one status or another — for example, why it was rejected. Status reasons are for this.
- Open Settings → Work Order Settings → the Status reasons tab.
- Click Add.
- Fill in the Name of the reason (for example, “Duplicate” or “No parts”), the Code, and the Color.
- In the Applies to field, select the statuses for which, on transition, the system will ask for this reason (for example, the Rejected status).
- Click Save.
Now, when moving a work order to such a status, the system will ask you to choose a reason, and it will be saved in the work order history.
SLA setup
Section titled “SLA setup”The SLA sets the work order’s due date. A policy is selected by the combination of priority and maintenance type.
- Open the Settings section in the left menu.
- Select the Work Order Settings page.
- Go to the SLA tab.
- Click Add.
- Fill in the policy:
- Priority — which work order priority the policy applies to.
- Maintenance Type — which type. Leave the field empty (All) for the policy to fit any type with this priority.
- Response — the target in minutes.
- Resolution — the resolution target in minutes; it is what determines the Due Date on the work order and the SLA badge.
- Click Save.
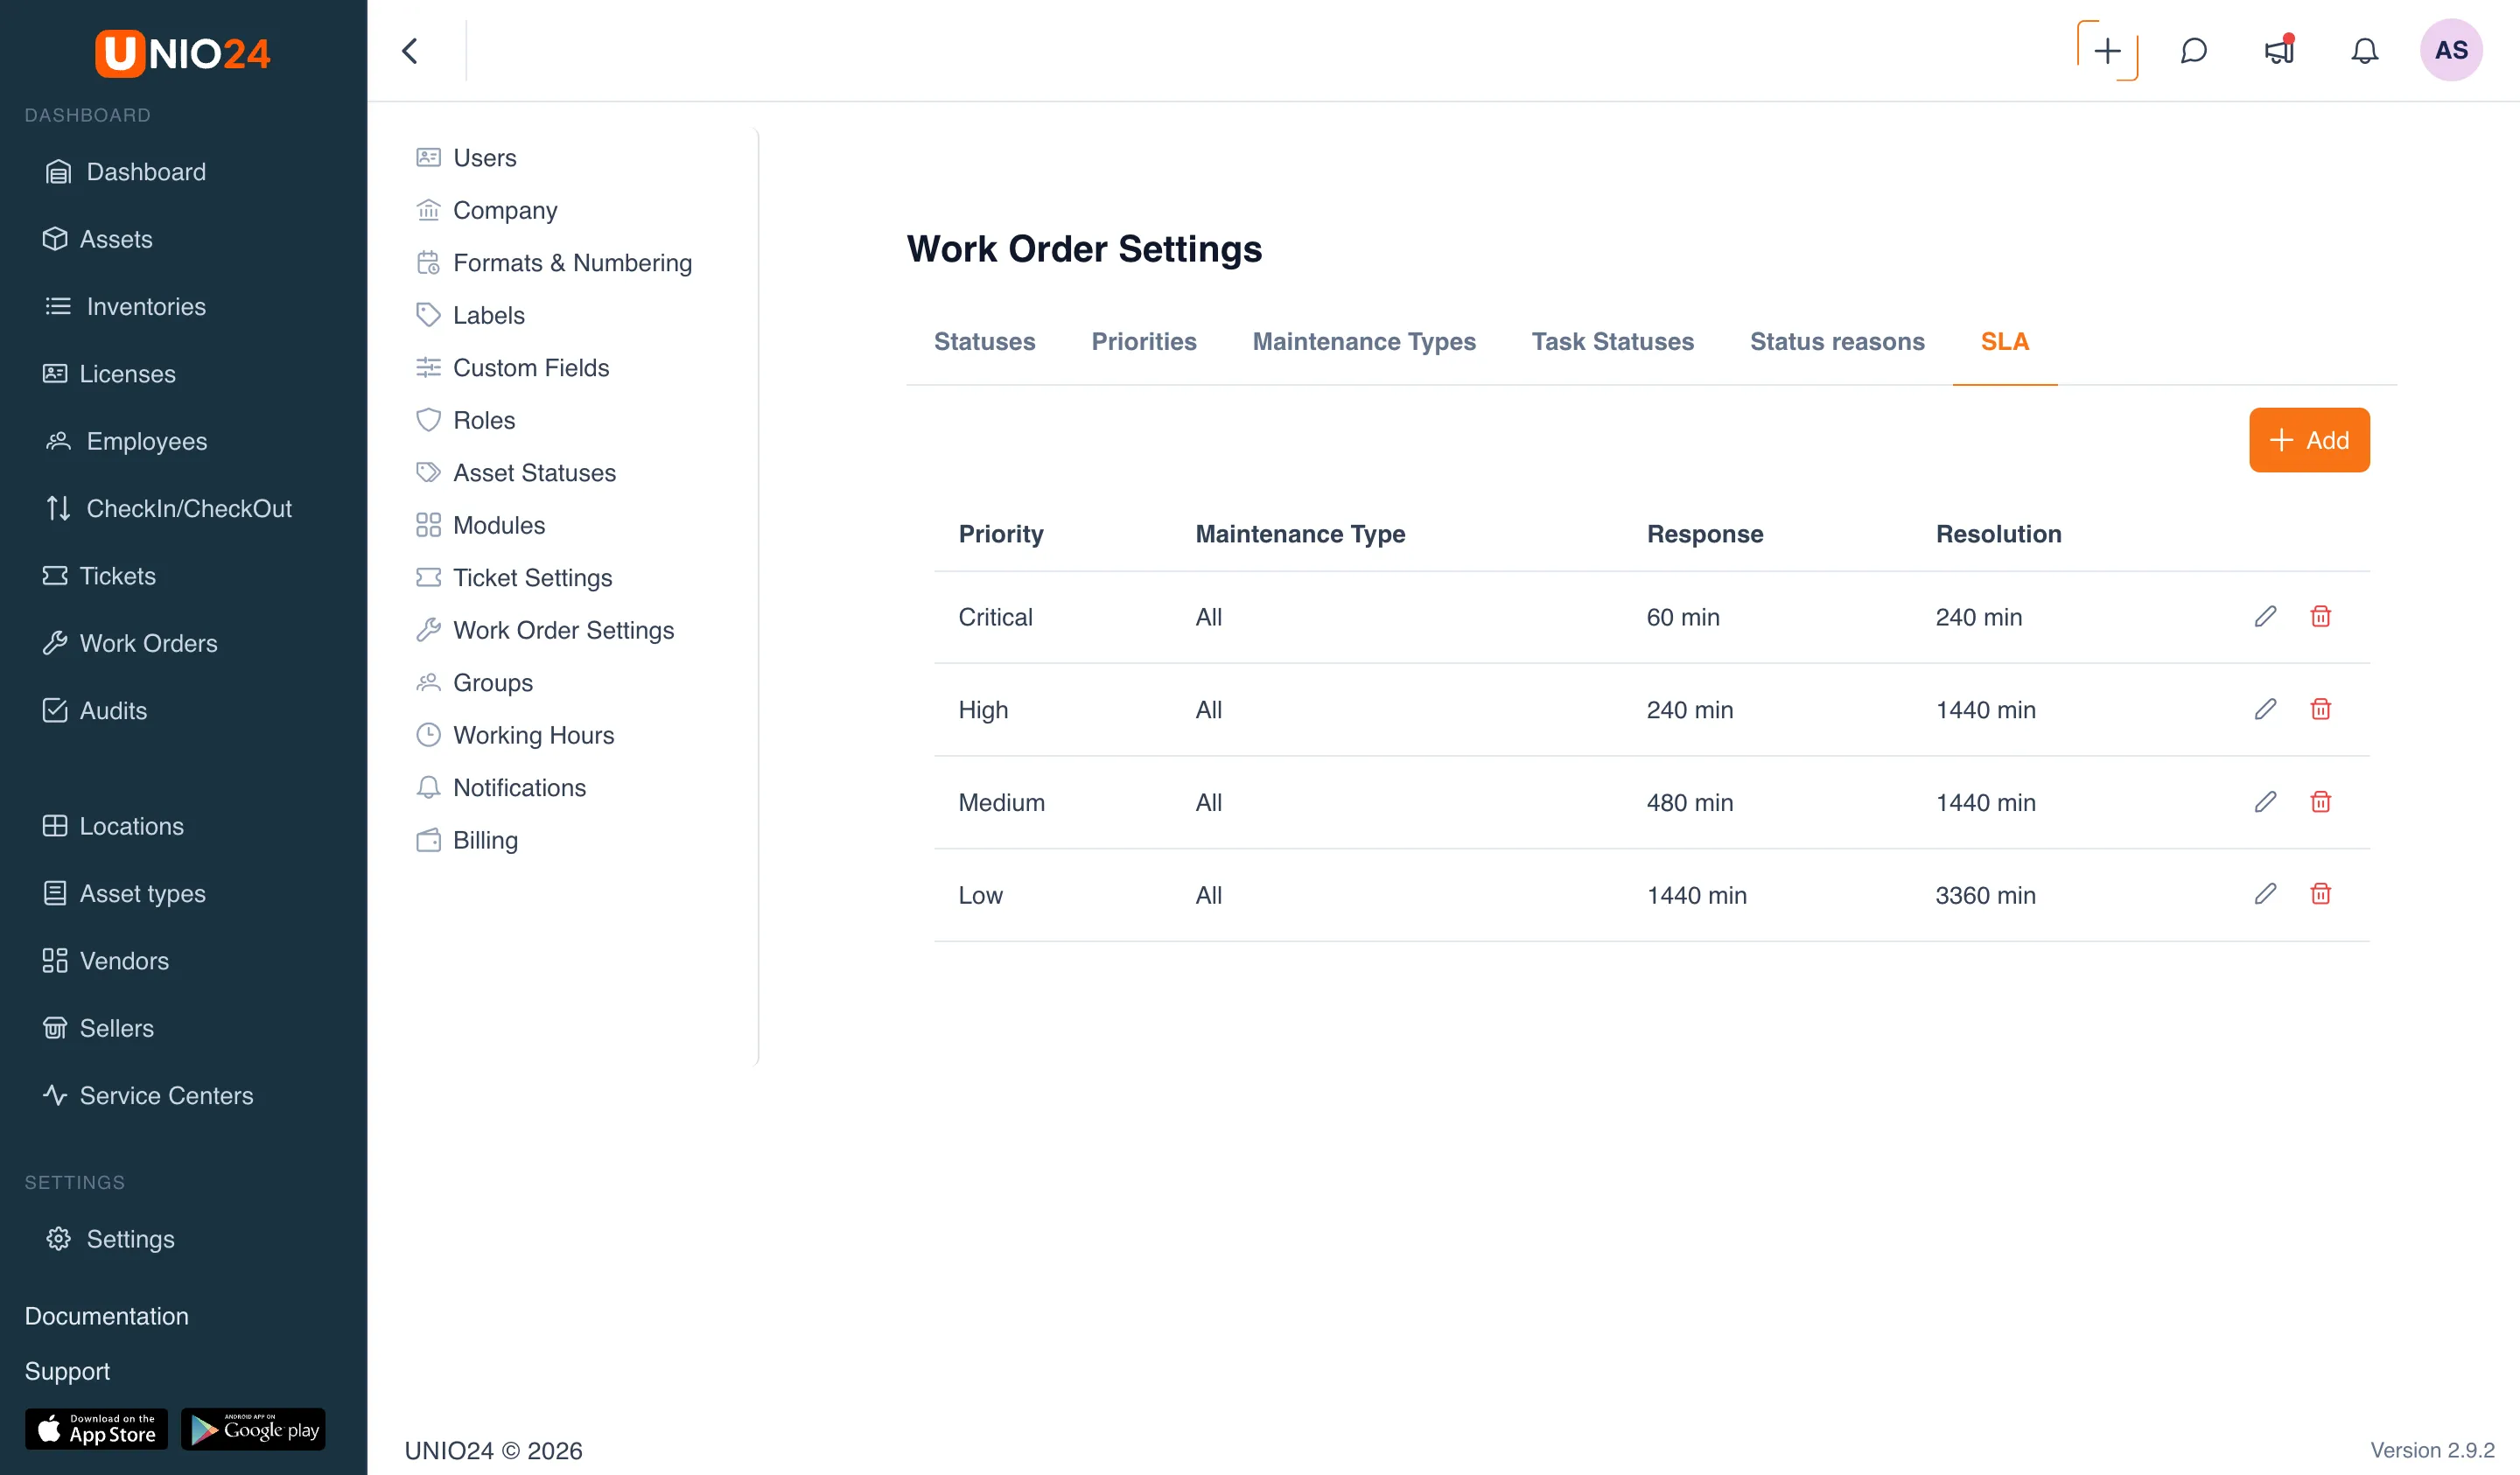
Add one policy per combination of priority and type that needs targets. If a priority has both a general policy (type All) and a policy with a specific type, the more precise one — with a matching type — is chosen for the work order.
Business hours
Section titled “Business hours”The Business Hours tab sets the company’s business hours used to count SLA targets in the “business hours only” mode. It does not affect work order targets (the work order SLA is counted around the clock by default), so for work orders its setup is optional and is mainly needed for tickets.
Open Settings → Working Hours, the Business Hours tab. On it, for each day of the week (Monday–Sunday) you set the working hours, and with the Add break button you add a break.
Holidays
Section titled “Holidays”The Holidays tab lists the holidays and non-working days that are excluded from the business-hours SLA calculation. Like business hours, it does not affect work order targets.
Open Settings → Working Hours, the Holidays tab. The Add day button adds a day with the Date and Name fields; the Repeats every year checkbox makes the day annual.