

Working with labels
This page collects the common tasks for working with labels. For how codes, templates, and the lost & found page work, see Labels: how it works. For the full list of actions and fields, see the Labels reference.
You can tag Assets, Inventories, Employees, Locations, and Licenses. All actions on a tag are done on the record card through its tag button.
Tag menu
Section titled “Tag menu”- Open the record card (an asset’s, for example).
- Find the button with the QR code icon. If no code is assigned yet, it reads Generate Tag; if one is assigned, it shows the tag number in
XXXX-XXXXformat. - Click the button — the actions menu opens. The set of items depends on whether the record has an active code.
When there is no code yet, the menu has two items: Generate new tag and Enter code from tag. After a code is assigned, Show tag, Print, and Remove tag also appear in the menu.
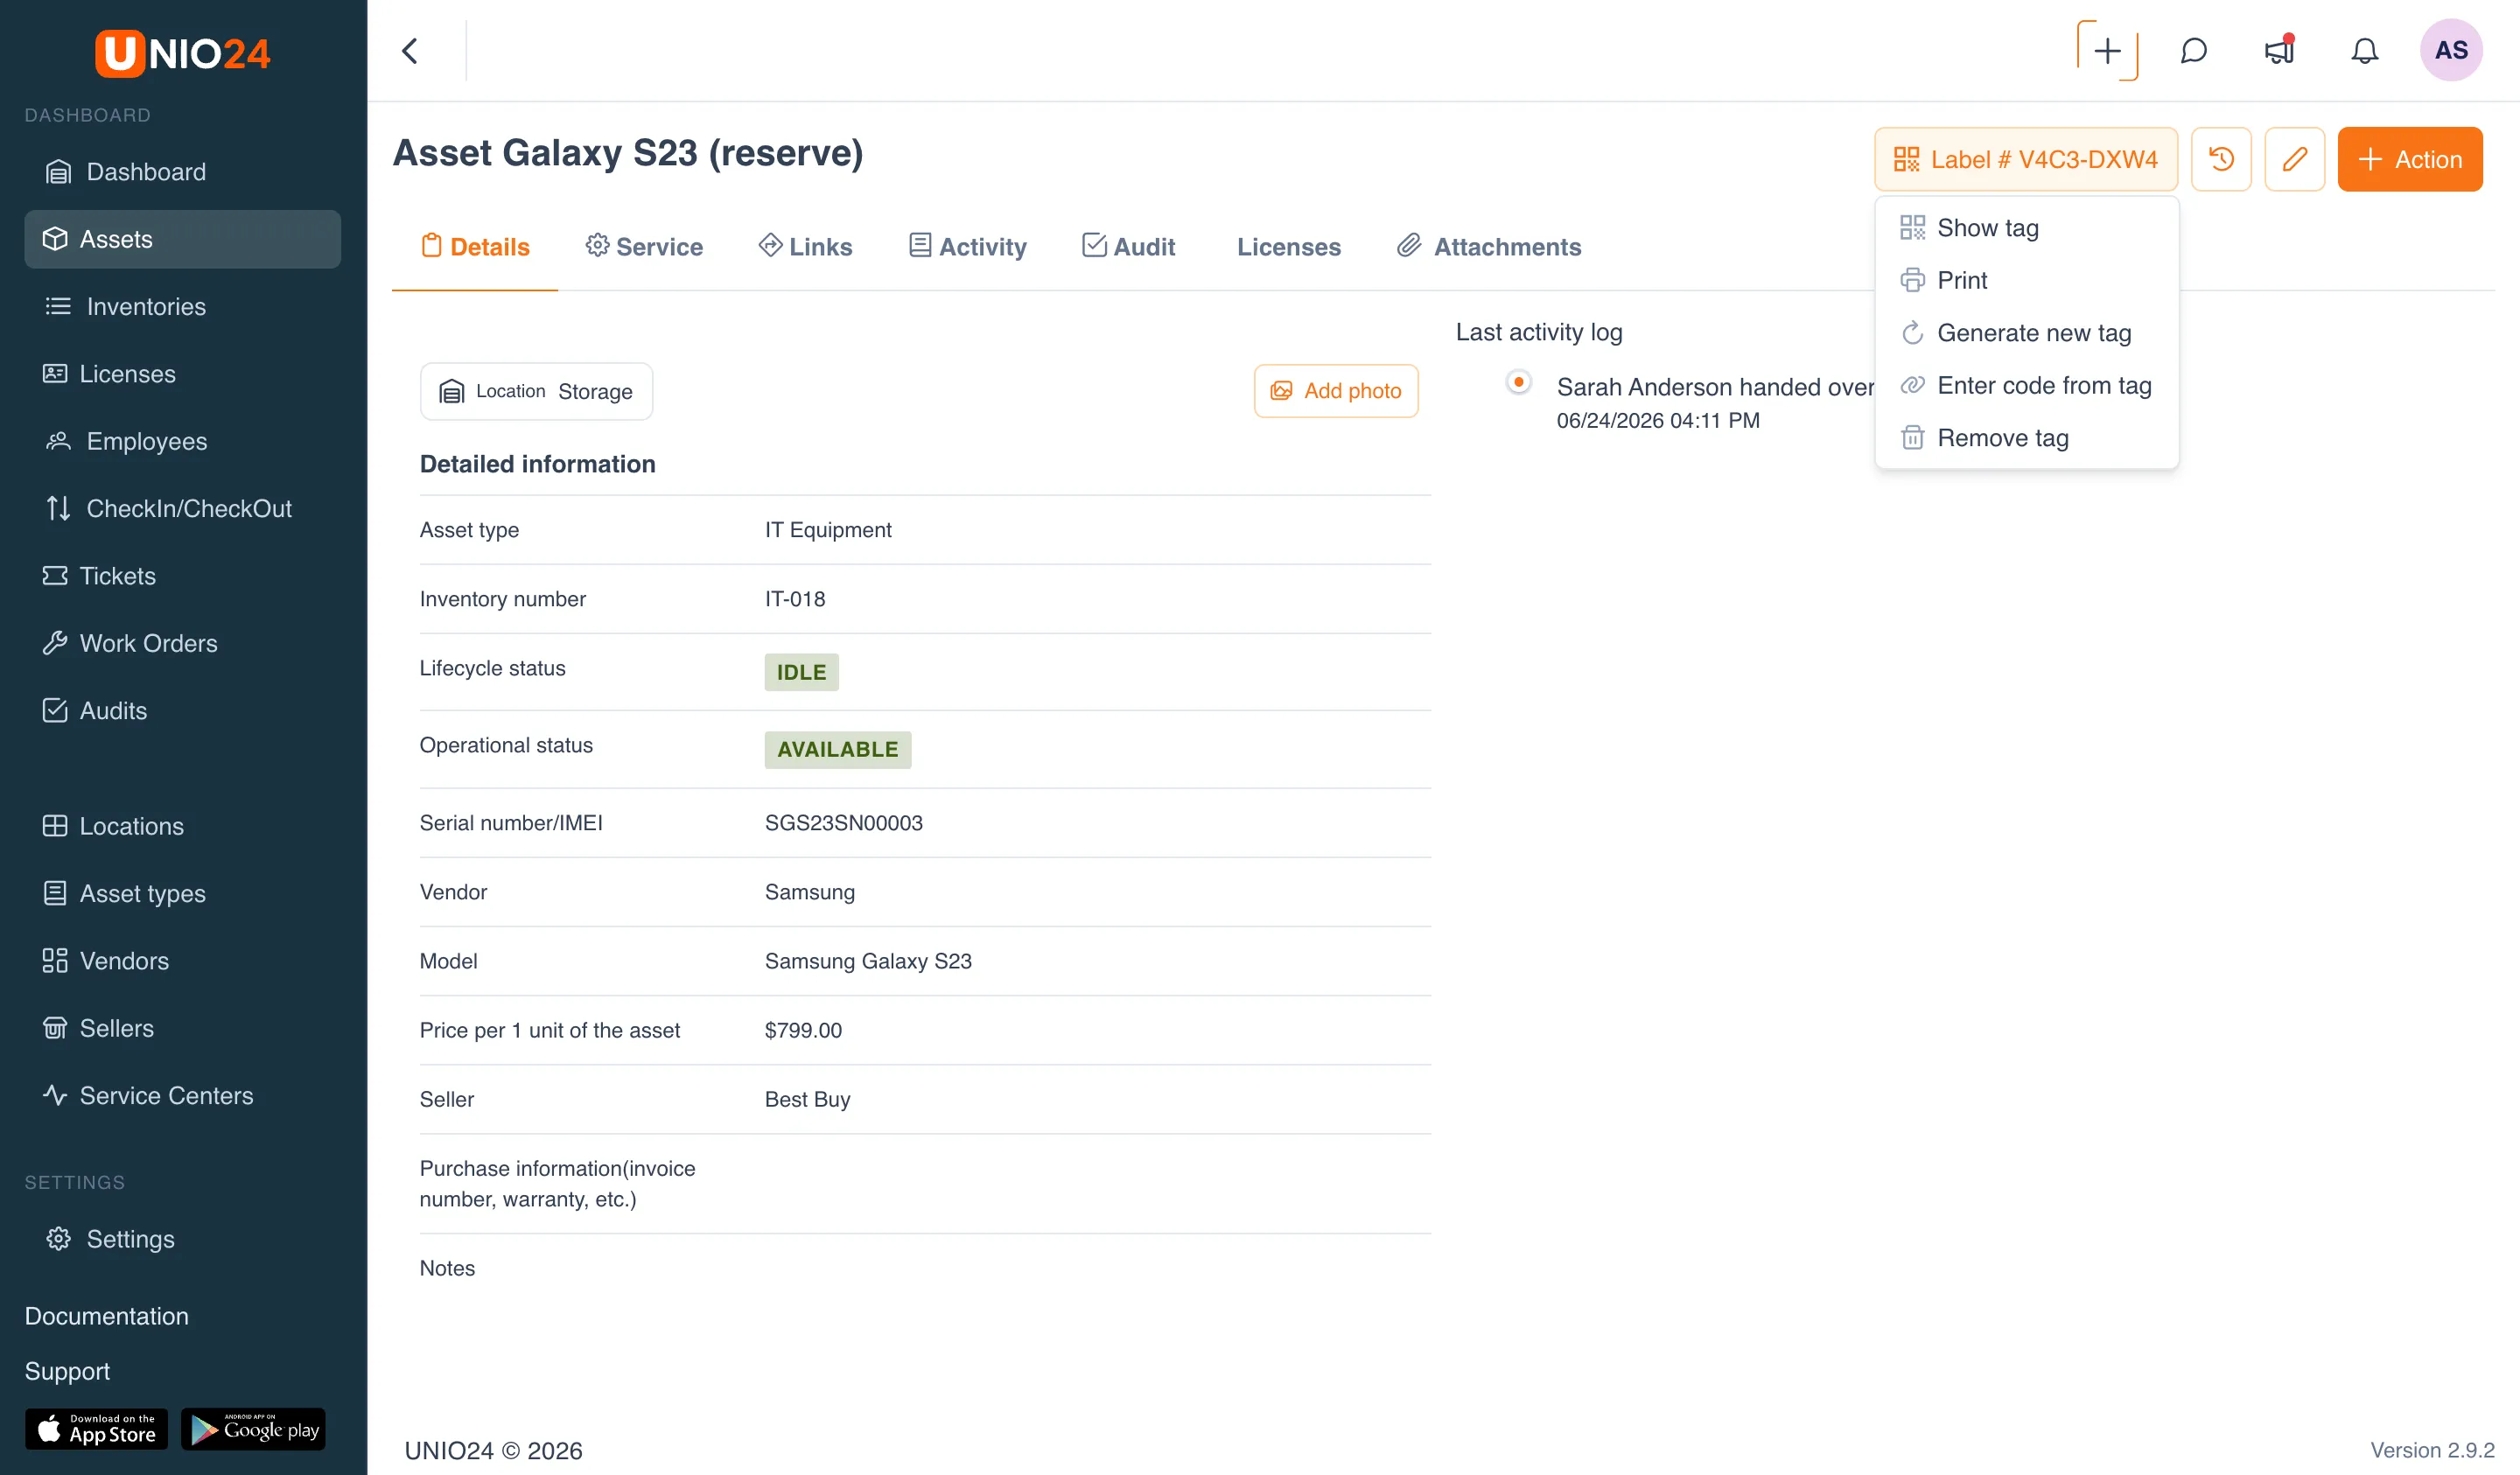
Generate a new tag
Section titled “Generate a new tag”- On the record card, open the tag menu.
- Choose Generate new tag.
- The system generates a new code and attaches it to the record. The tag number appears on the button.
Enter a code from a tag
Section titled “Enter a code from a tag”This option is needed if a label is already printed in advance or you have a third-party code you want to attach to the record.
- On the record card, open the tag menu.
- Choose Enter code from tag.
- Enter the code in the field (8 characters; the
XXXX-XXXXformat is applied automatically). Or click the camera button and scan the code via Scan. - Click Save.
If such a code is already used by another record, the system shows the error “This code is already in use” — enter a different code.
Show the tag
Section titled “Show the tag”- On the record card, open the tag menu.
- Choose Show tag.
- The QR code with the record’s active code opens. It can be shown on screen for scanning.
Replace a code
Section titled “Replace a code”Replacement creates a new code instead of the current one.
- On the record card, open the tag menu.
- Choose Generate new tag.
- The system warns that the current code will be replaced and the printed label will become invalid forever. Confirm the action.
After replacement, the previous label no longer leads to the record — it must be reprinted.
Replacing and removing a code are irreversible. A previously printed label becomes invalid forever and is no longer scanned.
Remove the tag
Section titled “Remove the tag”- On the record card, open the tag menu.
- Choose Remove tag.
- Confirm the removal in the prompt that appears.
The record keeps a Generate Tag button — a code can be assigned again at any time.
Print a single label
Section titled “Print a single label”- On the record card, open the tag menu.
- Choose Print — the print dialog opens.
- In the Template field, choose a label template. The default template is offered first.
- In the Copies field, set how many labels to print (from 1 to 500).
- If a sheet template is chosen, in the Start cell field set which cell of the sheet to start from (to print onto a partially used sheet).
- Check the label preview.
- Click Print to open the browser print dialog, or Download PDF to save the file and print later.
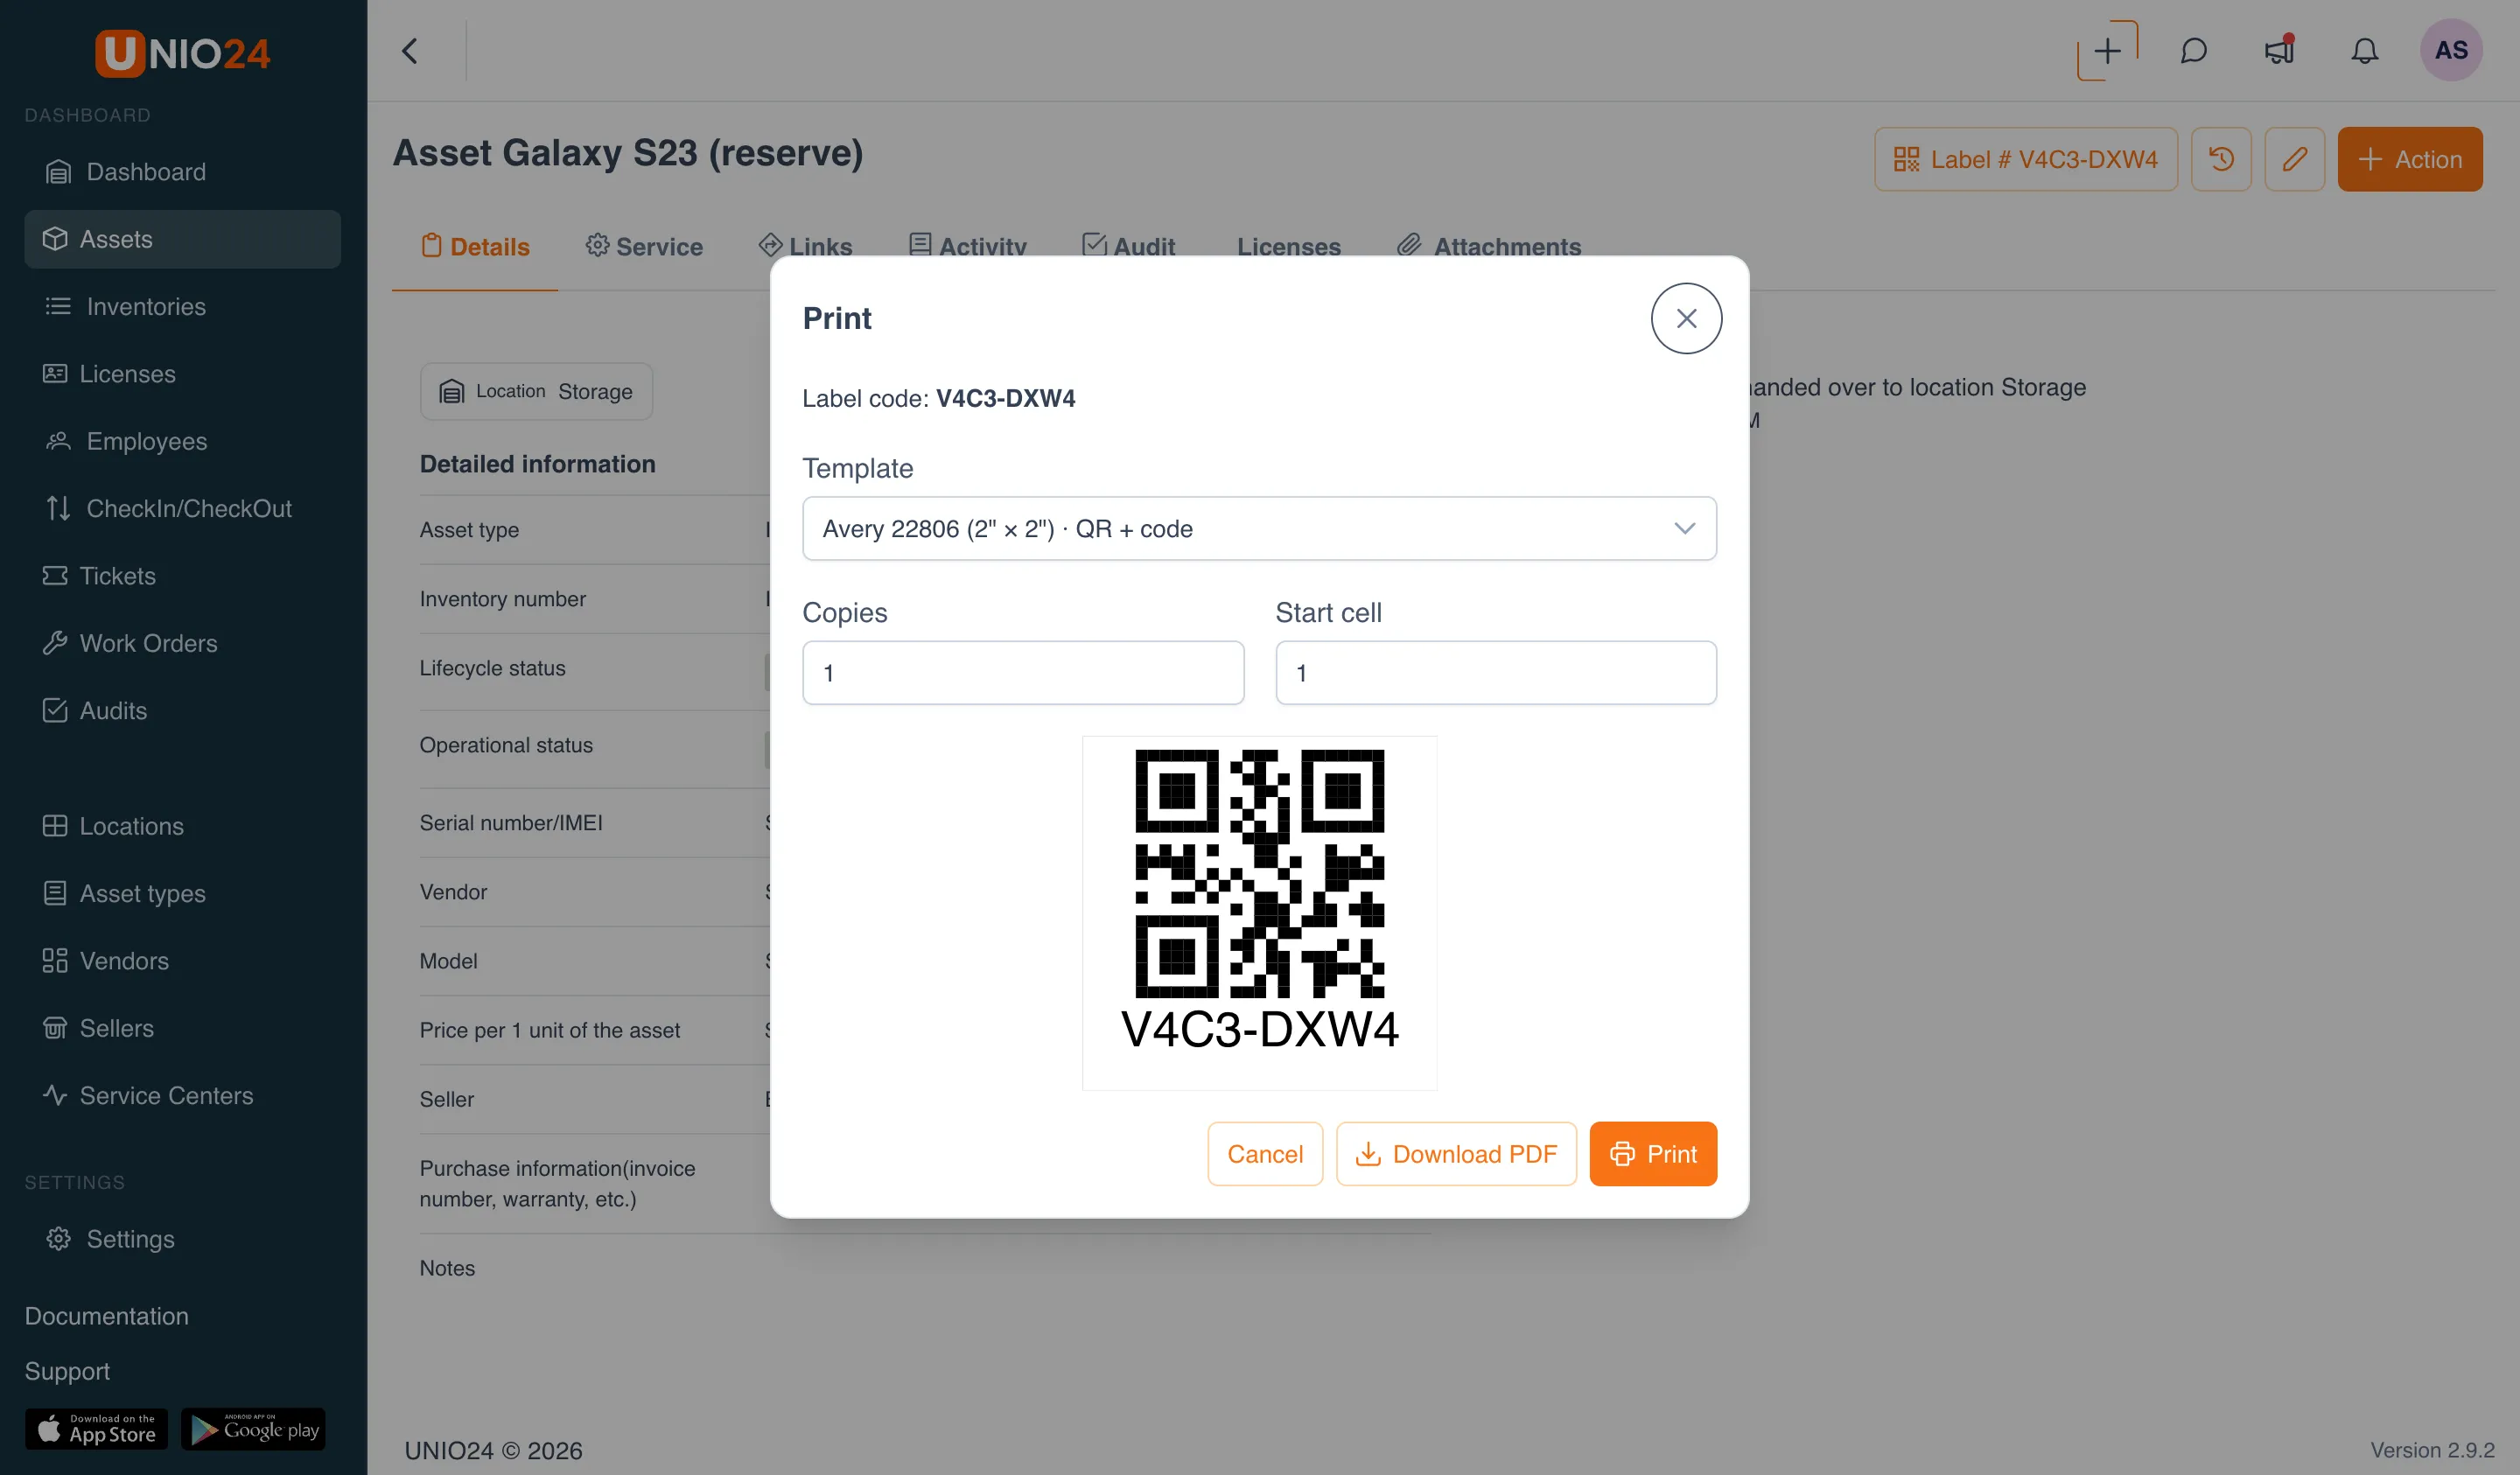
Any printer that can print PDF will do — no separate driver is needed.
Bulk printing from a list
Section titled “Bulk printing from a list”- Open a list of records: Assets, Inventory, Locations, Employees, or Licenses.
- Check the boxes of the records you need.
- Start printing labels for the selected records — the bulk print dialog opens.
- If some records have no active code yet, a warning with a list of such records appears at the top. Click Generate codes to create codes for them (records without a code are otherwise skipped).
- Choose a Template.
- In the Copies per label field, set how many copies to print for each record.
- For a sheet template, set the Start cell.
- At the bottom of the dialog, the total number of labels (and sheets) to be produced is shown.
- Click Print or Download PDF.