

Performing asset operations
This page collects the common tasks for working with operations. For how the holder and operation types work, see Asset operations. For the list of fields of each operation, see the Asset operations reference.
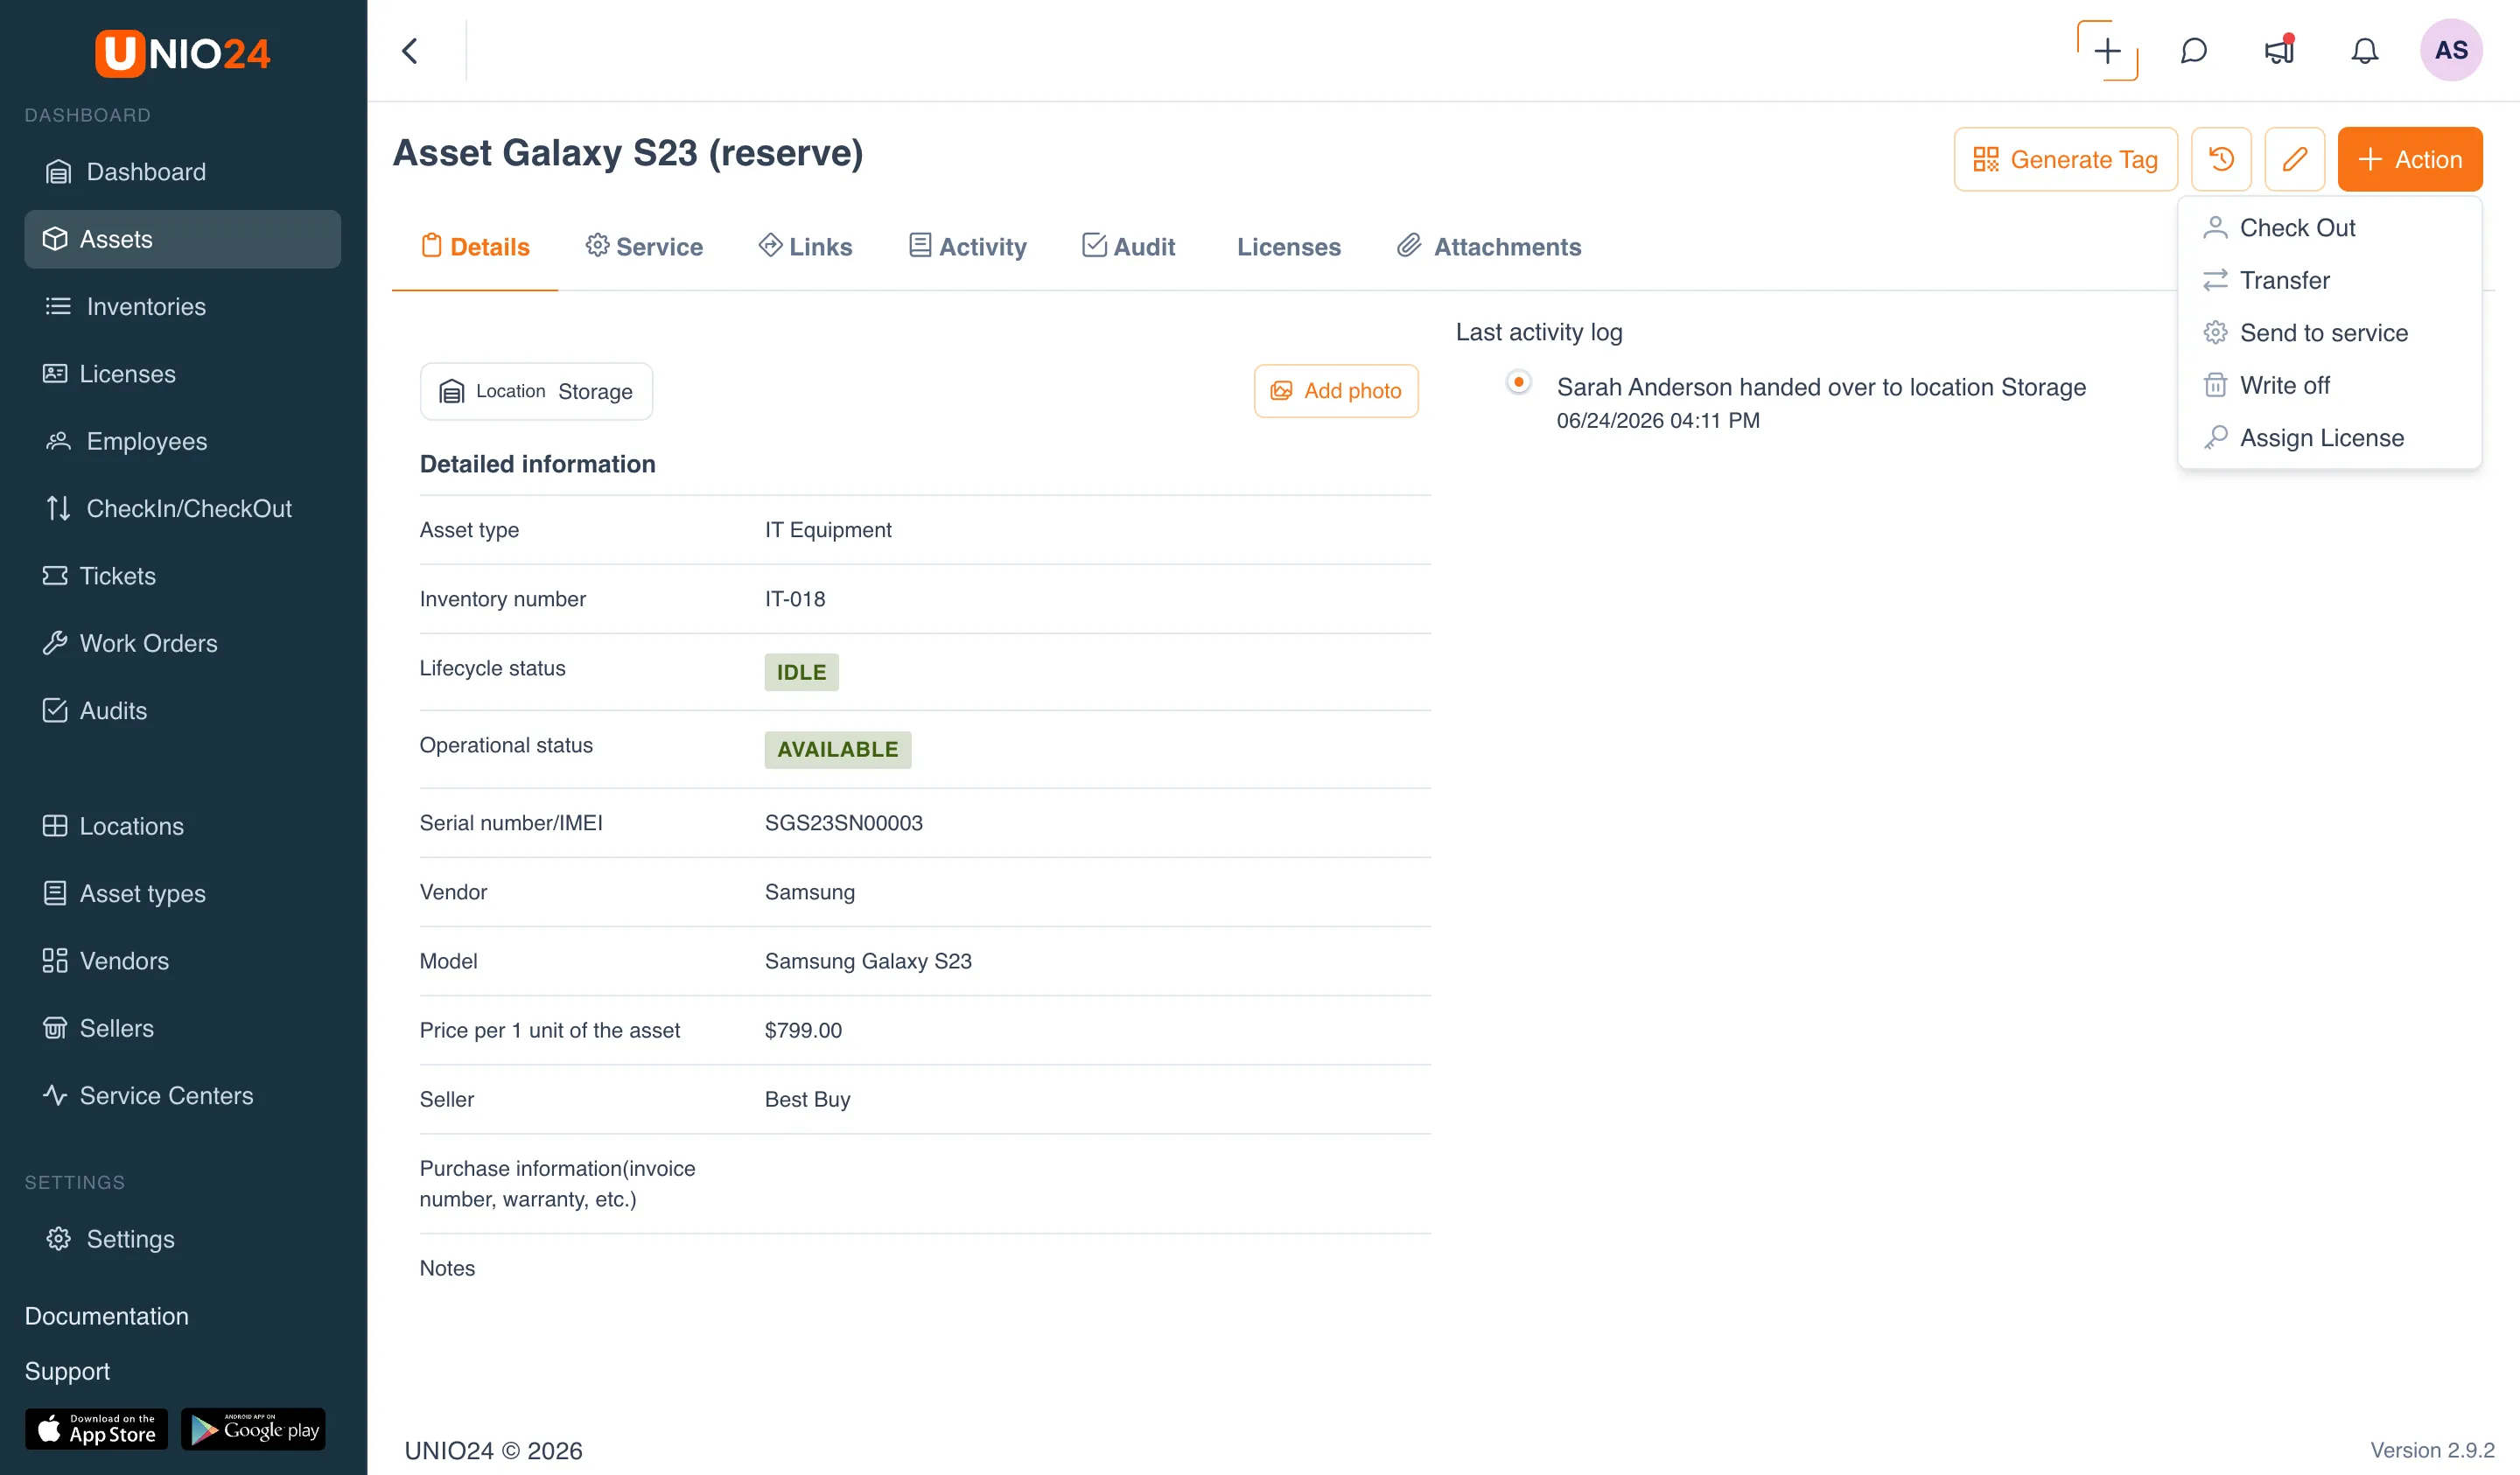
Most operations are easier to do from the asset card: actions open in a modal window, and you stay on the same page. Which actions are available depends on the asset’s current holder and on your role’s permissions.
Opening the action menu on the asset card
Section titled “Opening the action menu on the asset card”- Open the Assets section in the left menu.
- Click the asset you need to open its card.
- Click the Action button in the top-right corner.
- Choose an operation from the dropdown menu.
The Action button is visible only with the transfers.create permission. The menu shows only the operations suitable for the asset’s current state.
Checking out an asset to an employee
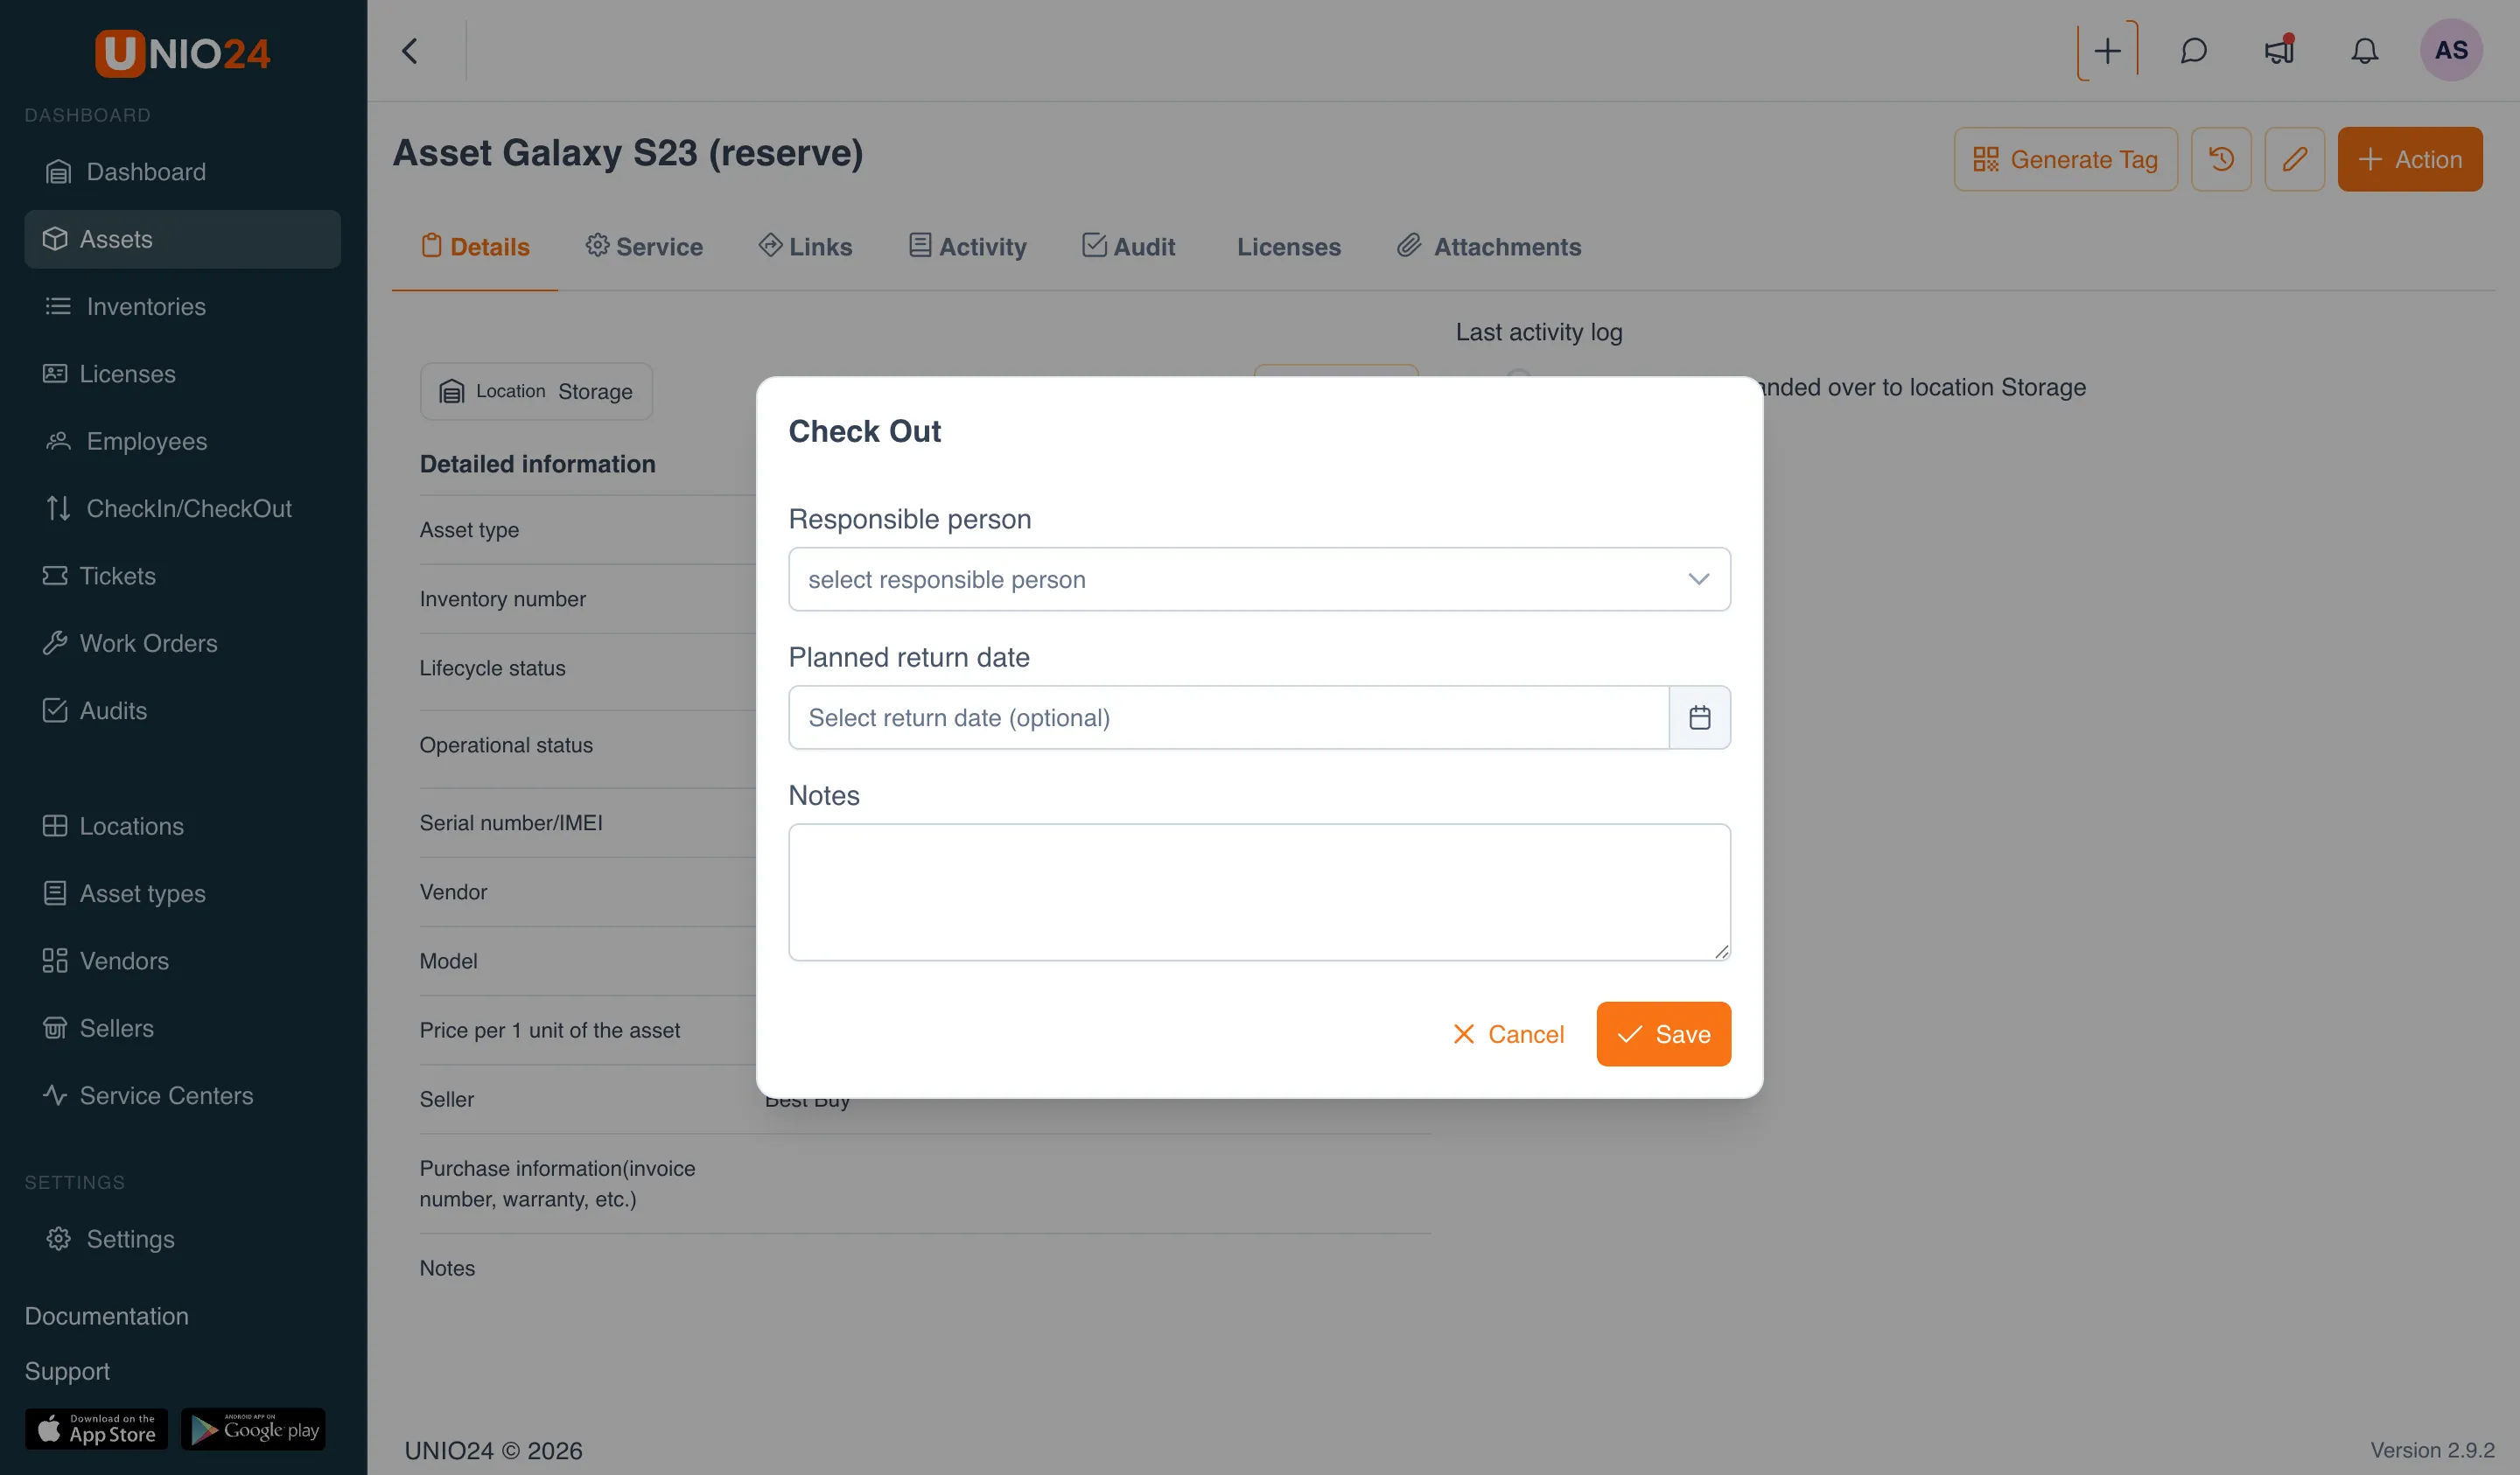
Section titled “Checking out an asset to an employee”Available when the asset is at a location.
- On the asset card, open the Action menu and choose Check Out.
- In the Responsible person field, choose the employee the asset is issued to (required).
- If needed, specify a Planned return date.
- If needed, add Notes.
- Click Save.
Checking in an asset
Section titled “Checking in an asset”Available when the asset is assigned to an employee.
- On the asset card, open the Action menu and choose Check In.
- In the Location of the asset when relocated field, choose the location the asset is returned to (required).
- If needed, specify the asset’s condition on return in the Condition field. If left blank, it stays “Not specified”.
- If needed, add Notes.
- Click Save.
Transferring an asset to another location
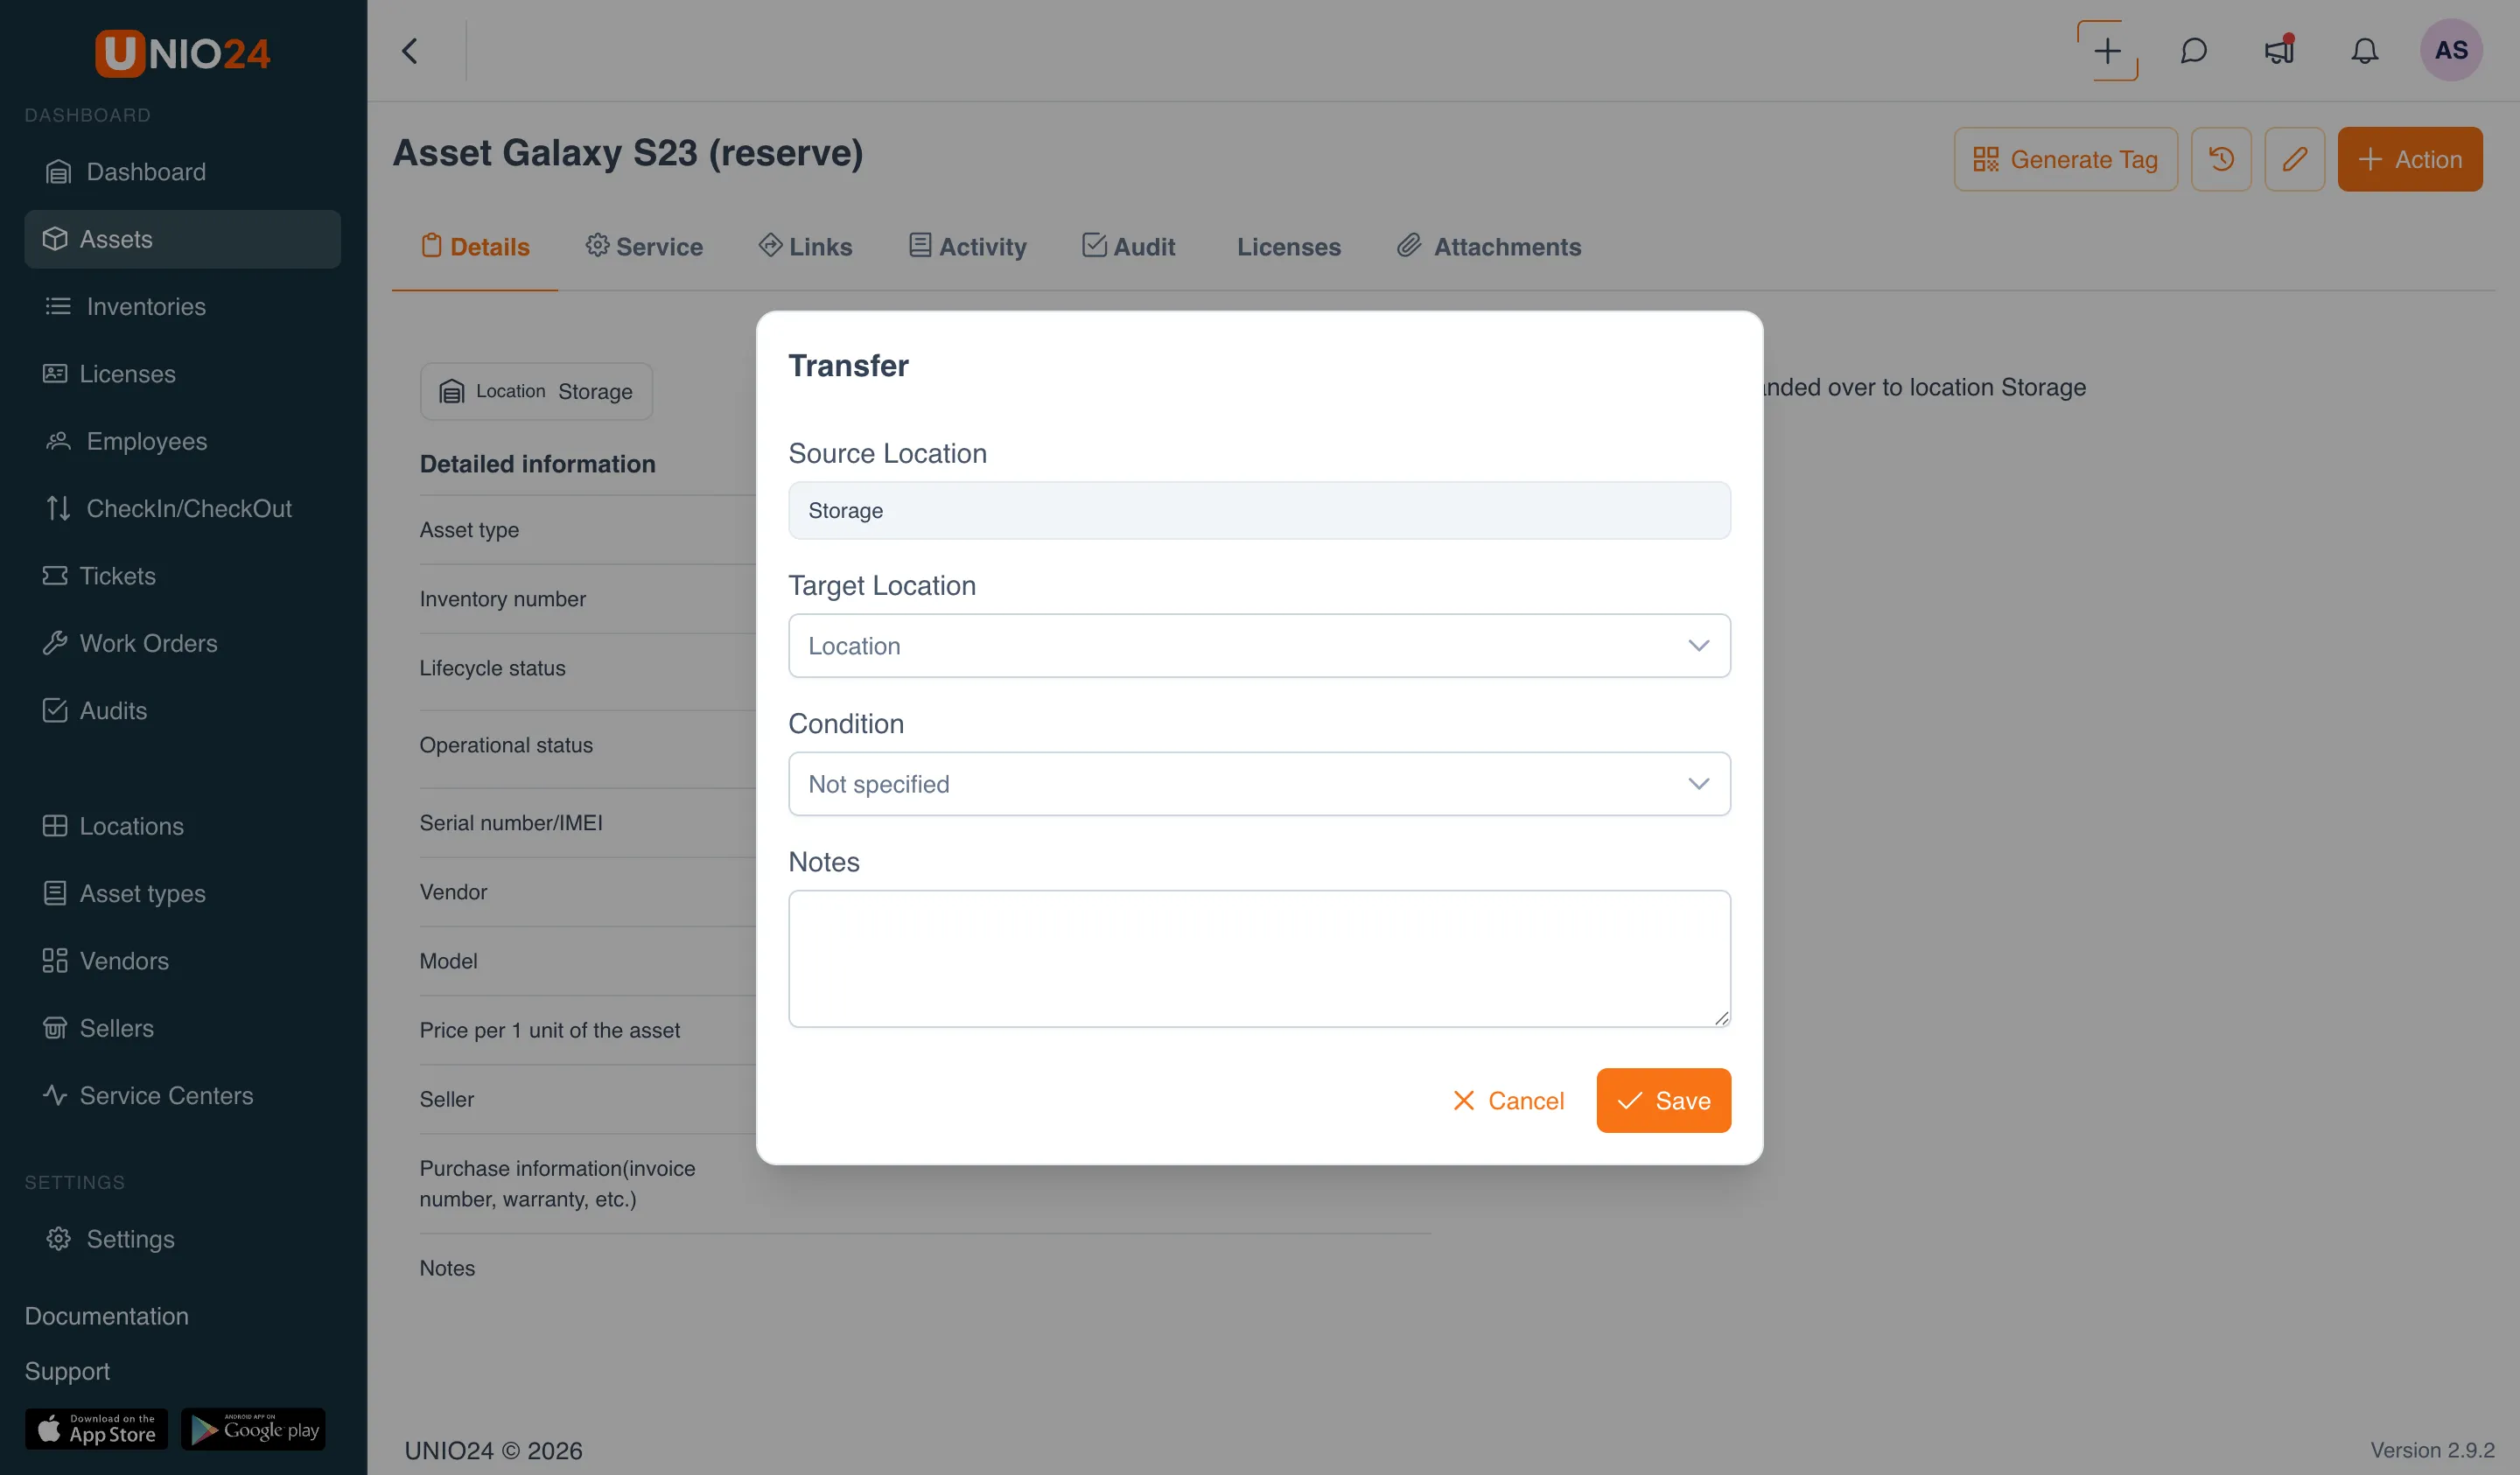
Section titled “Transferring an asset to another location”Available when the asset is at a location.
- On the asset card, open the Action menu and choose Transfer.
- The Source Location field is filled with the current location and is read-only.
- In the Target Location field, choose the location the asset is moved to (required).
- If needed, specify the Condition and Notes.
- Click Save.
Sending an asset to service
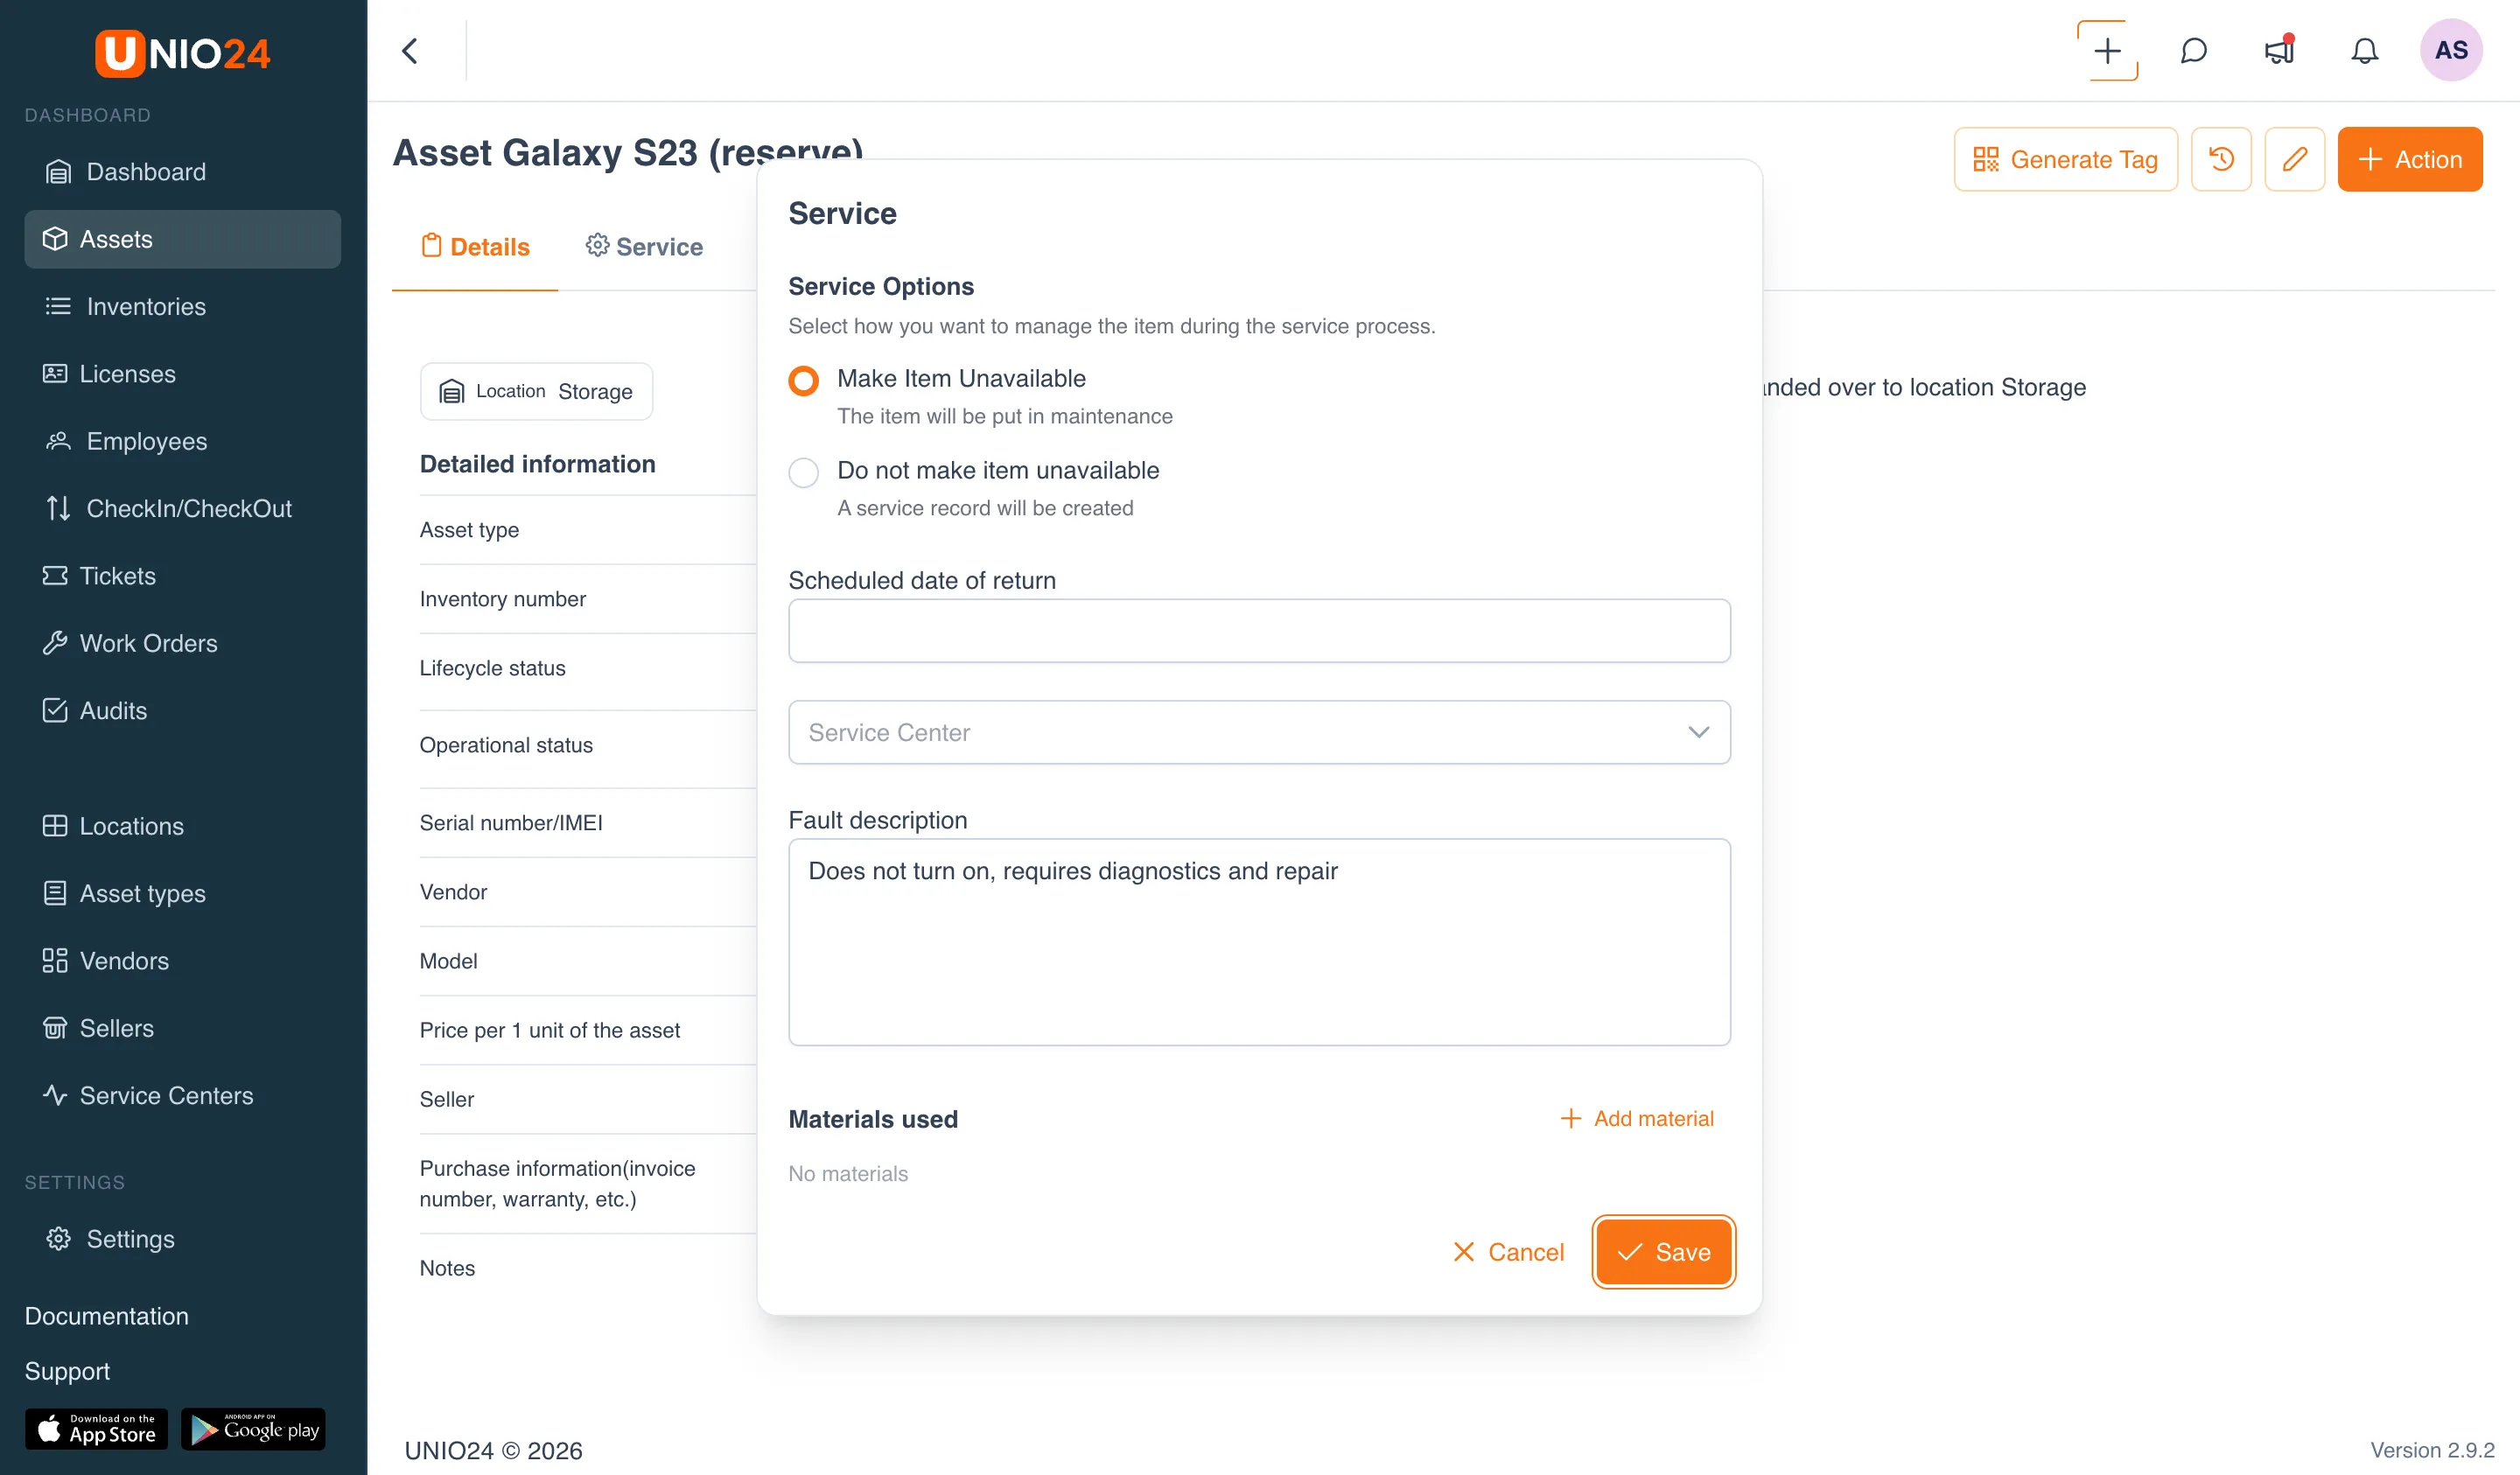
Section titled “Sending an asset to service”Available when the asset is not in maintenance.
- On the asset card, open the Action menu and choose Send to service.
- In the Service Options block, choose a mode:
- Make Item Unavailable — the asset is moved to the “In Maintenance” status and becomes unavailable. Fill in the Scheduled date of return.
- Do not make item unavailable — the asset’s status does not change. Fill in the Date of transfer to service, Date of return from the service, and Repair cost.
- In the Service Center field, choose a center or enter the name of a new one.
- Describe the problem in the Fault description field.
- If needed, in the Materials used block, click Add material and choose a material, place, and quantity from the Inventory module.
- Click Save.
Returning an asset from service
Section titled “Returning an asset from service”Available when the asset is in the “In Maintenance” status.
- On the asset card, open the Action menu and choose Return from service.
- In the Return to field, choose where the asset returns to — Employee or Location — then choose the specific holder. If the previous holder is known, the field is filled with it automatically.
- If needed, specify the Repair cost.
- If needed, fill in the Description of the problem from the service.
- If needed, add the materials used in the Materials used block.
- Click Save.
Performing an operation from the “CheckIn/CheckOut” section
Section titled “Performing an operation from the “CheckIn/CheckOut” section”Check-out, check-in, and transfer can also be done from the CheckIn/CheckOut section. It also stores the list of all transfer documents.
- Open the CheckIn/CheckOut section in the left menu.
- Click the button you need: Check In, Check Out, or Transfer.
- On the page that opens, select the assets and fill in the operation fields.
- Save the document.
Unlike the asset card, here you can handle several assets in one document. Send to service and return from service are not in this section — they are done only from the asset card.
Writing off an asset
Section titled “Writing off an asset”Writing off is done by moving the asset to a write-off location.
- Move the asset to a write-off location with an ordinary check-in or transfer operation, choosing such a location as the target.
- After the move, the asset’s lifecycle status becomes “Pending Disposal”.
- The asset stays in this location until it is deleted.
Deleting an asset
Section titled “Deleting an asset”Deletion is available only for assets that are already in a write-off location.
- Open the Assets section → the write-off location, or open the location directly.
- In the location’s asset list, find the asset and click the delete icon (trash can).
- Confirm the deletion.
The delete icon is shown only in write-off locations.