

Managing custom fields
These tasks are performed by the administrator. For what custom fields are and how they work, see Custom fields: how it works. For the list of types and dialog fields, see the reference.
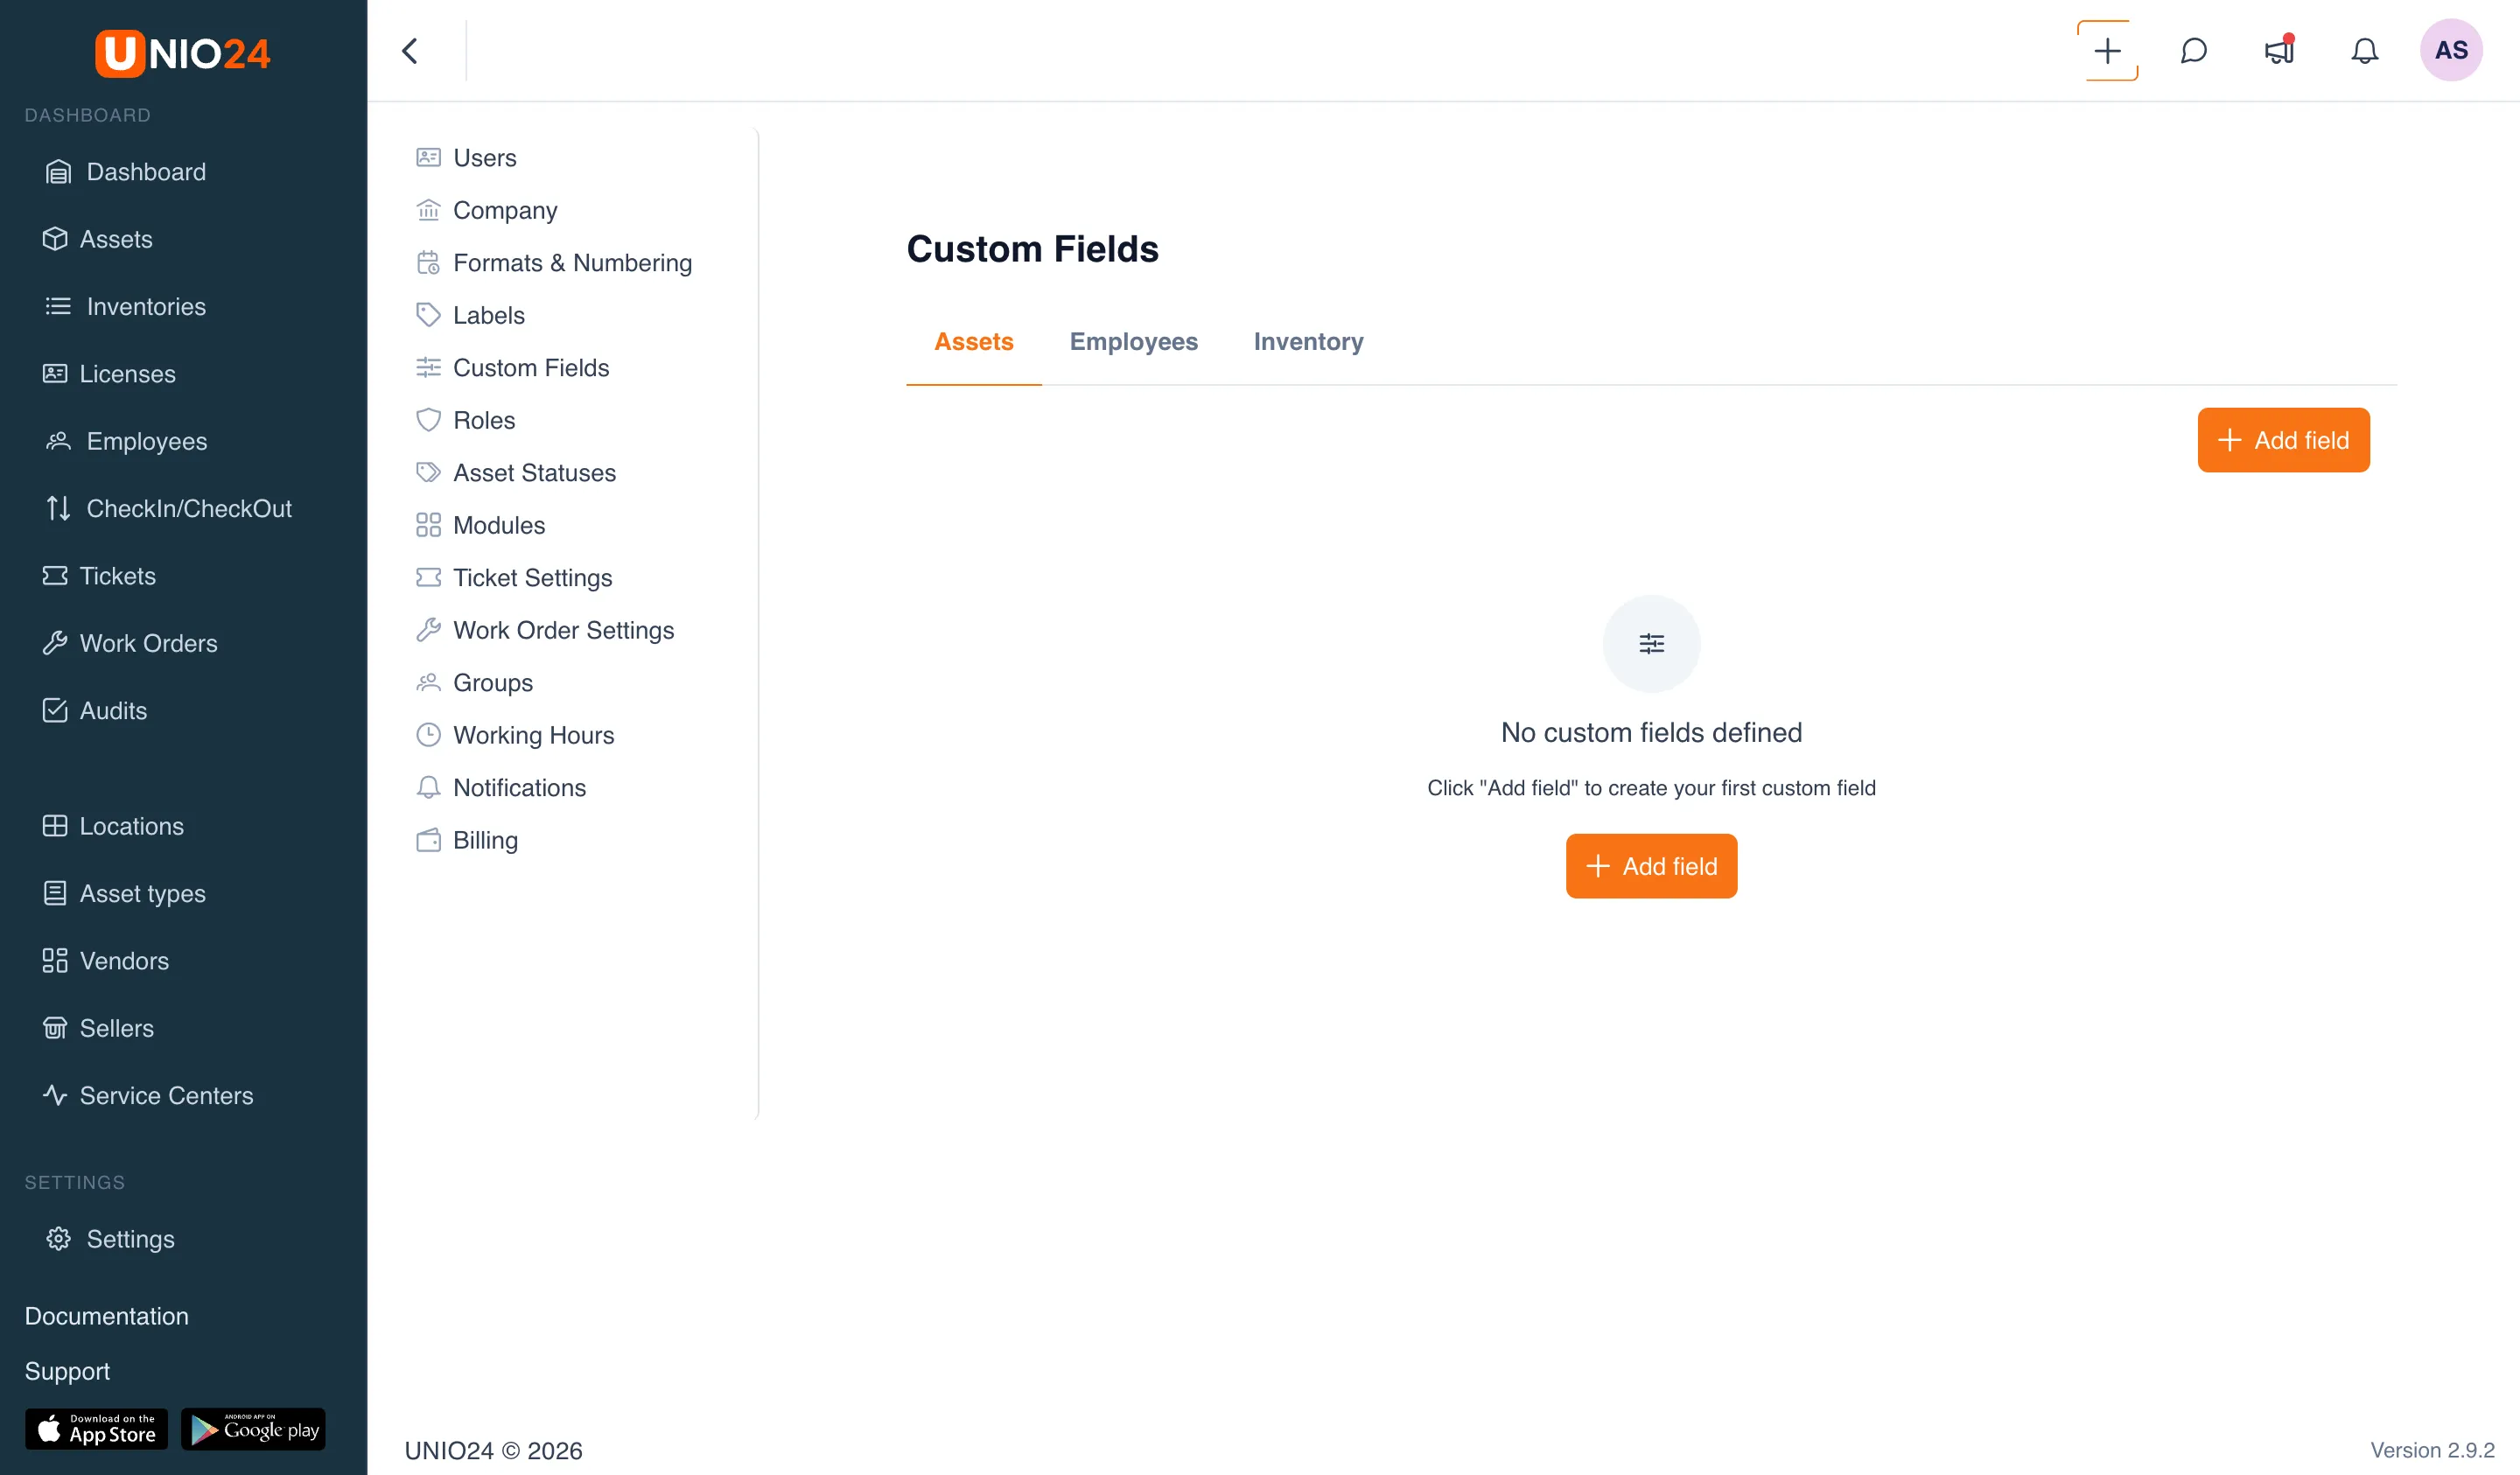
How to open the custom fields page
Section titled “How to open the custom fields page”- In the main menu on the left, open the Settings section.
- Select the Custom Fields page.
- At the top of the page there are tabs by entity type: Assets, Employees, Inventory. Open the tab of the entity you are creating a field for.
If there are no fields on the tab yet, the text No custom fields defined and an Add field button are shown in the center.
Adding a field
Section titled “Adding a field”- Open the tab you need (see above).
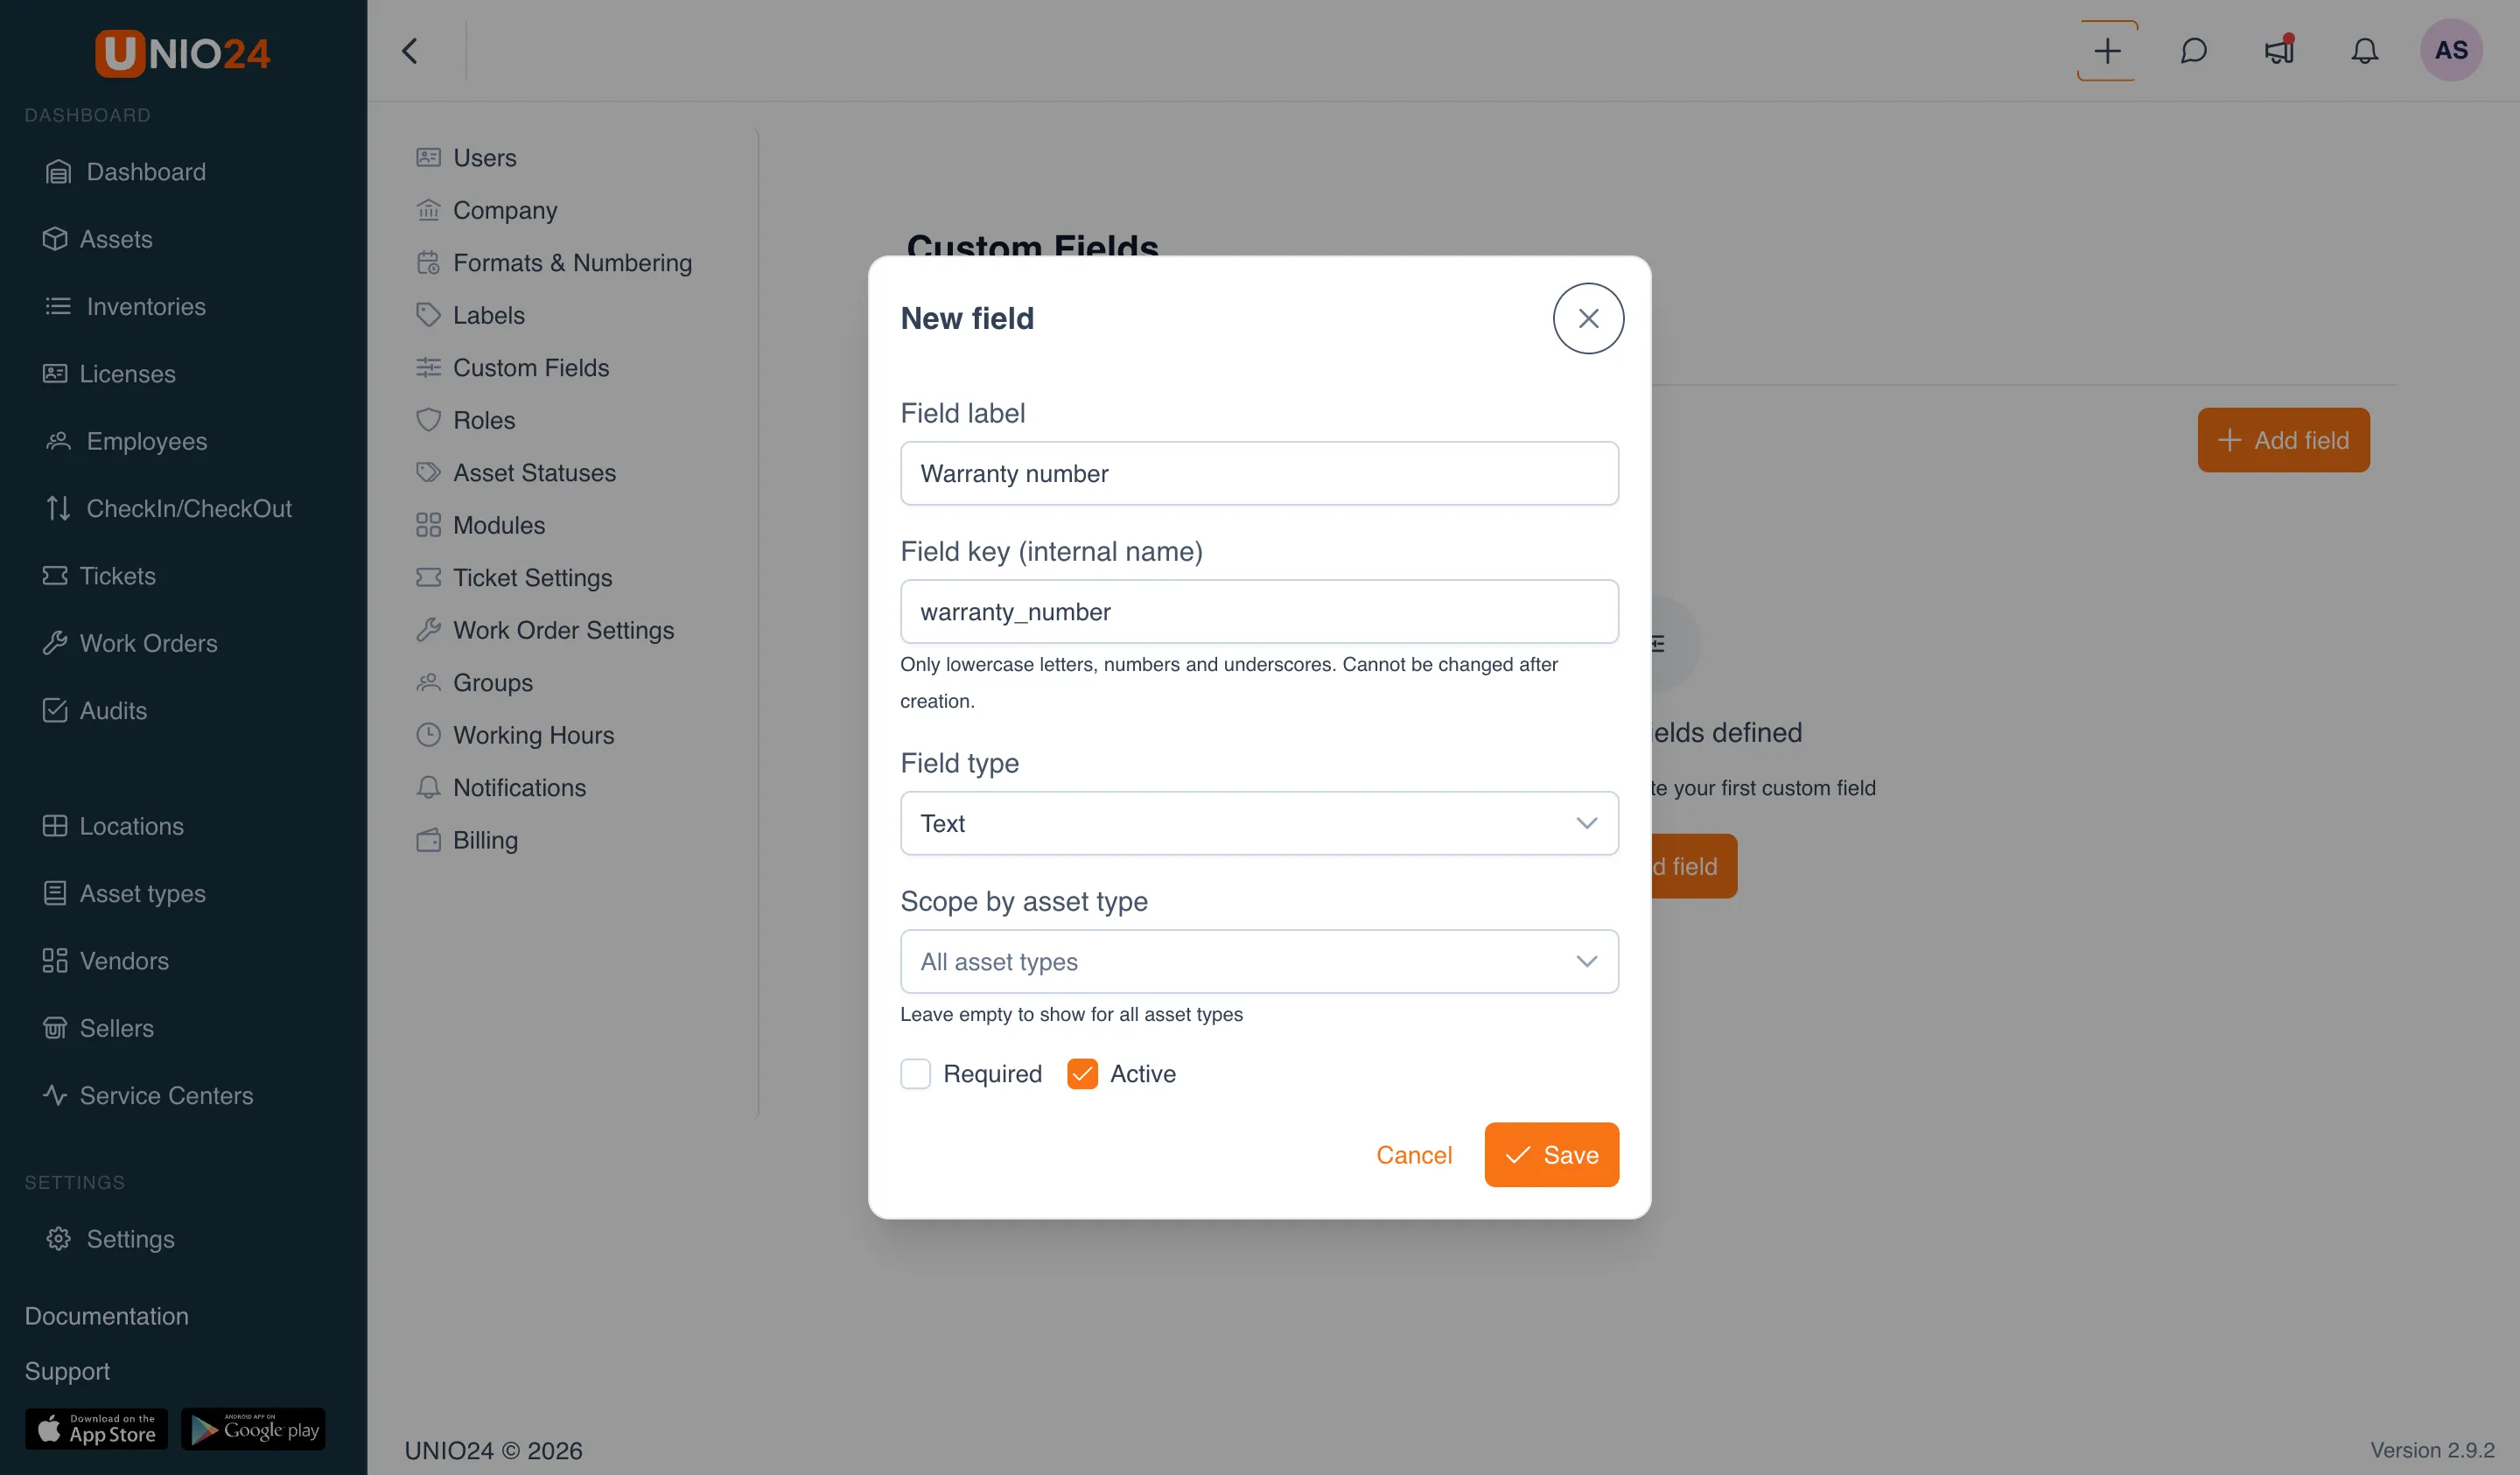
- Click Add field in the top right corner of the list. The New field dialog opens.
- Fill in the dialog fields:
- Field label — the name that will be visible in forms and on cards.
- Field key (internal name) — the identifier for storing values. The hint below the field: “Only lowercase letters, digits, and underscore. Cannot be changed after creation.” The field has a placeholder example
e.g. warranty_number. - Field type — choose one of six types (see Choosing a field type). The type also cannot be changed after creation.
- Required — check this so that a record cannot be saved without filling in this field.
- Active — checked by default; clear it to hide the field without deleting it.
- Click Save.
Choosing a field type
Section titled “Choosing a field type”The following are available in the Field type dropdown:
- Text
- Number
- Date
- Date and time
- List
- Yes / No
For the Text, Number, Date, Date and time, and Yes / No types, no additional configuration is needed — fill in the rest of the dialog fields and save.
A “List” type field with options
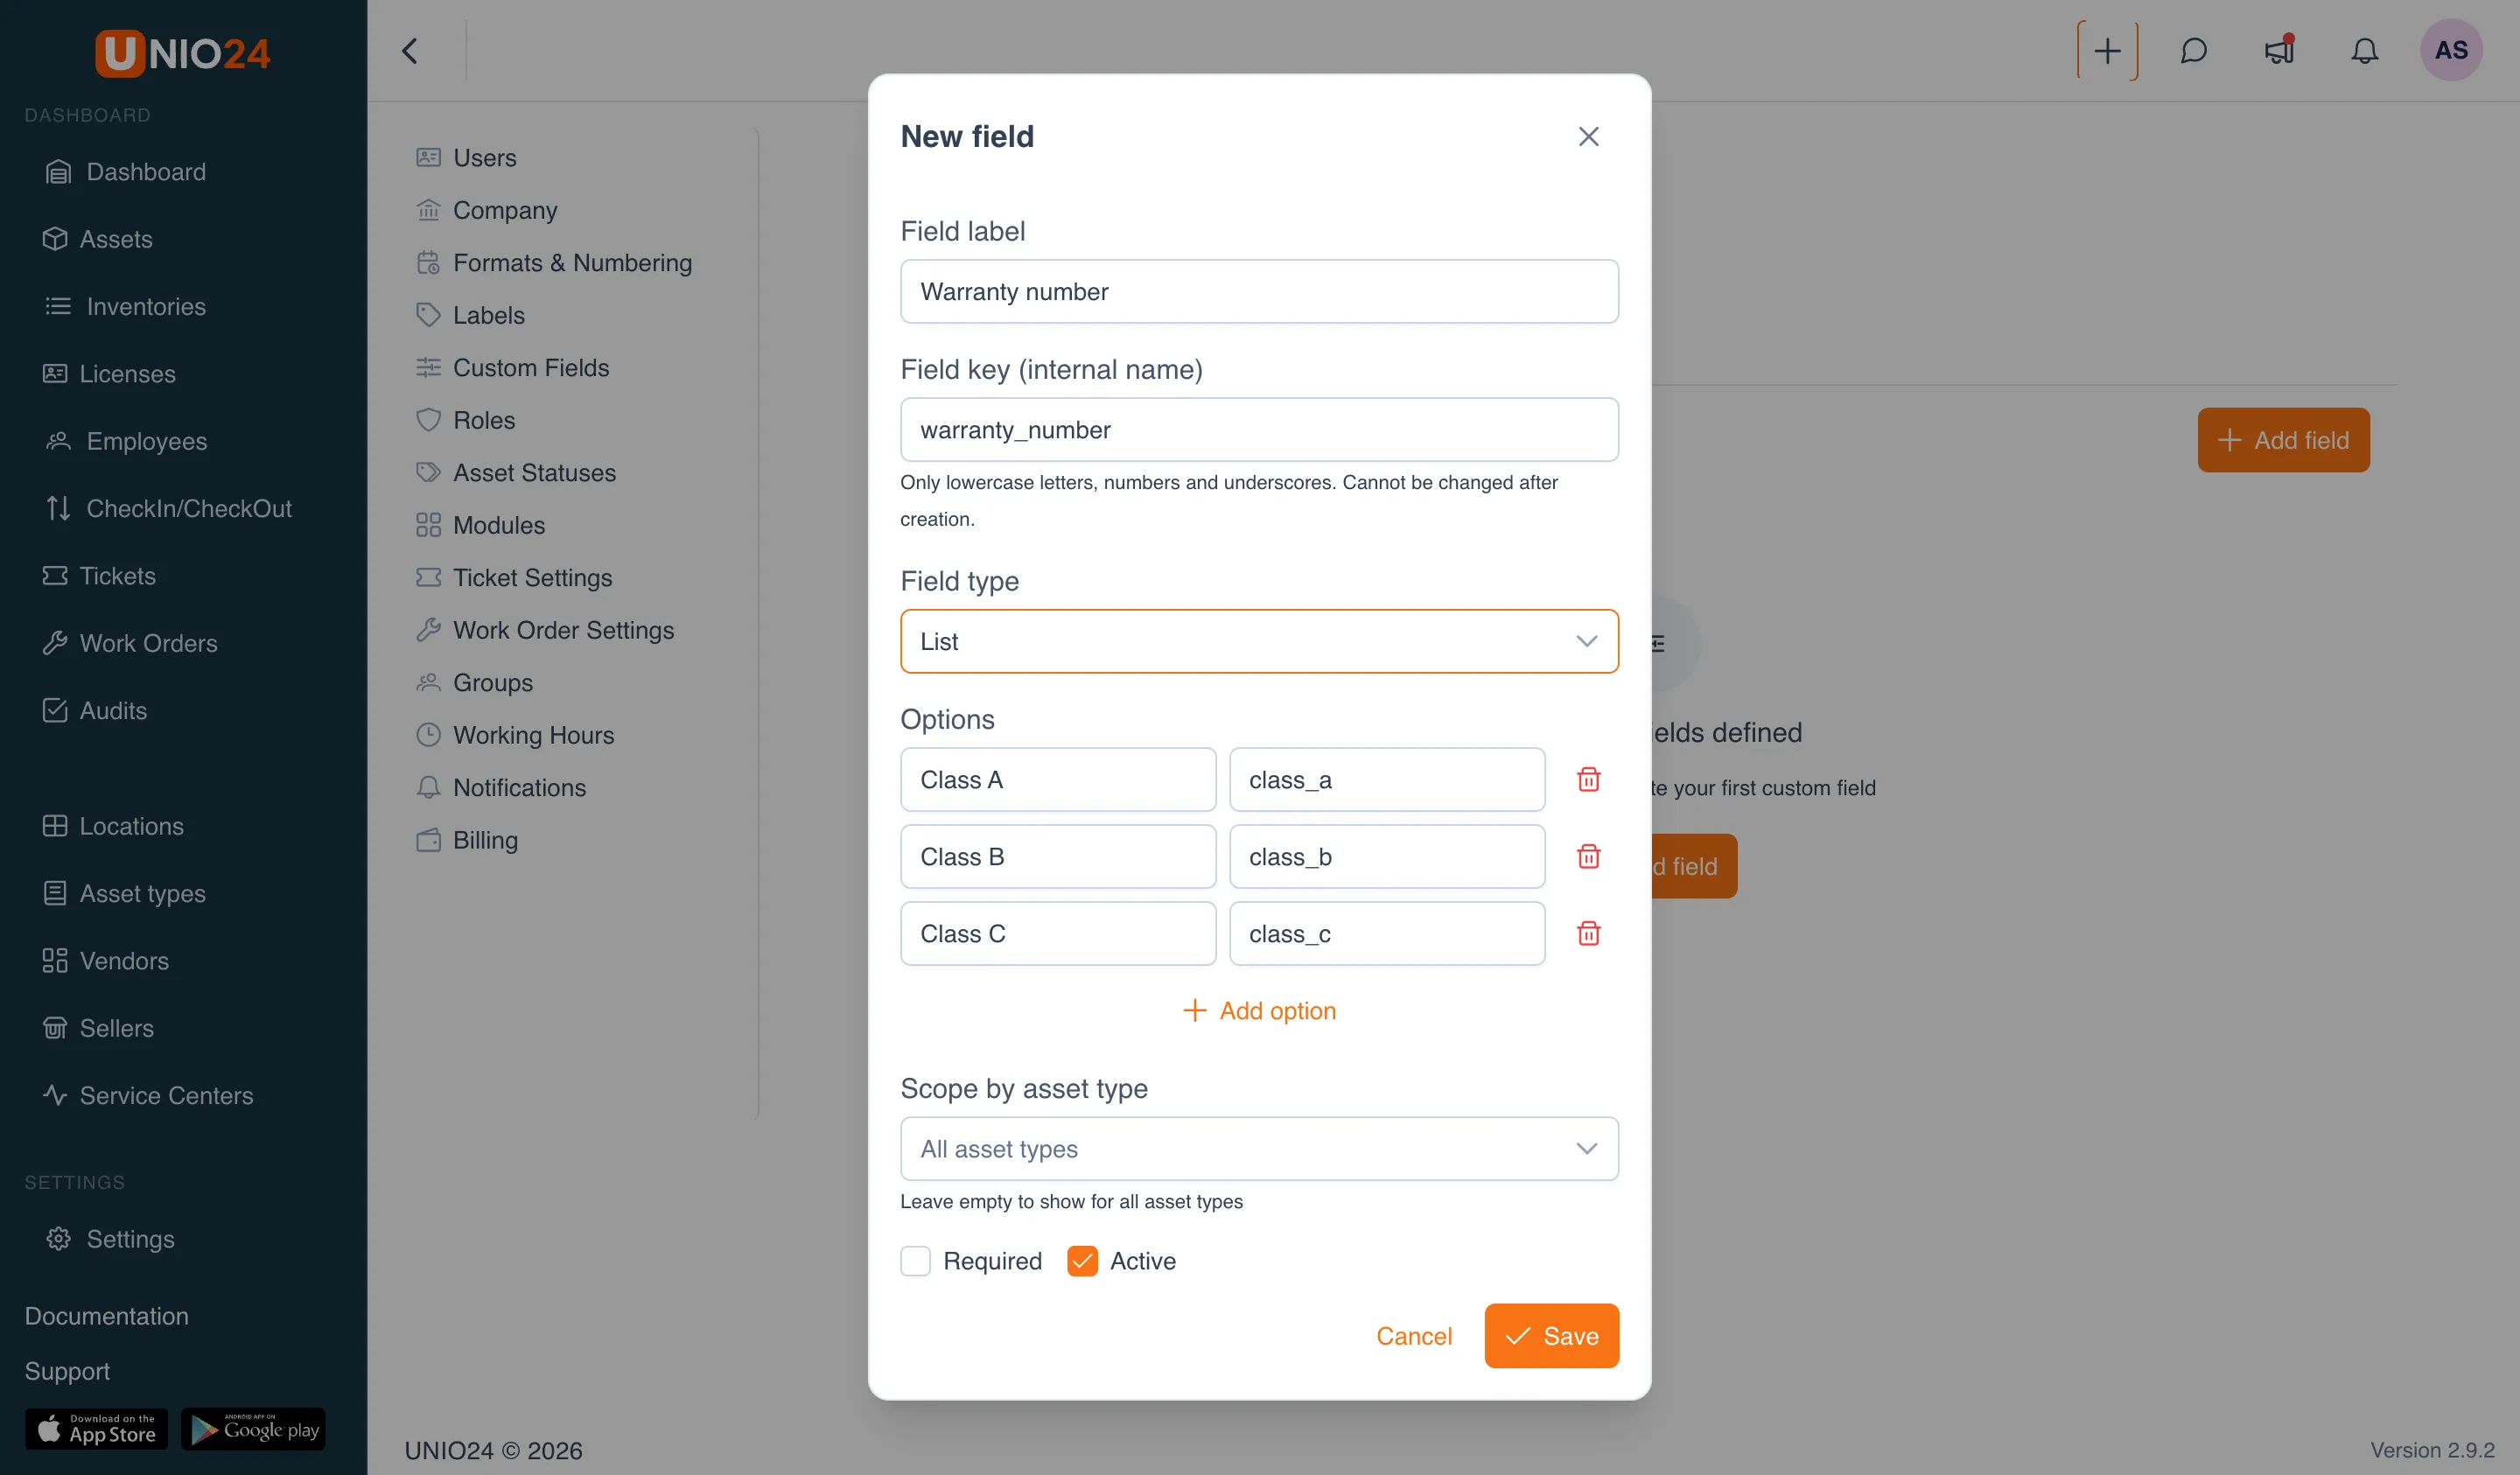
Section titled “A “List” type field with options”If you select List in the Field type field, the Options section appears in the dialog.
- Click Add option. A row with two fields appears: Name and Value.
- In the Name field, enter the text users will see in the dropdown.
- Value (stored in the system) is filled in automatically from Name. To set your own value, edit the Value field — after a manual edit, it stops updating along with the name.
- Repeat for the remaining options by clicking Add option.
- To delete an option, click the trash icon in its row.
- Fill in the rest of the dialog fields and click Save.
Options without a filled-in Name and Value are not saved.
Scoping by asset type
Section titled “Scoping by asset type”For the Assets and Inventory tabs, the dialog has a Scope by asset type setting.
- In the field creation dialog, find the Scope by asset type field.
- Select the asset type the field applies to. To apply the field to all types, leave the field empty — it shows the All asset types option, and below it the hint “Leave empty to show for all types.” The selected type can be cleared with the cross in the field.
- Save.
The Employees tab does not have this setting: employee fields always apply to all employees.
Changing the field order
Section titled “Changing the field order”Fields on a tab are shown in the order they appear in the form.
- Open the tab you need.
- Each field has Move up and Move down arrows on the right. Click them to move the field.
For Assets and Inventory, the order changes within a single scope: fields with the same asset type are reordered among themselves, so an arrow may be unavailable at a group boundary.
Editing a field
Section titled “Editing a field”- Open the tab with the field you need.
- Click the pencil icon in the field’s row. The Edit field dialog opens.
- Change the Field label, the Required and Active checkboxes, and, for the List type, the Options. The Field key (internal name) and Field type fields are unavailable for changes.
- Click Save.
Disabling a field without deleting
Section titled “Disabling a field without deleting”To remove a field from forms but keep the data already entered:
- Open the field for editing (see above).
- Clear the Active checkbox.
- Click Save.
In the list, such a field gets an Inactive label. To bring the field back, check Active again.
Deleting a field
Section titled “Deleting a field”- Open the tab with the field you need.
- Click the trash icon in the field’s row.
- In the confirmation window, click Yes.
Deleting removes the field’s definition. If the field only needs to be temporarily removed from forms, instead of deleting, clear the Active checkbox (see Disabling a field without deleting).