

Creating and handling work orders
This page collects common tasks for working with work orders. For how statuses, the timer, and SLA work, see How work orders work. For a description of all fields, see the Work orders reference.
Work orders are an additional module. If the section is not in the menu, first enable it.
Create a work order
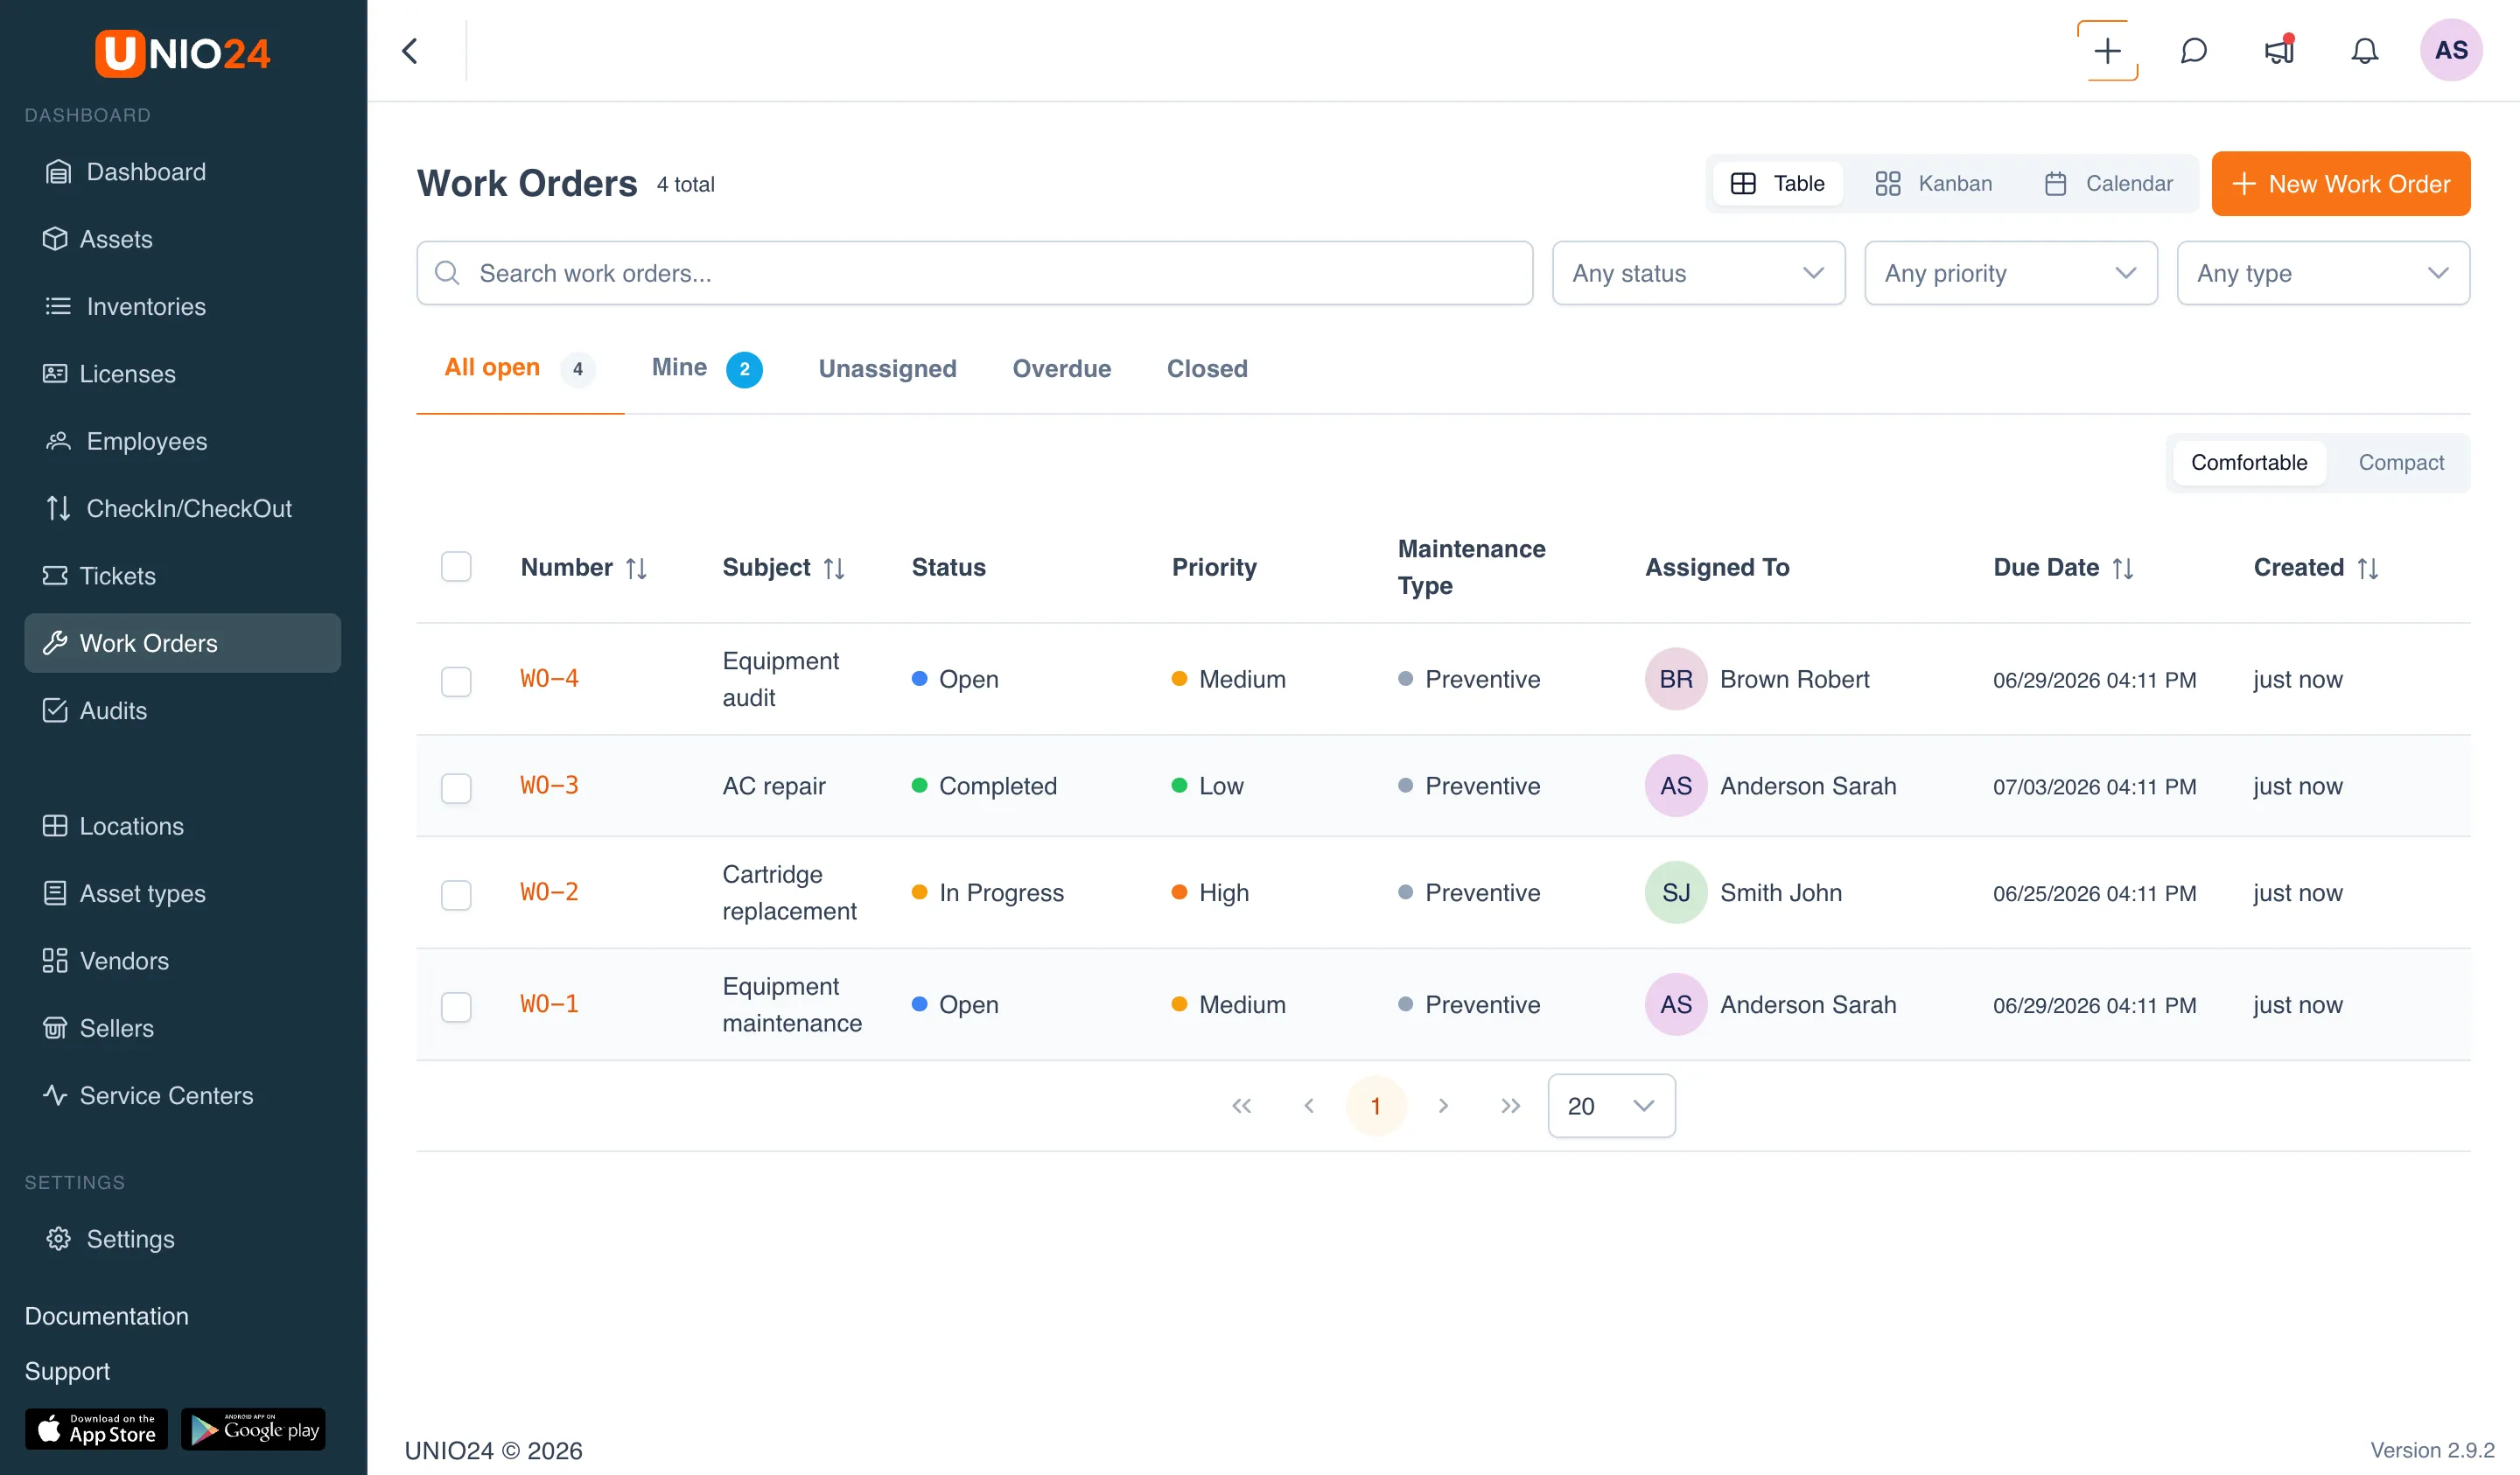
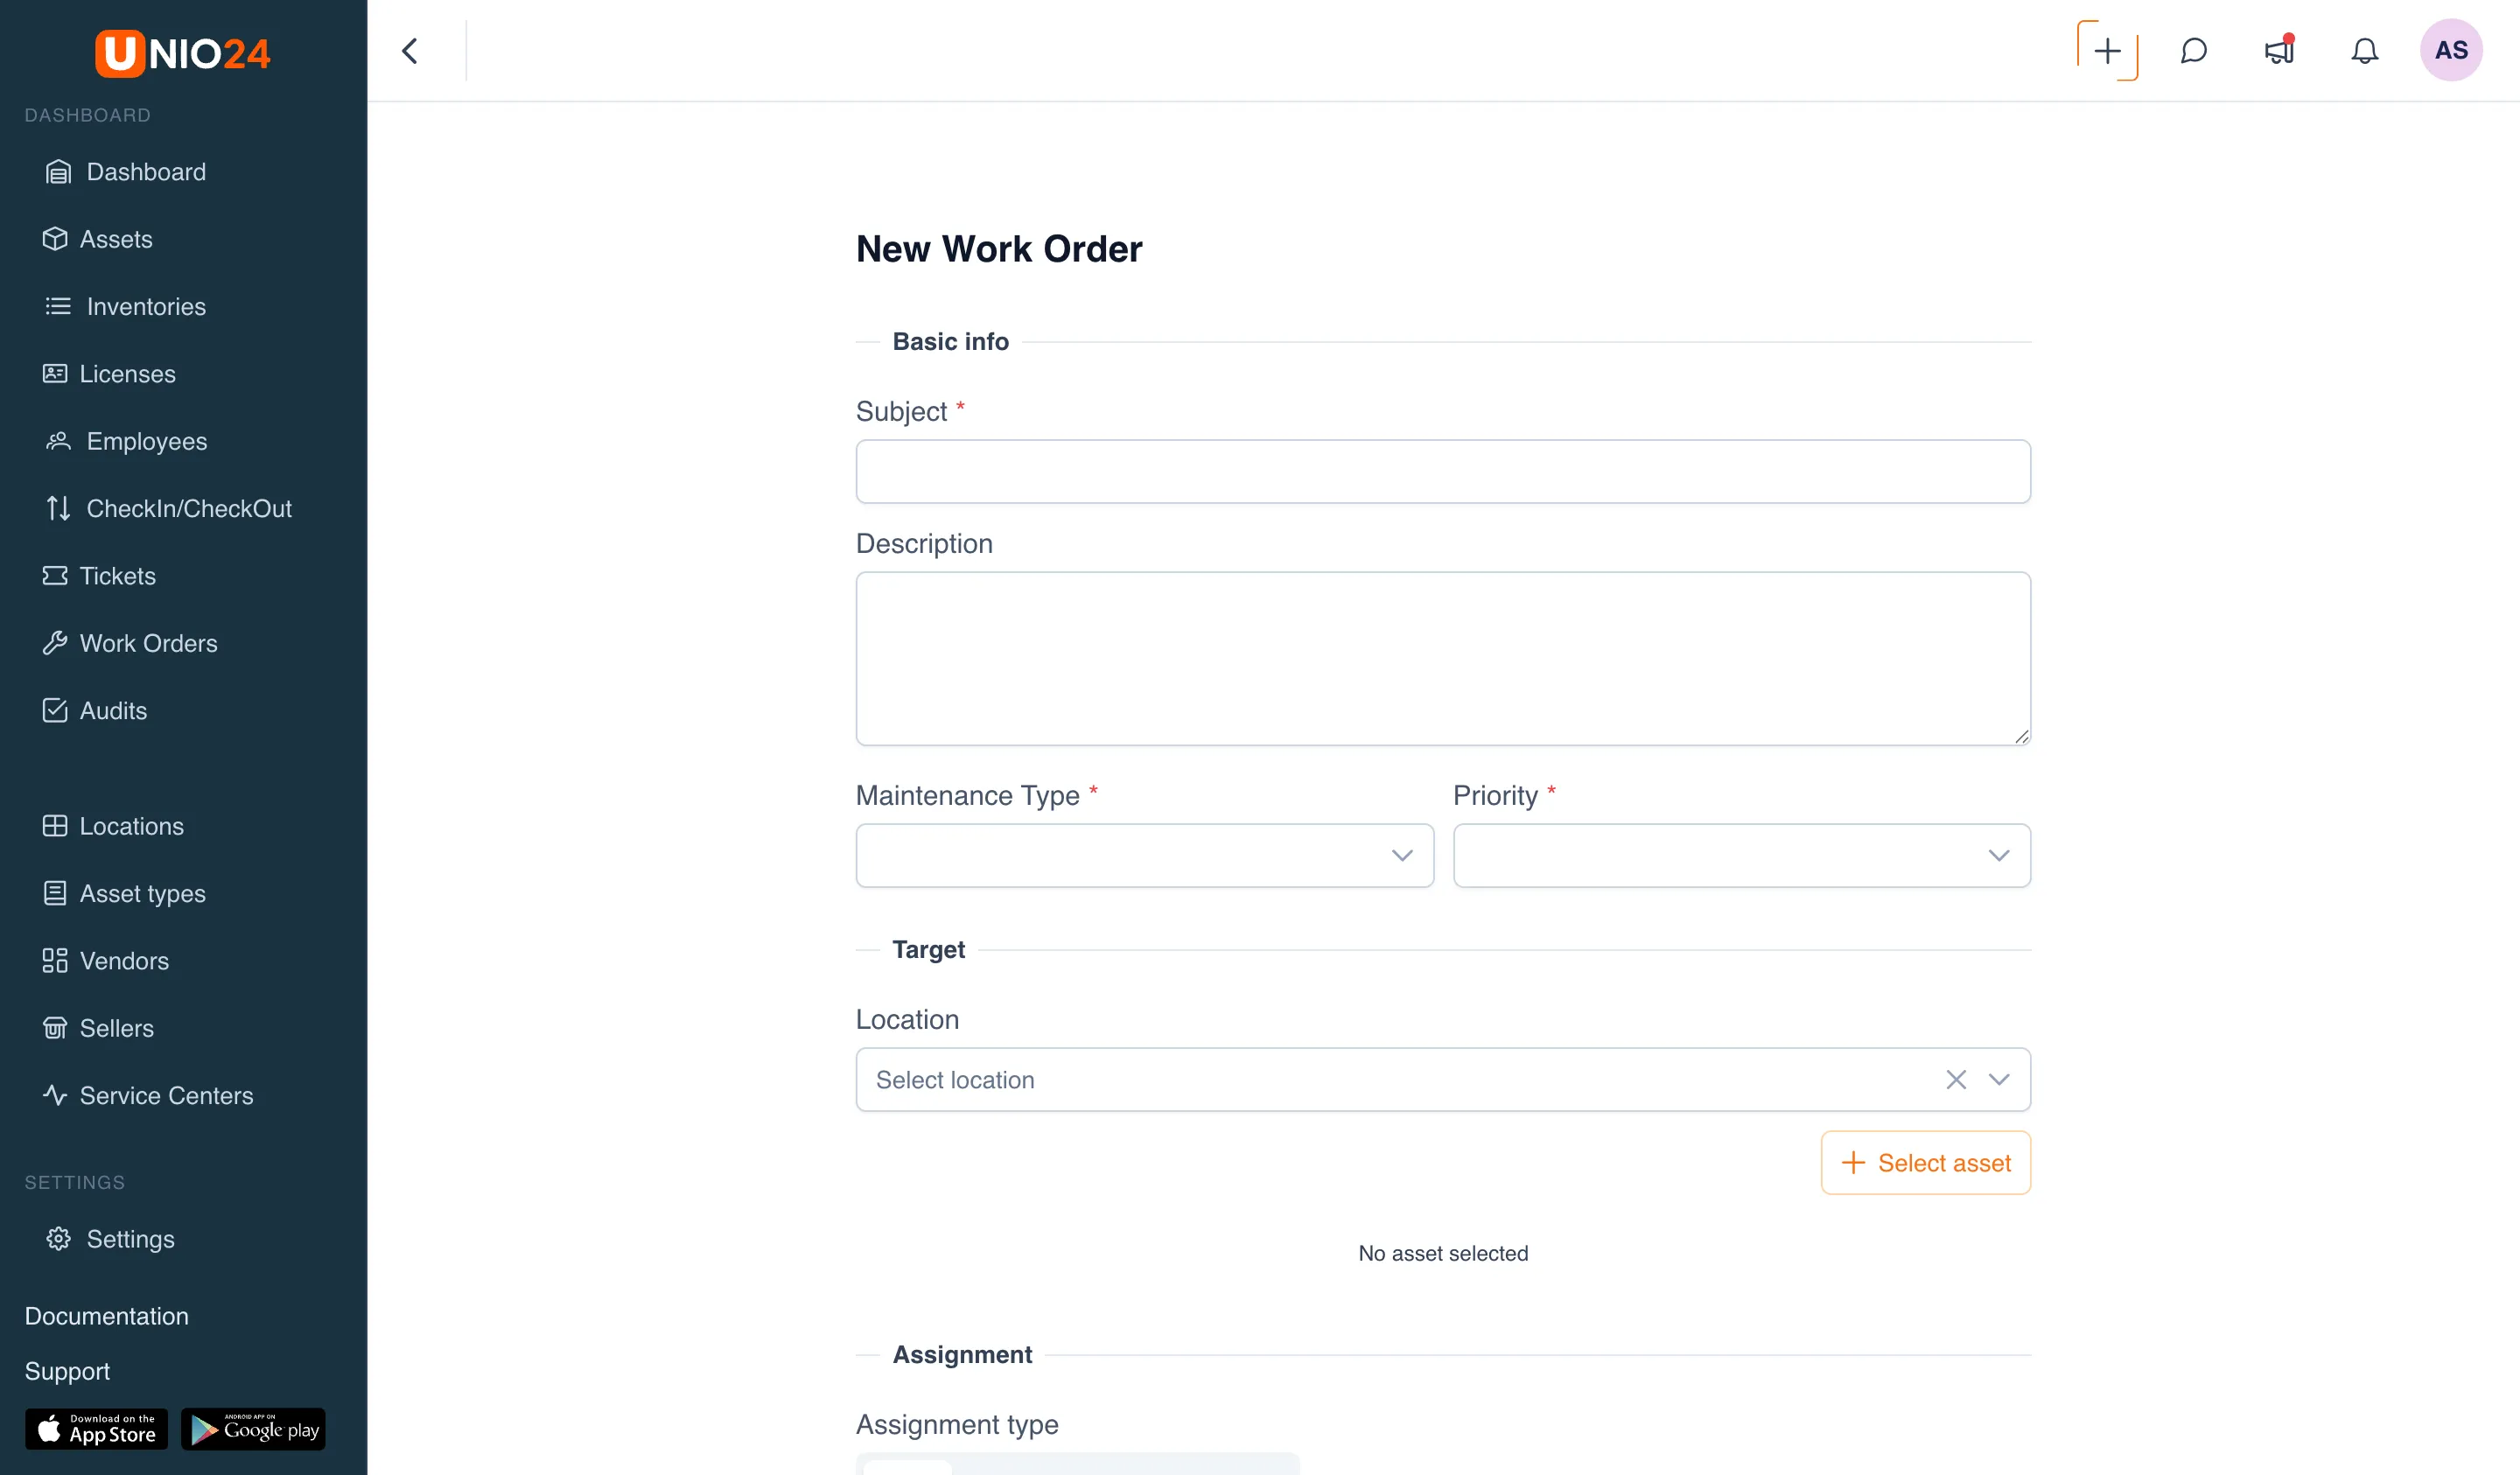
Section titled “Create a work order”- In the main menu on the left, open the Work Orders section.
- Click New Work Order.
- In the Core block, fill in the Subject — this is a required field.
- If needed, fill in the Description.
- Select a Maintenance Type — this is a required field.
- Select a Priority — this is a required field.
- In the Target block, select a Location if the work is tied to a place.
- To link an asset, click Select asset, find the asset you need, and confirm the selection. A linked asset can be removed with the cross button.
- In the Assign block, choose the assignment type — see Assign a work order below.
- In the Planning block, specify a Due Date, Estimated Hours, Planned Start, and Planned End if needed.
- Click Save.
Assign a work order
Section titled “Assign a work order”A work order can be assigned at creation (in the Assign block) or later on the work order page.
At creation
Section titled “At creation”In the Assign block, in the Assignment type field, choose one of the options:
- User — select an assignee in the Assignee field.
- Group — select a Group. A specific assignee is not set, and any member of the group can take the work order into work.
- Group and user — select a Group, then an Assignee. By default the assignee list shows only members of the selected group; to pick any user, turn on All users.
On the work order page
Section titled “On the work order page”- Open the work order.
- Click the three-dot button in the top right and choose Assign To.
- Select an Assignee and/or a Group.
- Click Save.
Switch the view
Section titled “Switch the view”At the top of the Work Orders page, on the right, there is a view switcher:
- Table — a list of work orders. Above the table there are view tabs: All open, Mine, Unassigned, Overdue, and Closed.
- Kanban — a board with columns by status. A card can be dragged into another column to change its status.
- Calendar — work orders by due date.
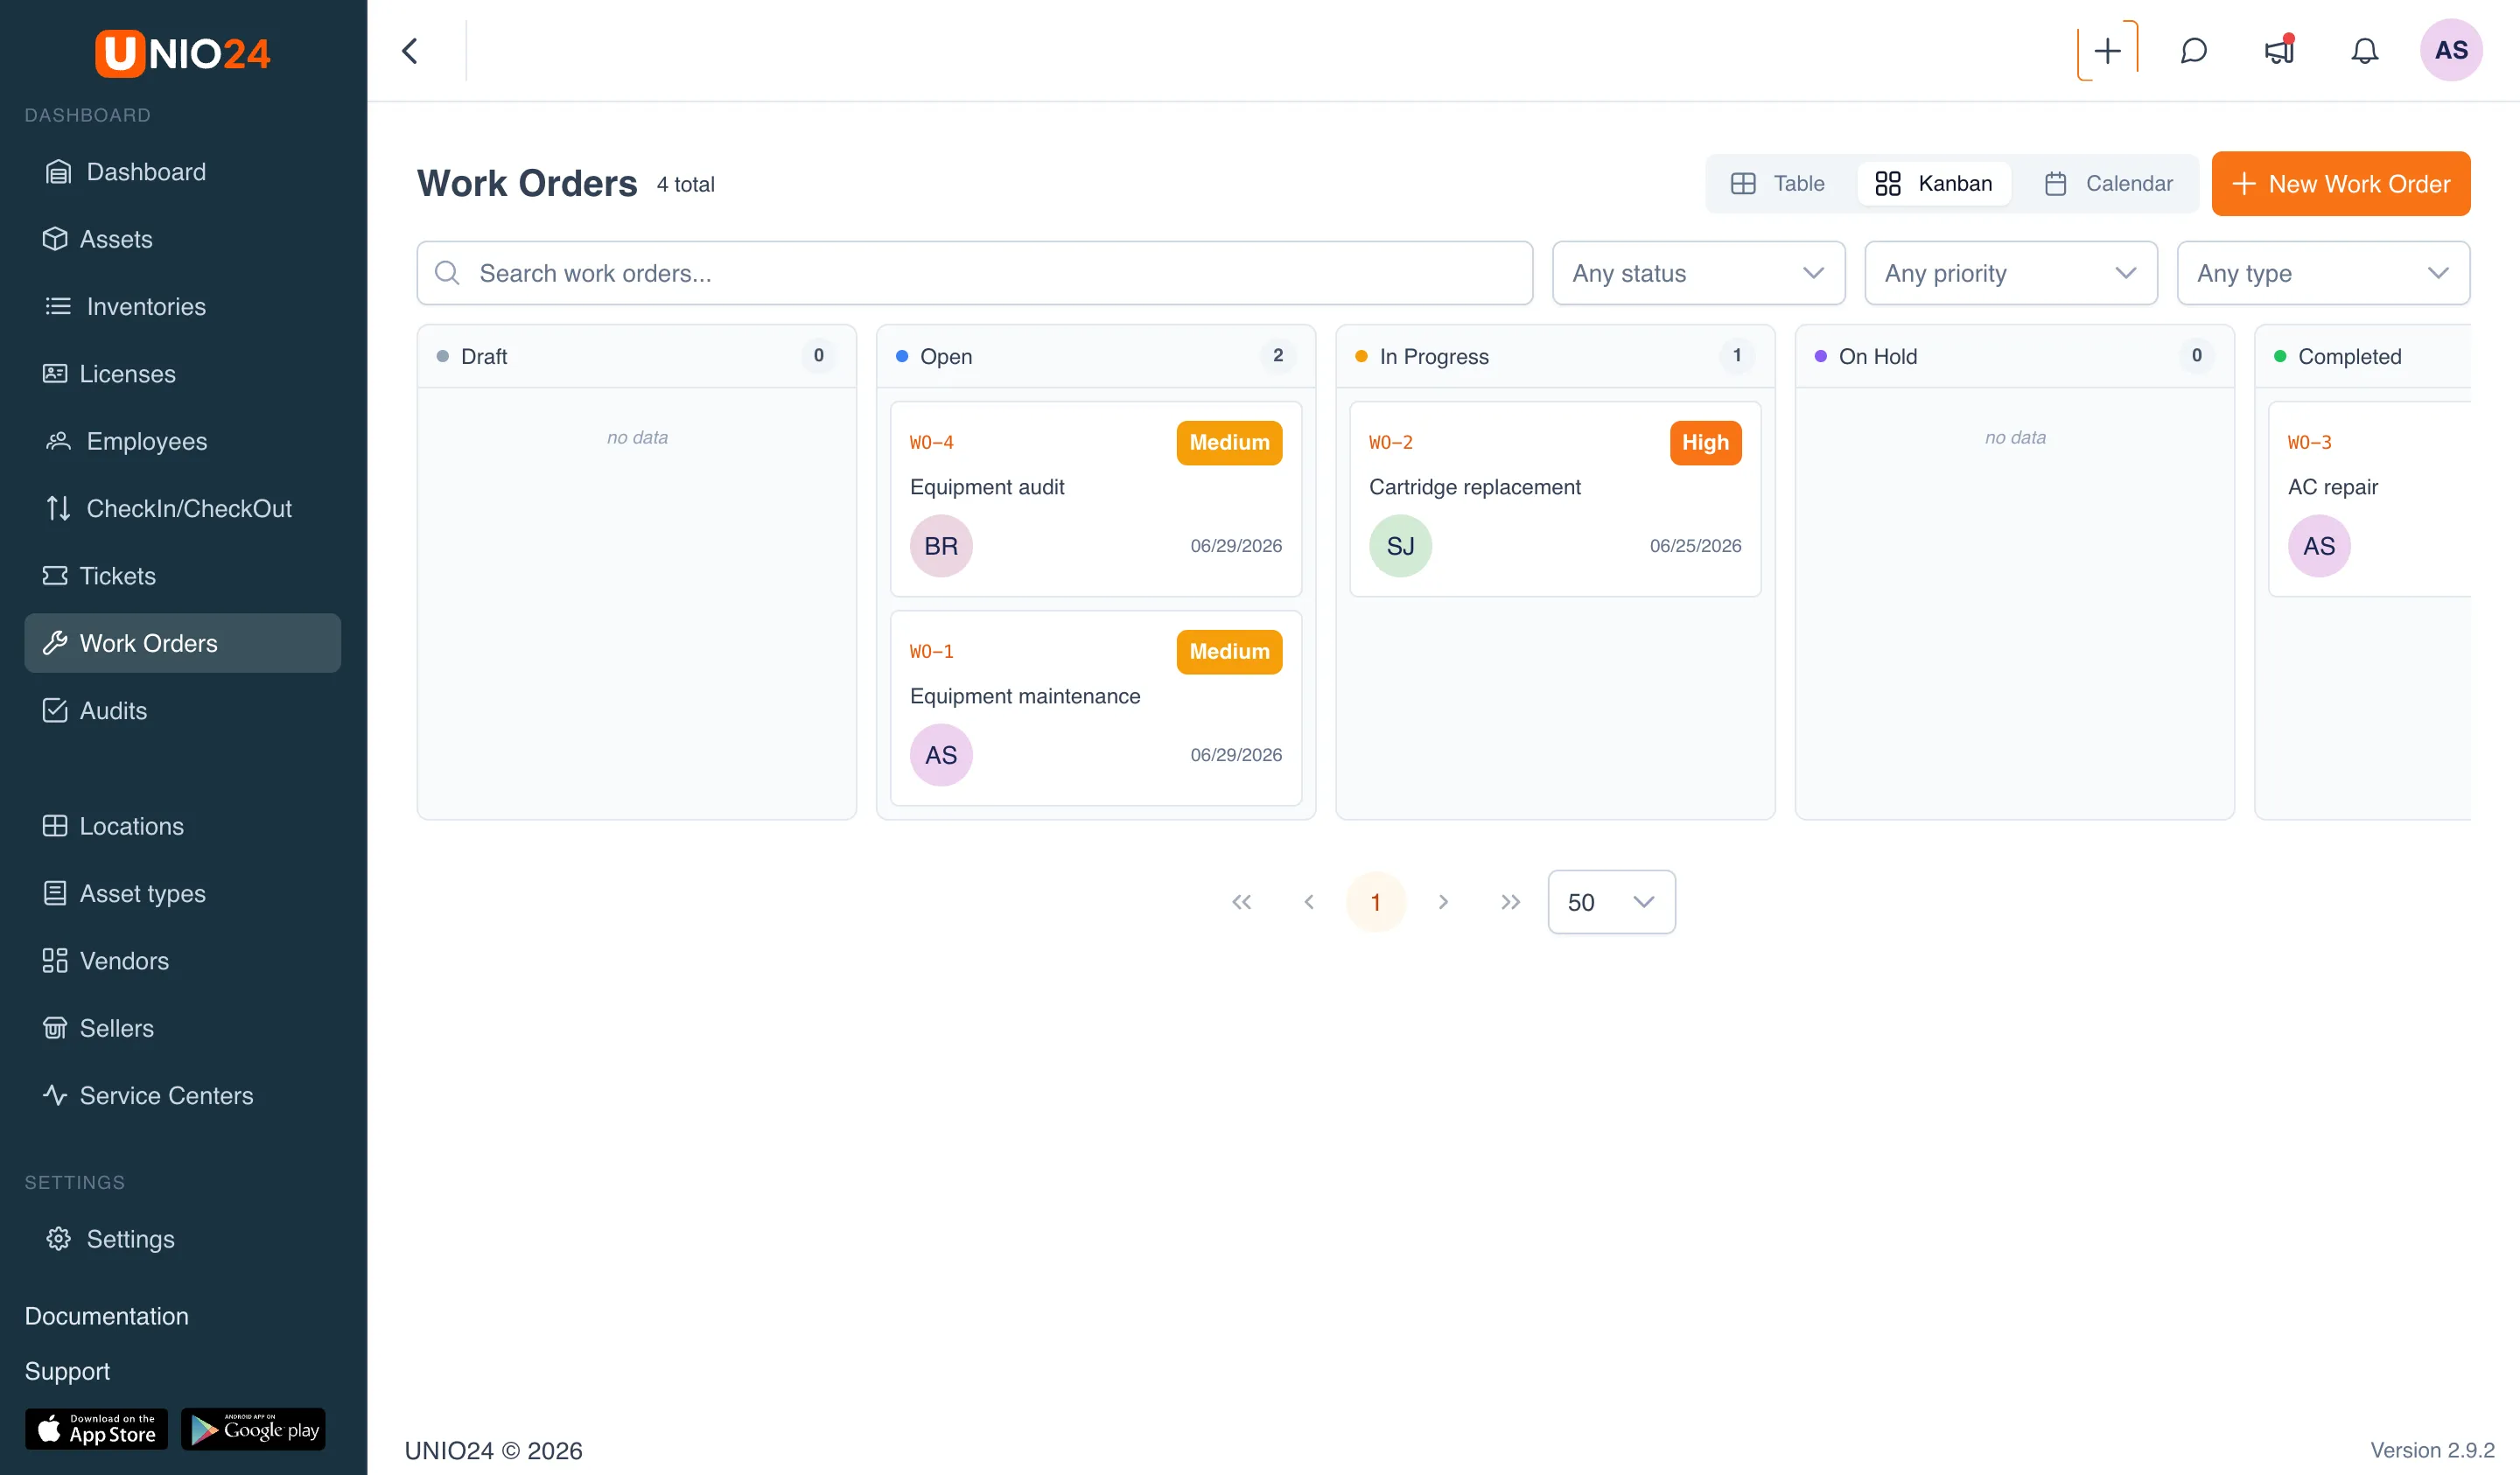
Below the switcher there is a search and the filters Any status, Any priority, and Any type for filtering work orders.
Start and stop the work timer
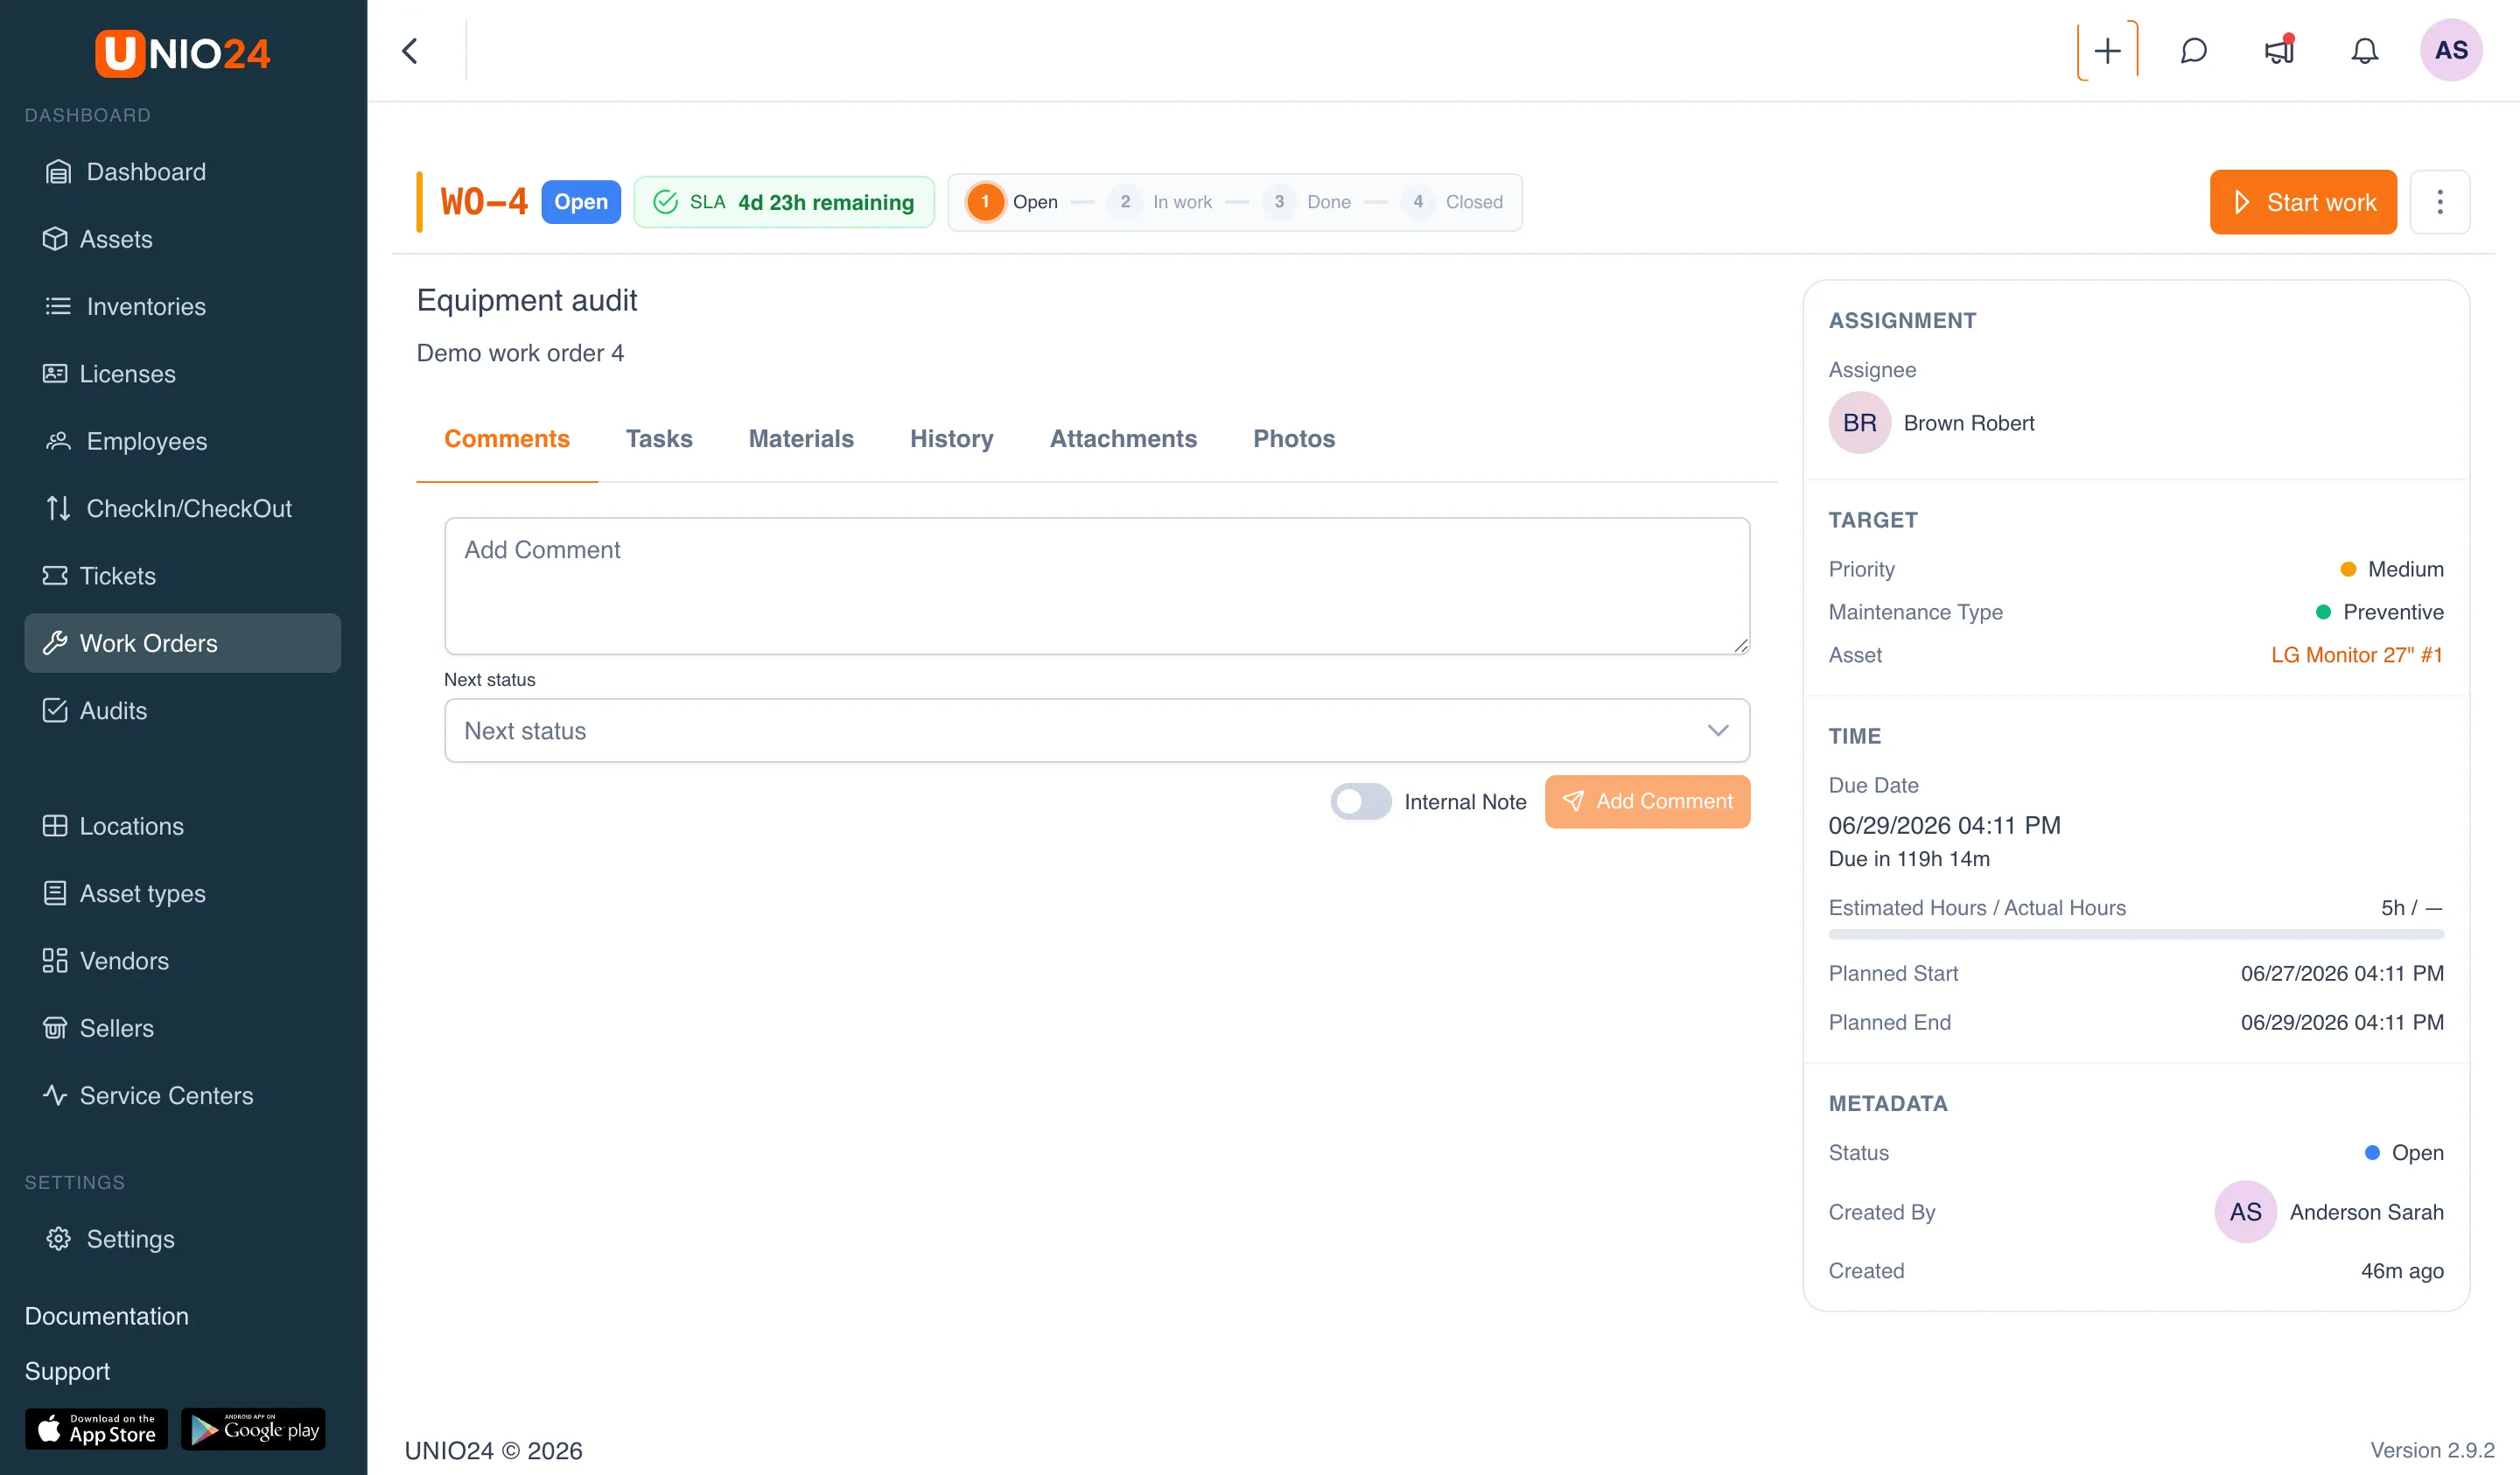
Section titled “Start and stop the work timer”The timer tracks the actual time and is controlled by the quick-action buttons in the top right of the work order page. The available buttons depend on the current status.
- Open a work order in the Open status and click Start work — the work order moves to the In progress status and the timer starts.
- To take a break, click Pause — the work order moves to the Paused status, the timer stops, but the accumulated time is kept.
- To continue, click Resume — the timer keeps counting from the same value.
- When the work is finished, click Complete — the work order moves to the Completed status.
- To close the work order for good, click Close. If an asset is linked to the work order, you can specify a New asset condition when closing.
The work order’s assignee or an administrator can start work.
Change the status manually
Section titled “Change the status manually”Besides the quick actions, the status can be changed manually.
- On the work order page, click the three-dot button in the top right and choose Change Status.
- In the New Status field, select a status. Only the statuses that the current one is allowed to transition to are available in the list.
- If the selected status requires a Reason, select one.
- Click Save.
Track tasks
Section titled “Track tasks”- On the work order page, open the Tasks tab.
- To add a task quickly, type its name in the field at the bottom of the list and press Enter.
- To add a task with a description, type the name and click Details — a dialog opens where you can fill in the Description, then click Save.
- To mark a task done, click the circle to its left; clicking again removes the mark.
- Above the list, the progress “Completed N of M” is shown.
- To edit a task, click the pencil; to delete it, click the trash icon.
Issue and return materials
Section titled “Issue and return materials”Materials are written off to a work order from consumables and are tied to stock balances at warehouse locations.
Issue a material
Section titled “Issue a material”- On the work order page, open the Materials tab.
- Click Issue material.
- In the Inventory field, select a consumable.
- In the Location field, select the location the material is written off from. Below the quantity field, how much is available at the location is shown.
- Specify a Quantity.
- Add a Note if needed.
- Click Save.
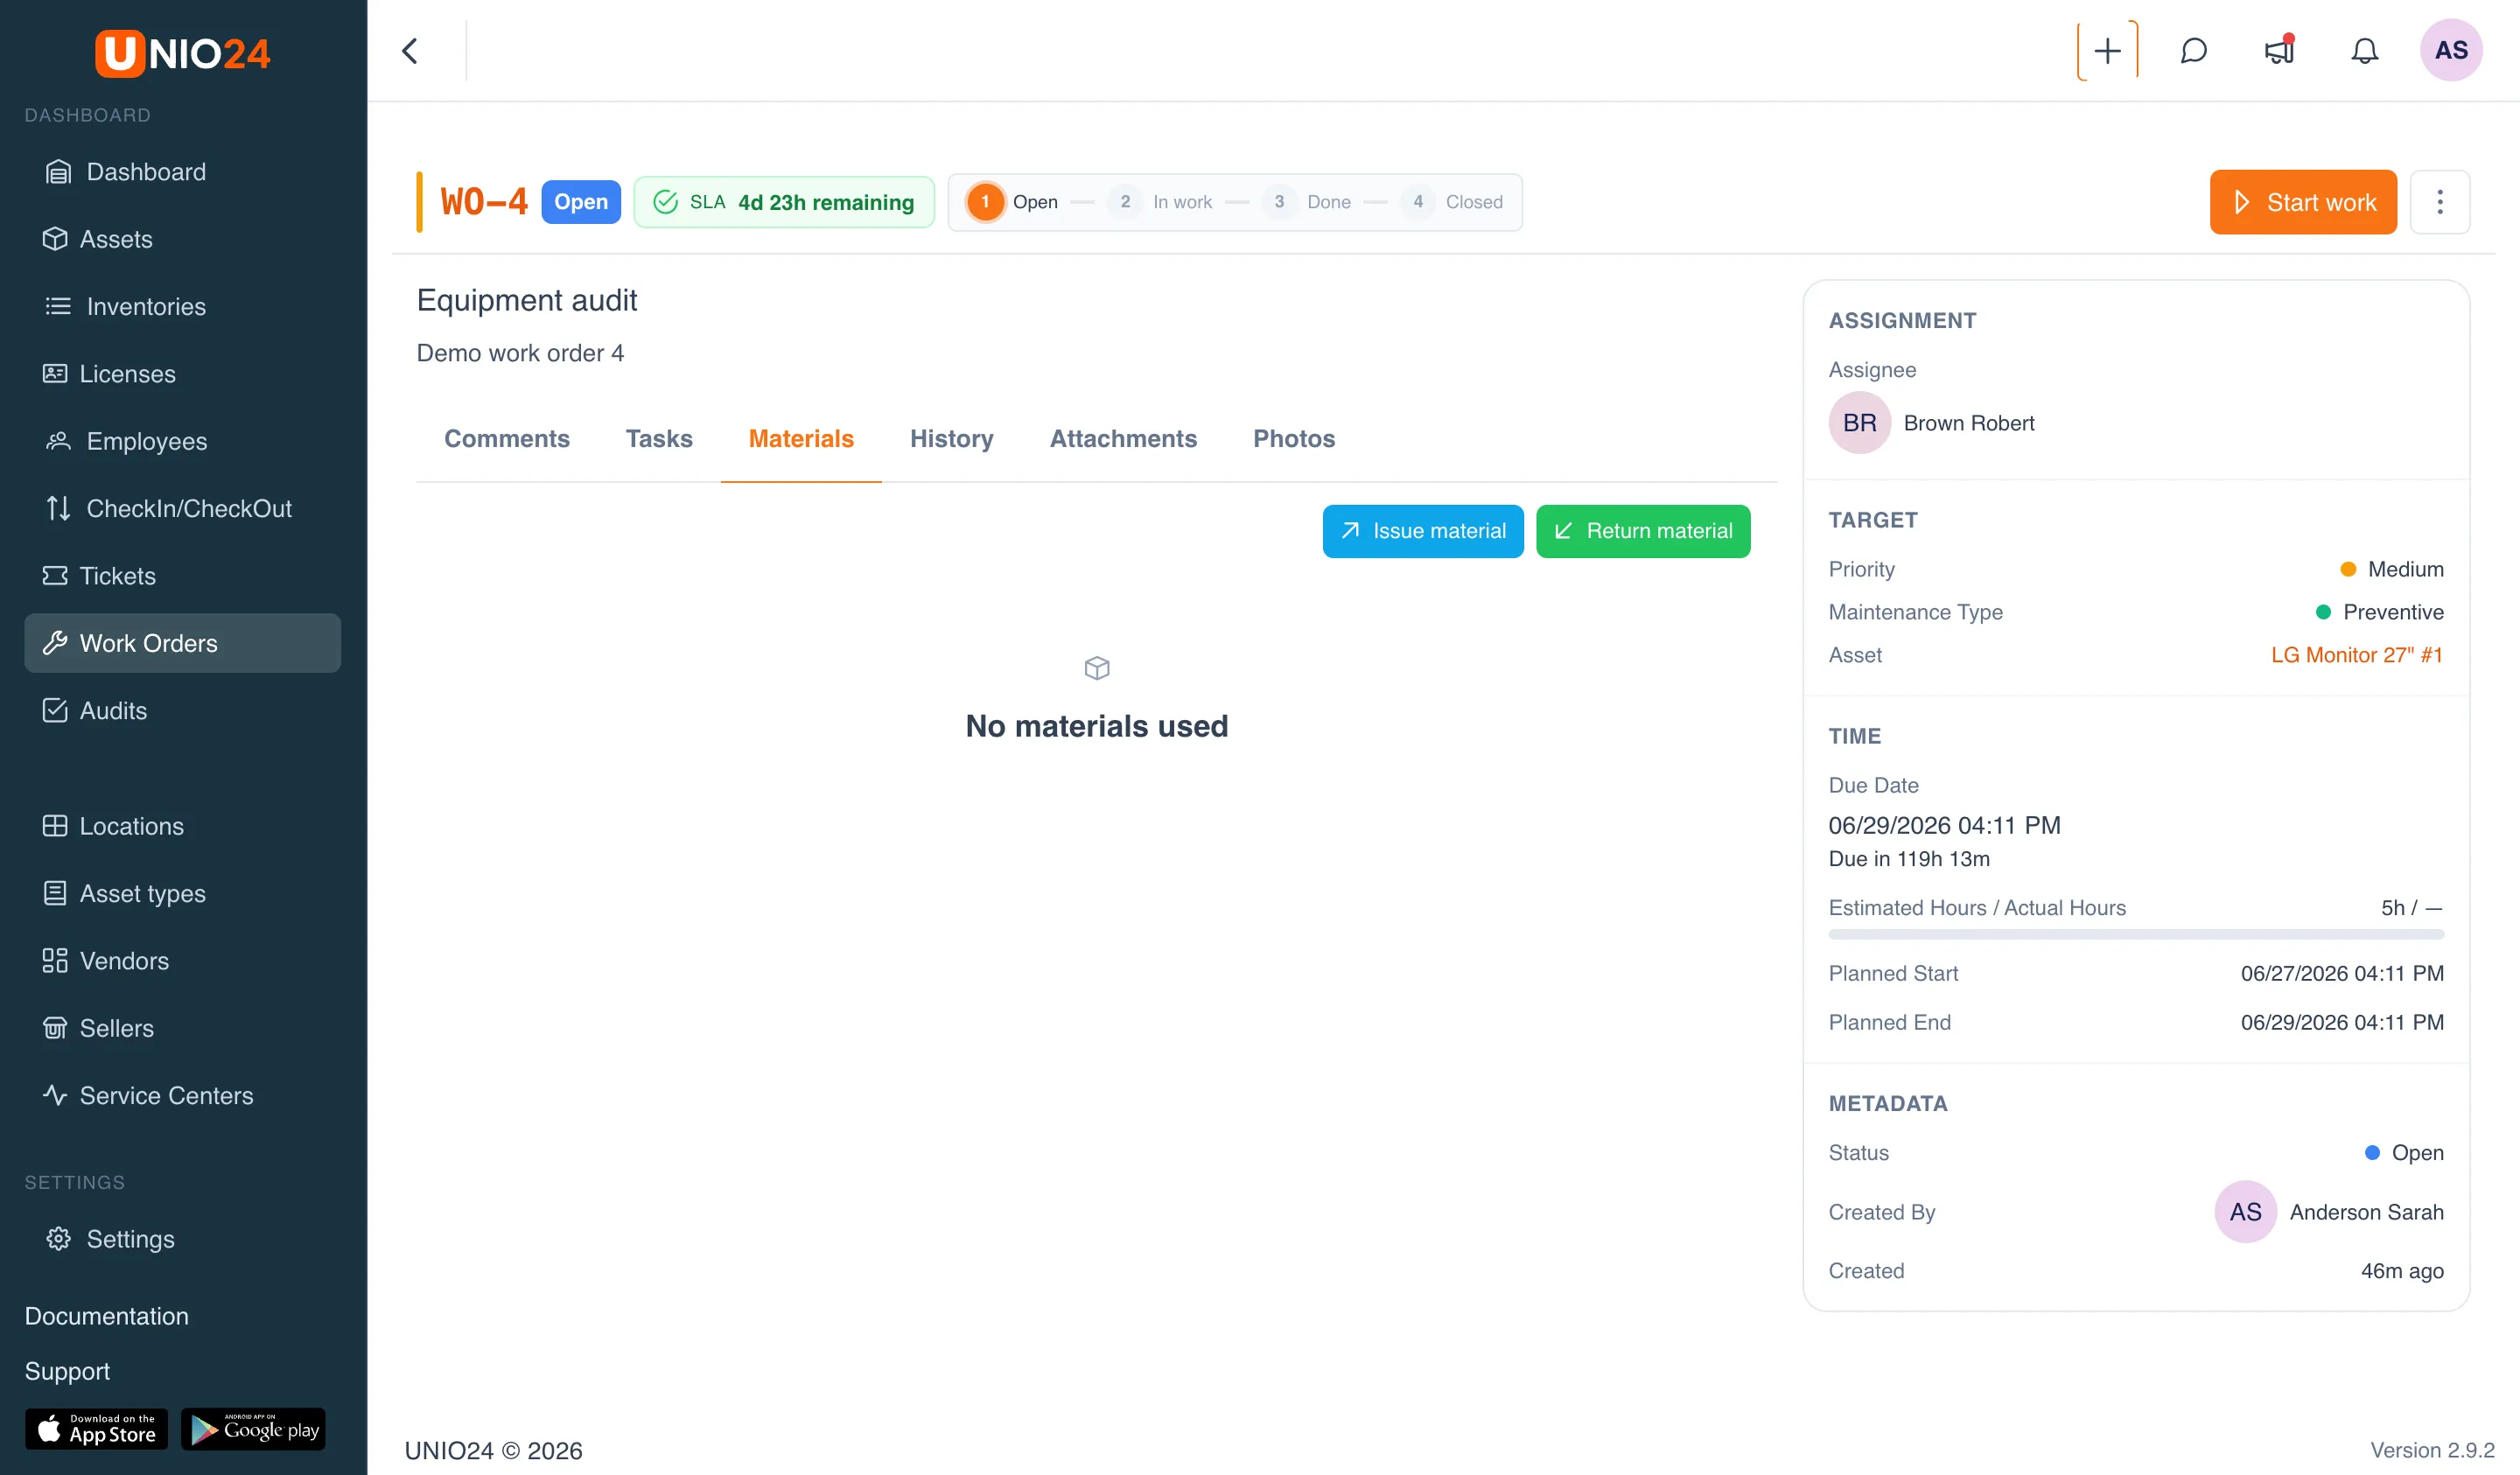
Return a material
Section titled “Return a material”- On the Materials tab, click Return material.
- In the Inventory field, select a material. Next to it, how much can be returned is shown.
- Select a Location and specify a Quantity within what can be returned.
- Add a Note if needed and click Save.
Below the list of transactions, a total for each material is shown: Issued, Returned, and Net.
Create a work order from a ticket
Section titled “Create a work order from a ticket”If the Tickets module is enabled, a work order can be created straight from a ticket. On the ticket page, on the Work Orders tab, click Create Work Order — the work order fields are filled in with data from the ticket, and a Source Ticket link appears on the work order.