

Managing consumables
This page collects the common tasks of working with consumables. For how stock levels and transactions work, see Consumables: how it works. For a description of all fields and columns, see the Consumables reference.
If there is no Inventories section in the menu, your role has no rights to it — contact an administrator (the section is not enabled separately, the way modules are).
Create an item
Section titled “Create an item”- In the main menu on the left, open the Inventories section.
- Click the New Inventory button in the top right corner.
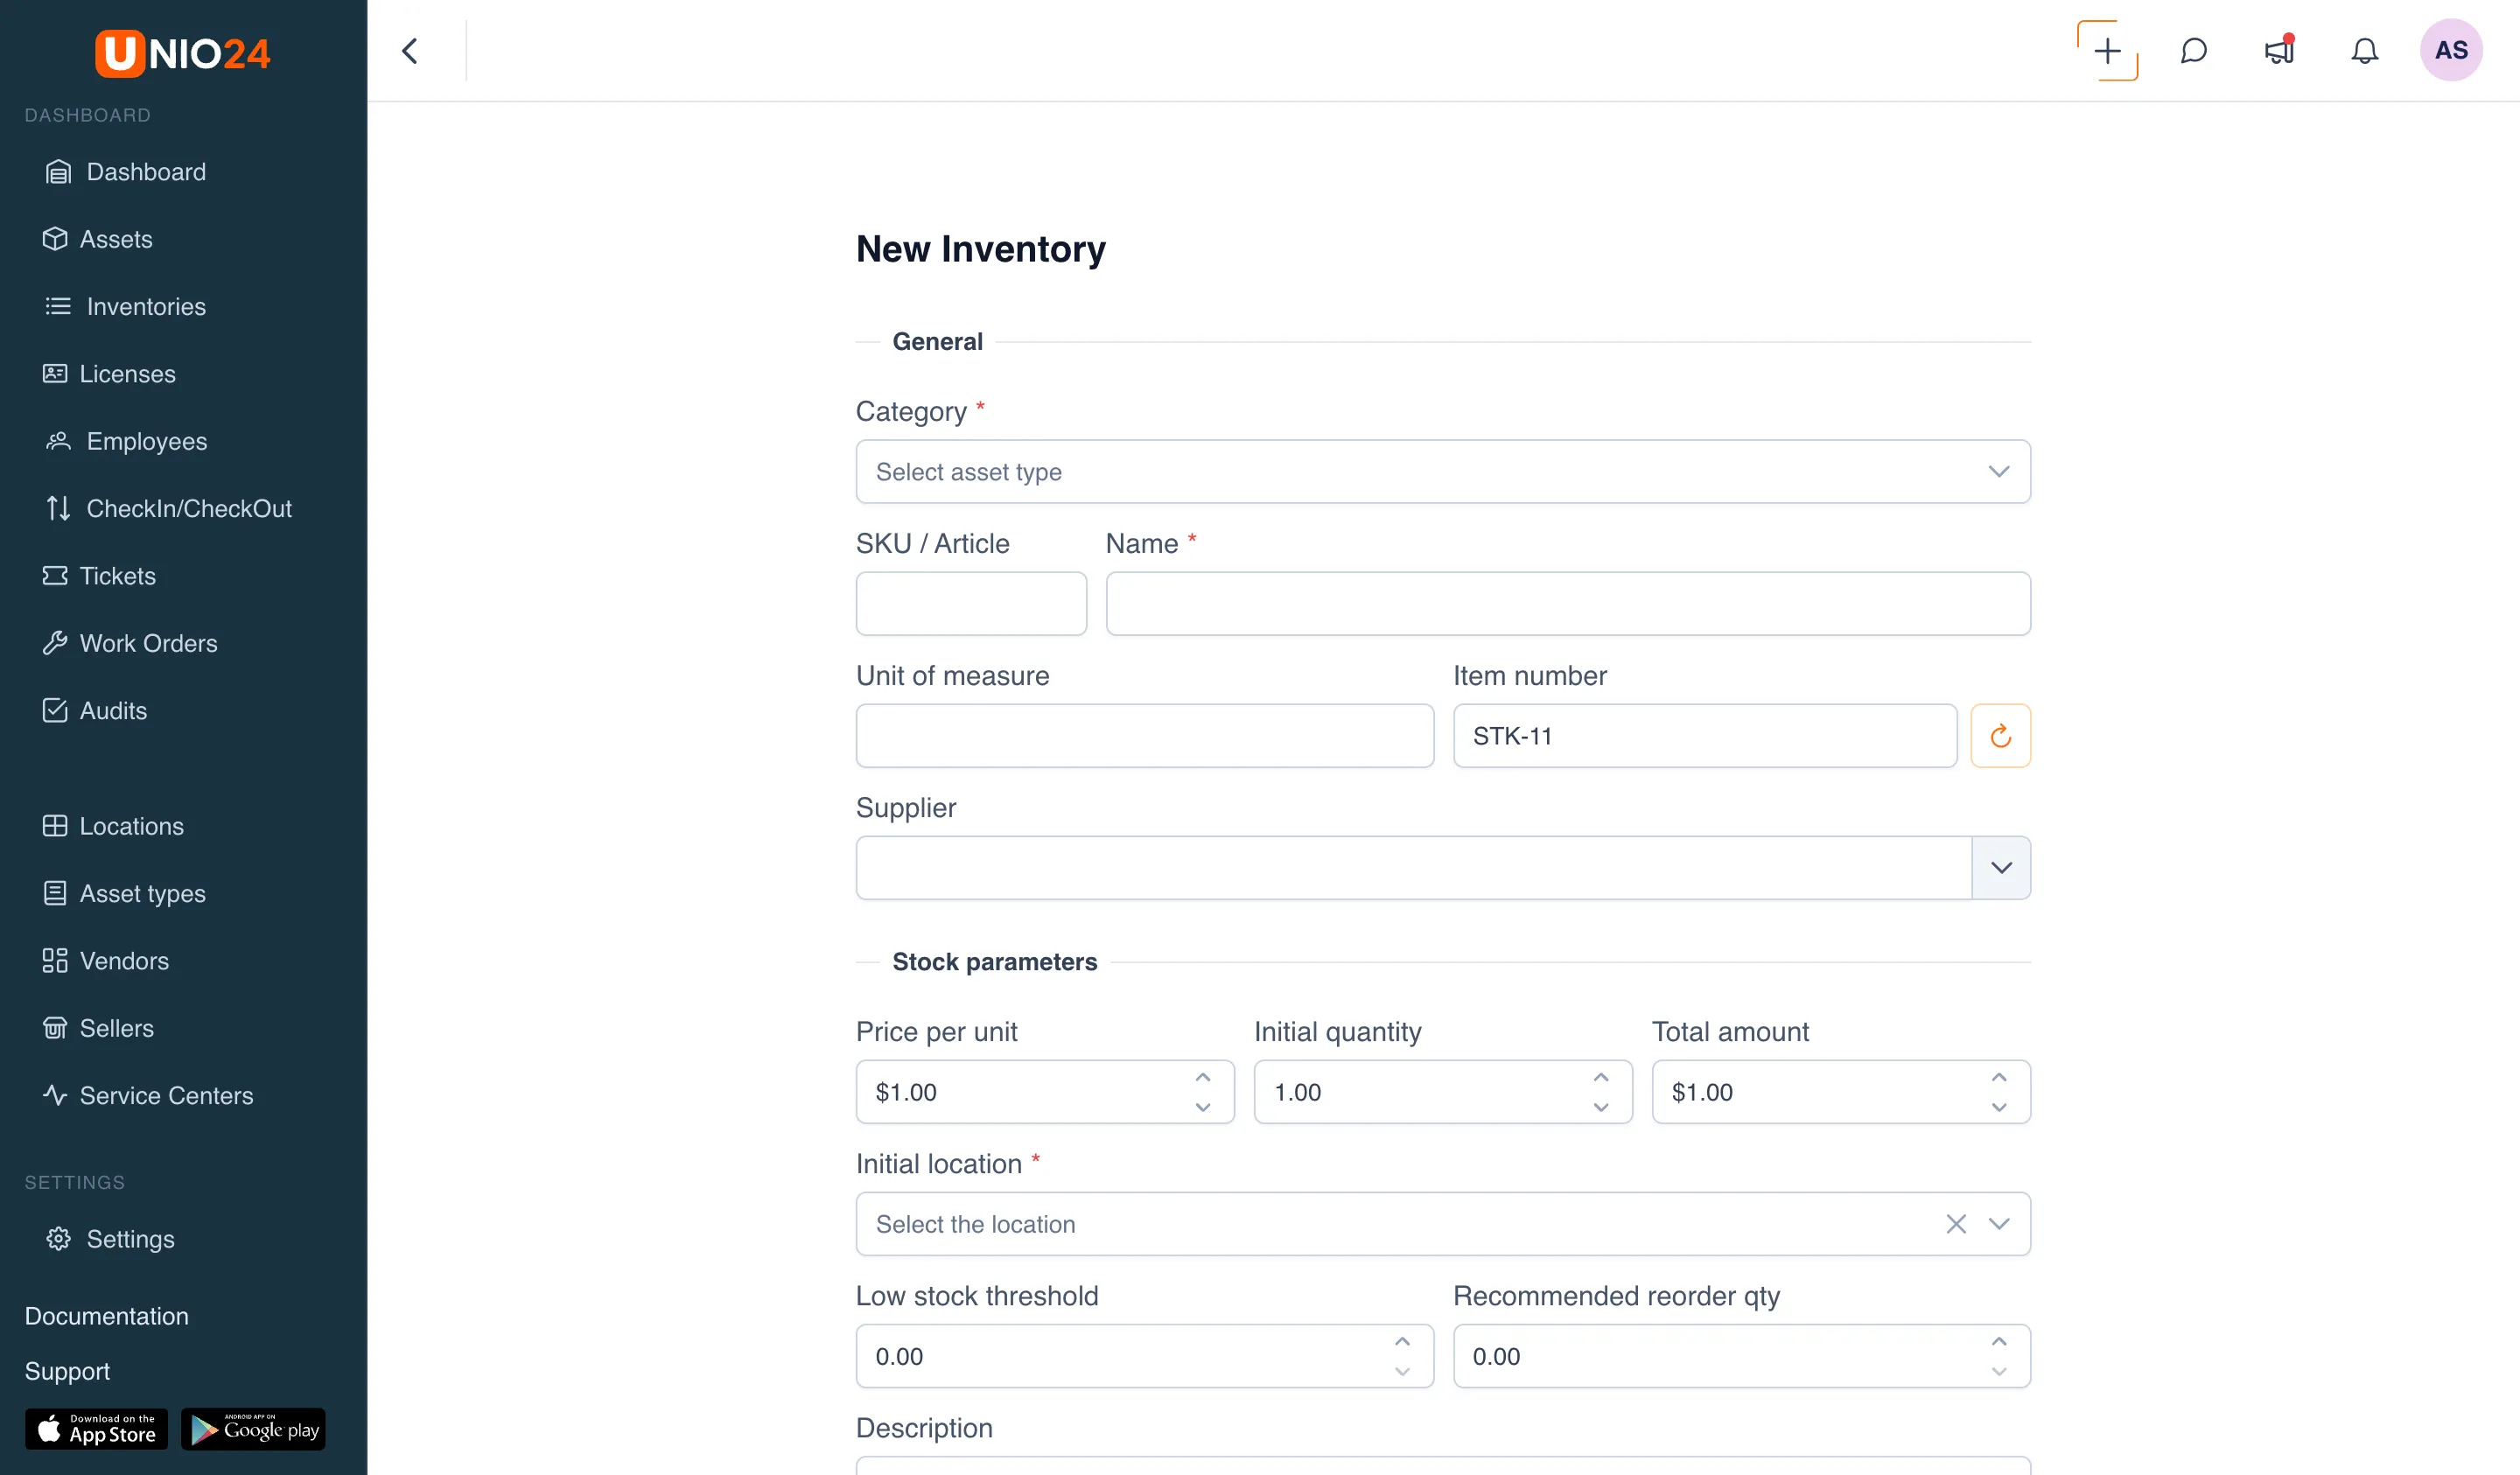
- In the General block, fill in the fields:
- Category — a required field; the category determines the additional fields (see step 6).
- SKU / Article — an optional item code.
- Name — a required field.
- Unit of measure — for example, pcs., kg, or L.
- Item number — can be entered manually or generated with the refresh button next to the field.
- Supplier — selected from a directory.
- In the Stock parameters block, set the initial stock:
- Price per unit, Initial quantity, and Sum — three connected fields in one row: when any of them changes, the others are recalculated. The Sum field is not saved separately, it only helps calculate the price or quantity.
- Initial location — a required field: where to credit the initial quantity.
- Low stock threshold — when the total quantity is at or below this level, the item is flagged as Low stock.
- Recommended reorder qty — a reference value, how much is usually reordered.
- If needed, fill in Description and Notes.
- If the selected category has additional fields configured, they appear below — fill them in.
- Click Save.
Transactions
Section titled “Transactions”All stock movements are recorded on the item page through the Action menu.
- In the Inventories section, open the item you need (click the row).
- Click the Action button in the top right.
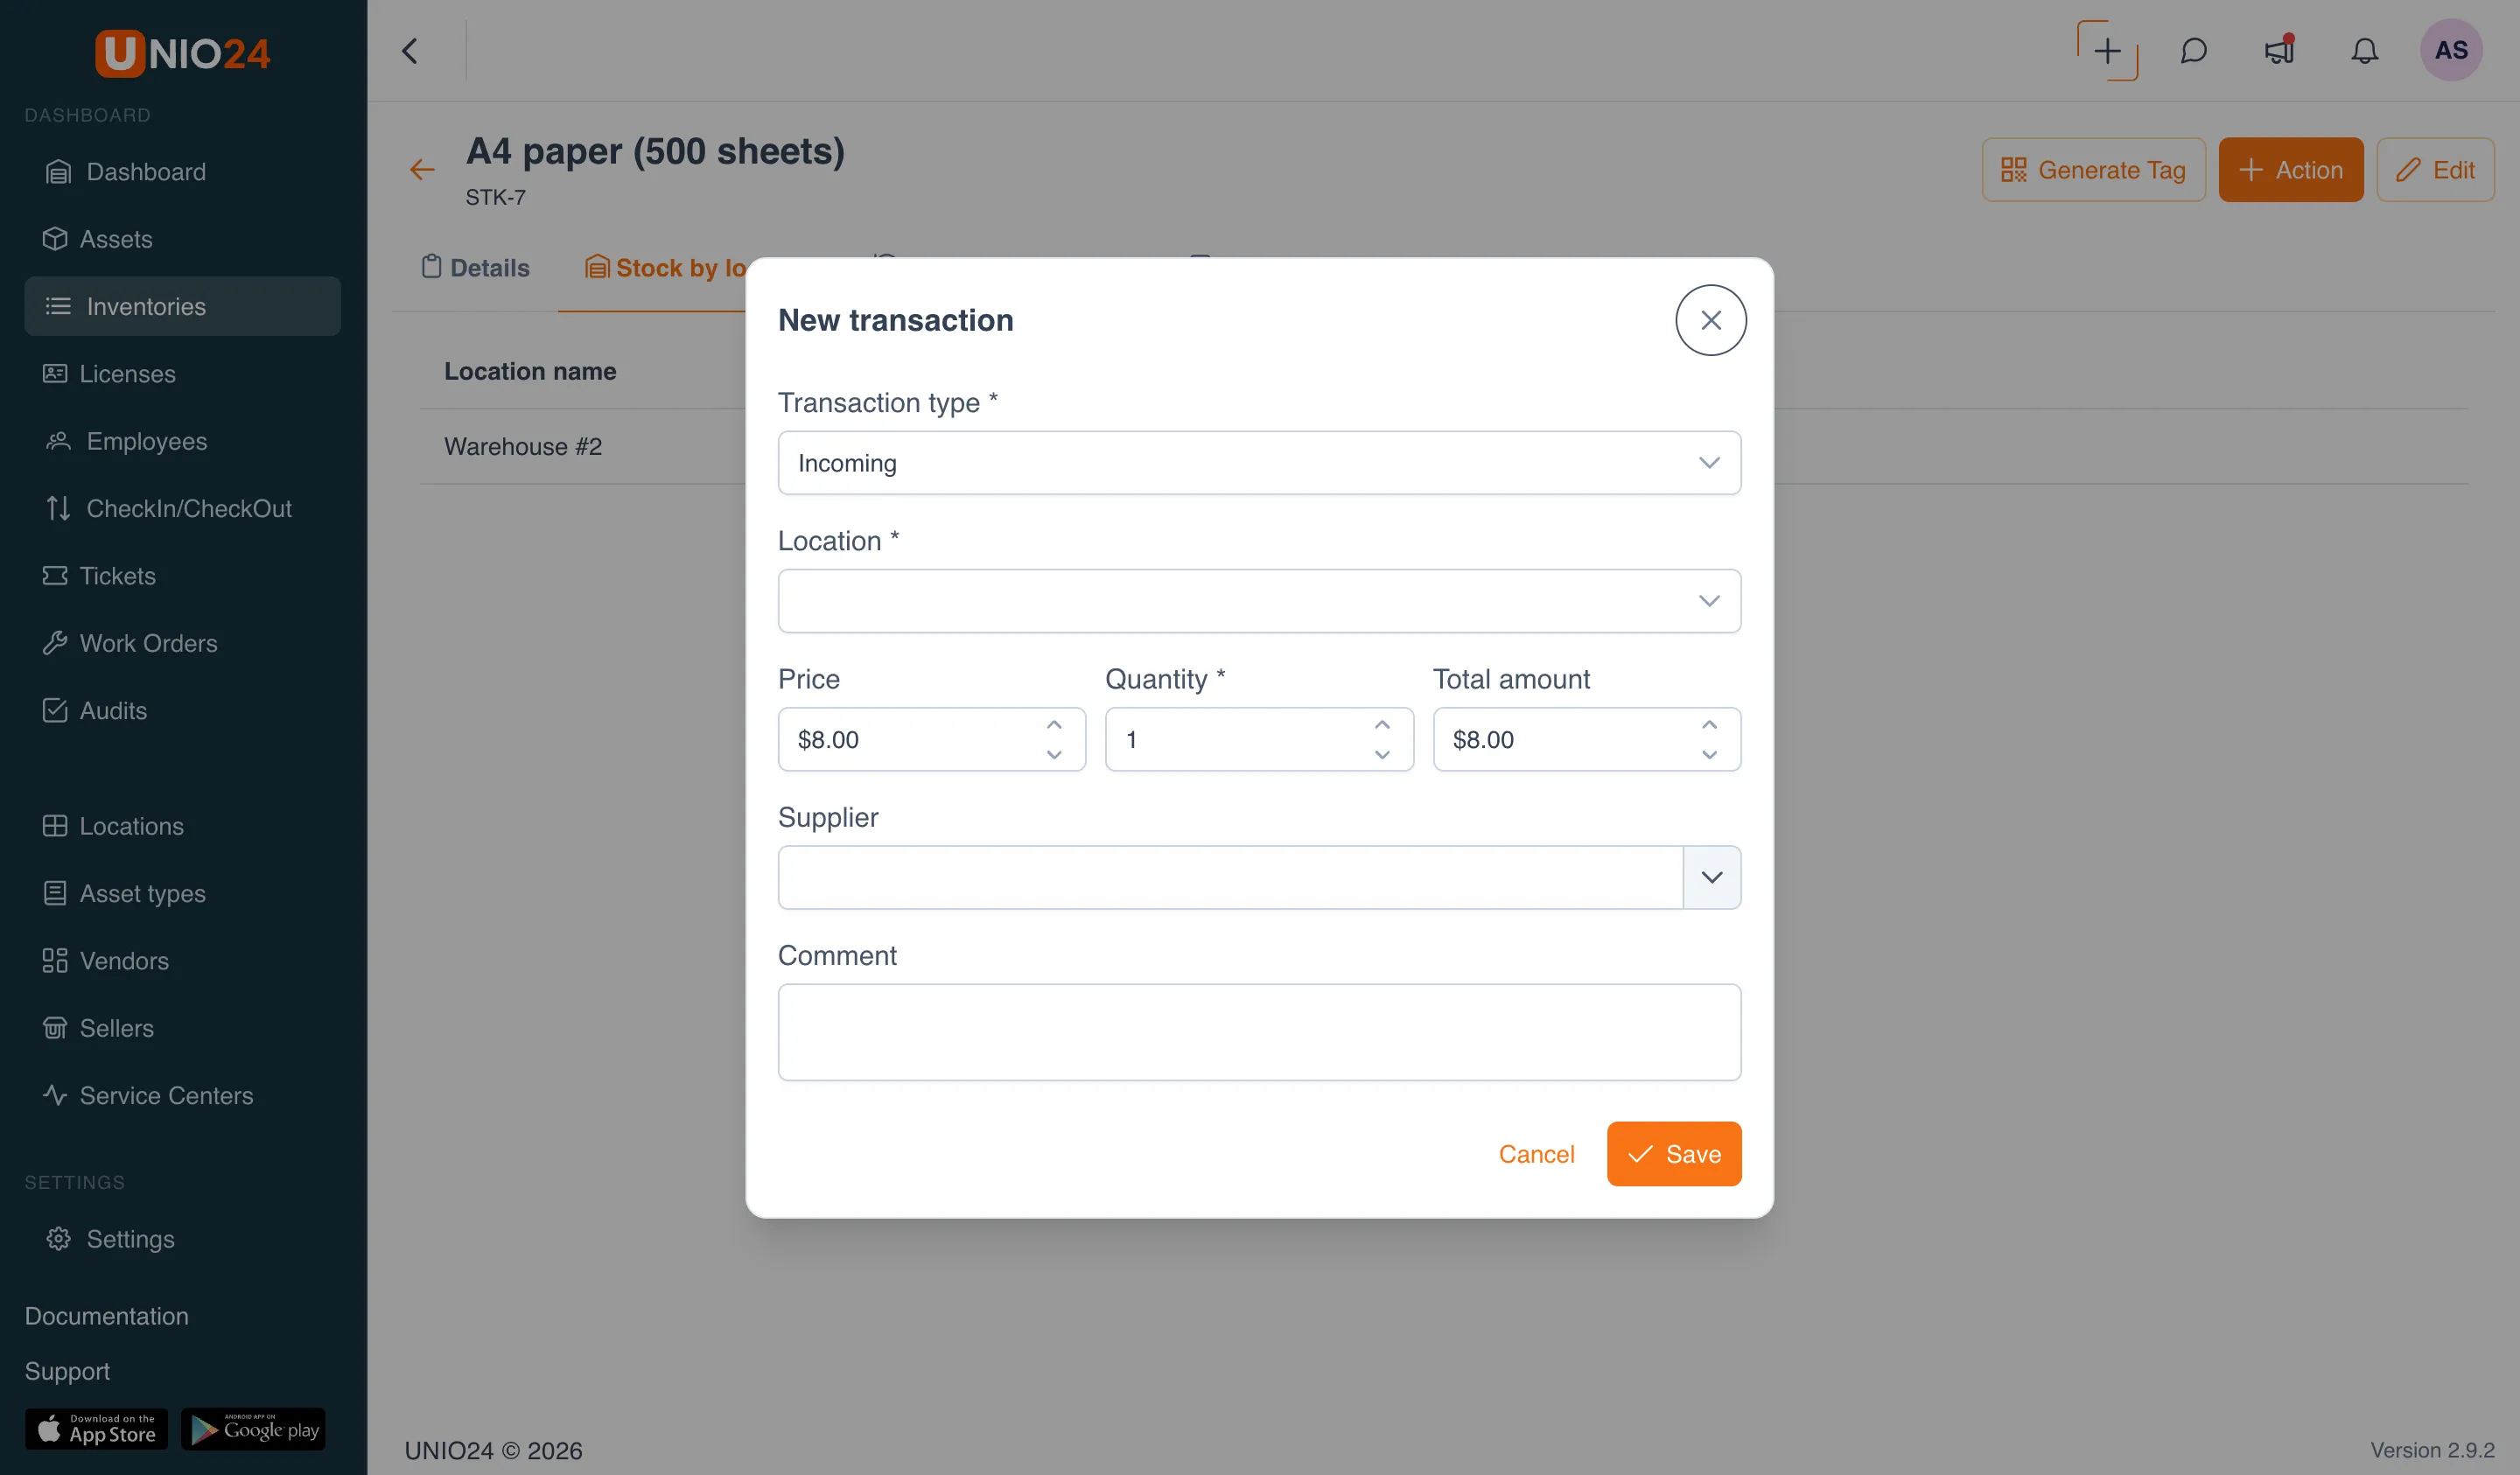
- Choose the movement type: Incoming, Outgoing, Transfer, or Adjustment. The New transaction window opens with the type already selected (the type can be changed in the Transaction type field).
Then fill in the window’s fields depending on the type.
Incoming
Section titled “Incoming”- In the Action menu, choose Incoming.
- In the Location field, choose the warehouse where the stock arrives. The current quantity is shown in parentheses next to each warehouse.
- If needed, specify Price and, in the Sum field, the total amount of the incoming stock (the Price, Quantity, and Sum fields are recalculated against each other).
- In the Quantity field, enter how much is arriving.
- If needed, choose a Supplier.
- If needed, add a Comment.
- Click Save.
Outgoing
Section titled “Outgoing”- In the Action menu, choose Outgoing.
- In the Source location field, choose the warehouse the stock is written off from (the list shows only warehouses that have stock).
- In the Quantity field, enter how much to write off. You cannot write off more than is stored at the warehouse — the system shows the message Exceeds available stock.
- If needed, add a Comment.
- Click Save.
Transfer
Section titled “Transfer”- In the Action menu, choose Transfer.
- In the Source location field, choose the warehouse the stock is moved from.
- In the Destination location field, choose the warehouse the stock is moved to.
- In the Quantity field, enter how much to move. You cannot move more than is at the source warehouse.
- If needed, add a Comment.
- Click Save.
Adjustment
Section titled “Adjustment”- In the Action menu, choose Adjustment.
- In the Location field, choose the warehouse whose stock is being corrected.
- In the Quantity field, enter the adjustment value.
- If needed, add a Comment — it explains why the correction is needed.
- Click Save.
After saving, the item’s stock and the breakdown by warehouse are recalculated, and the movement appears on the Transaction history tab.
View stock by location
Section titled “View stock by location”- Open an item in the Inventories section.
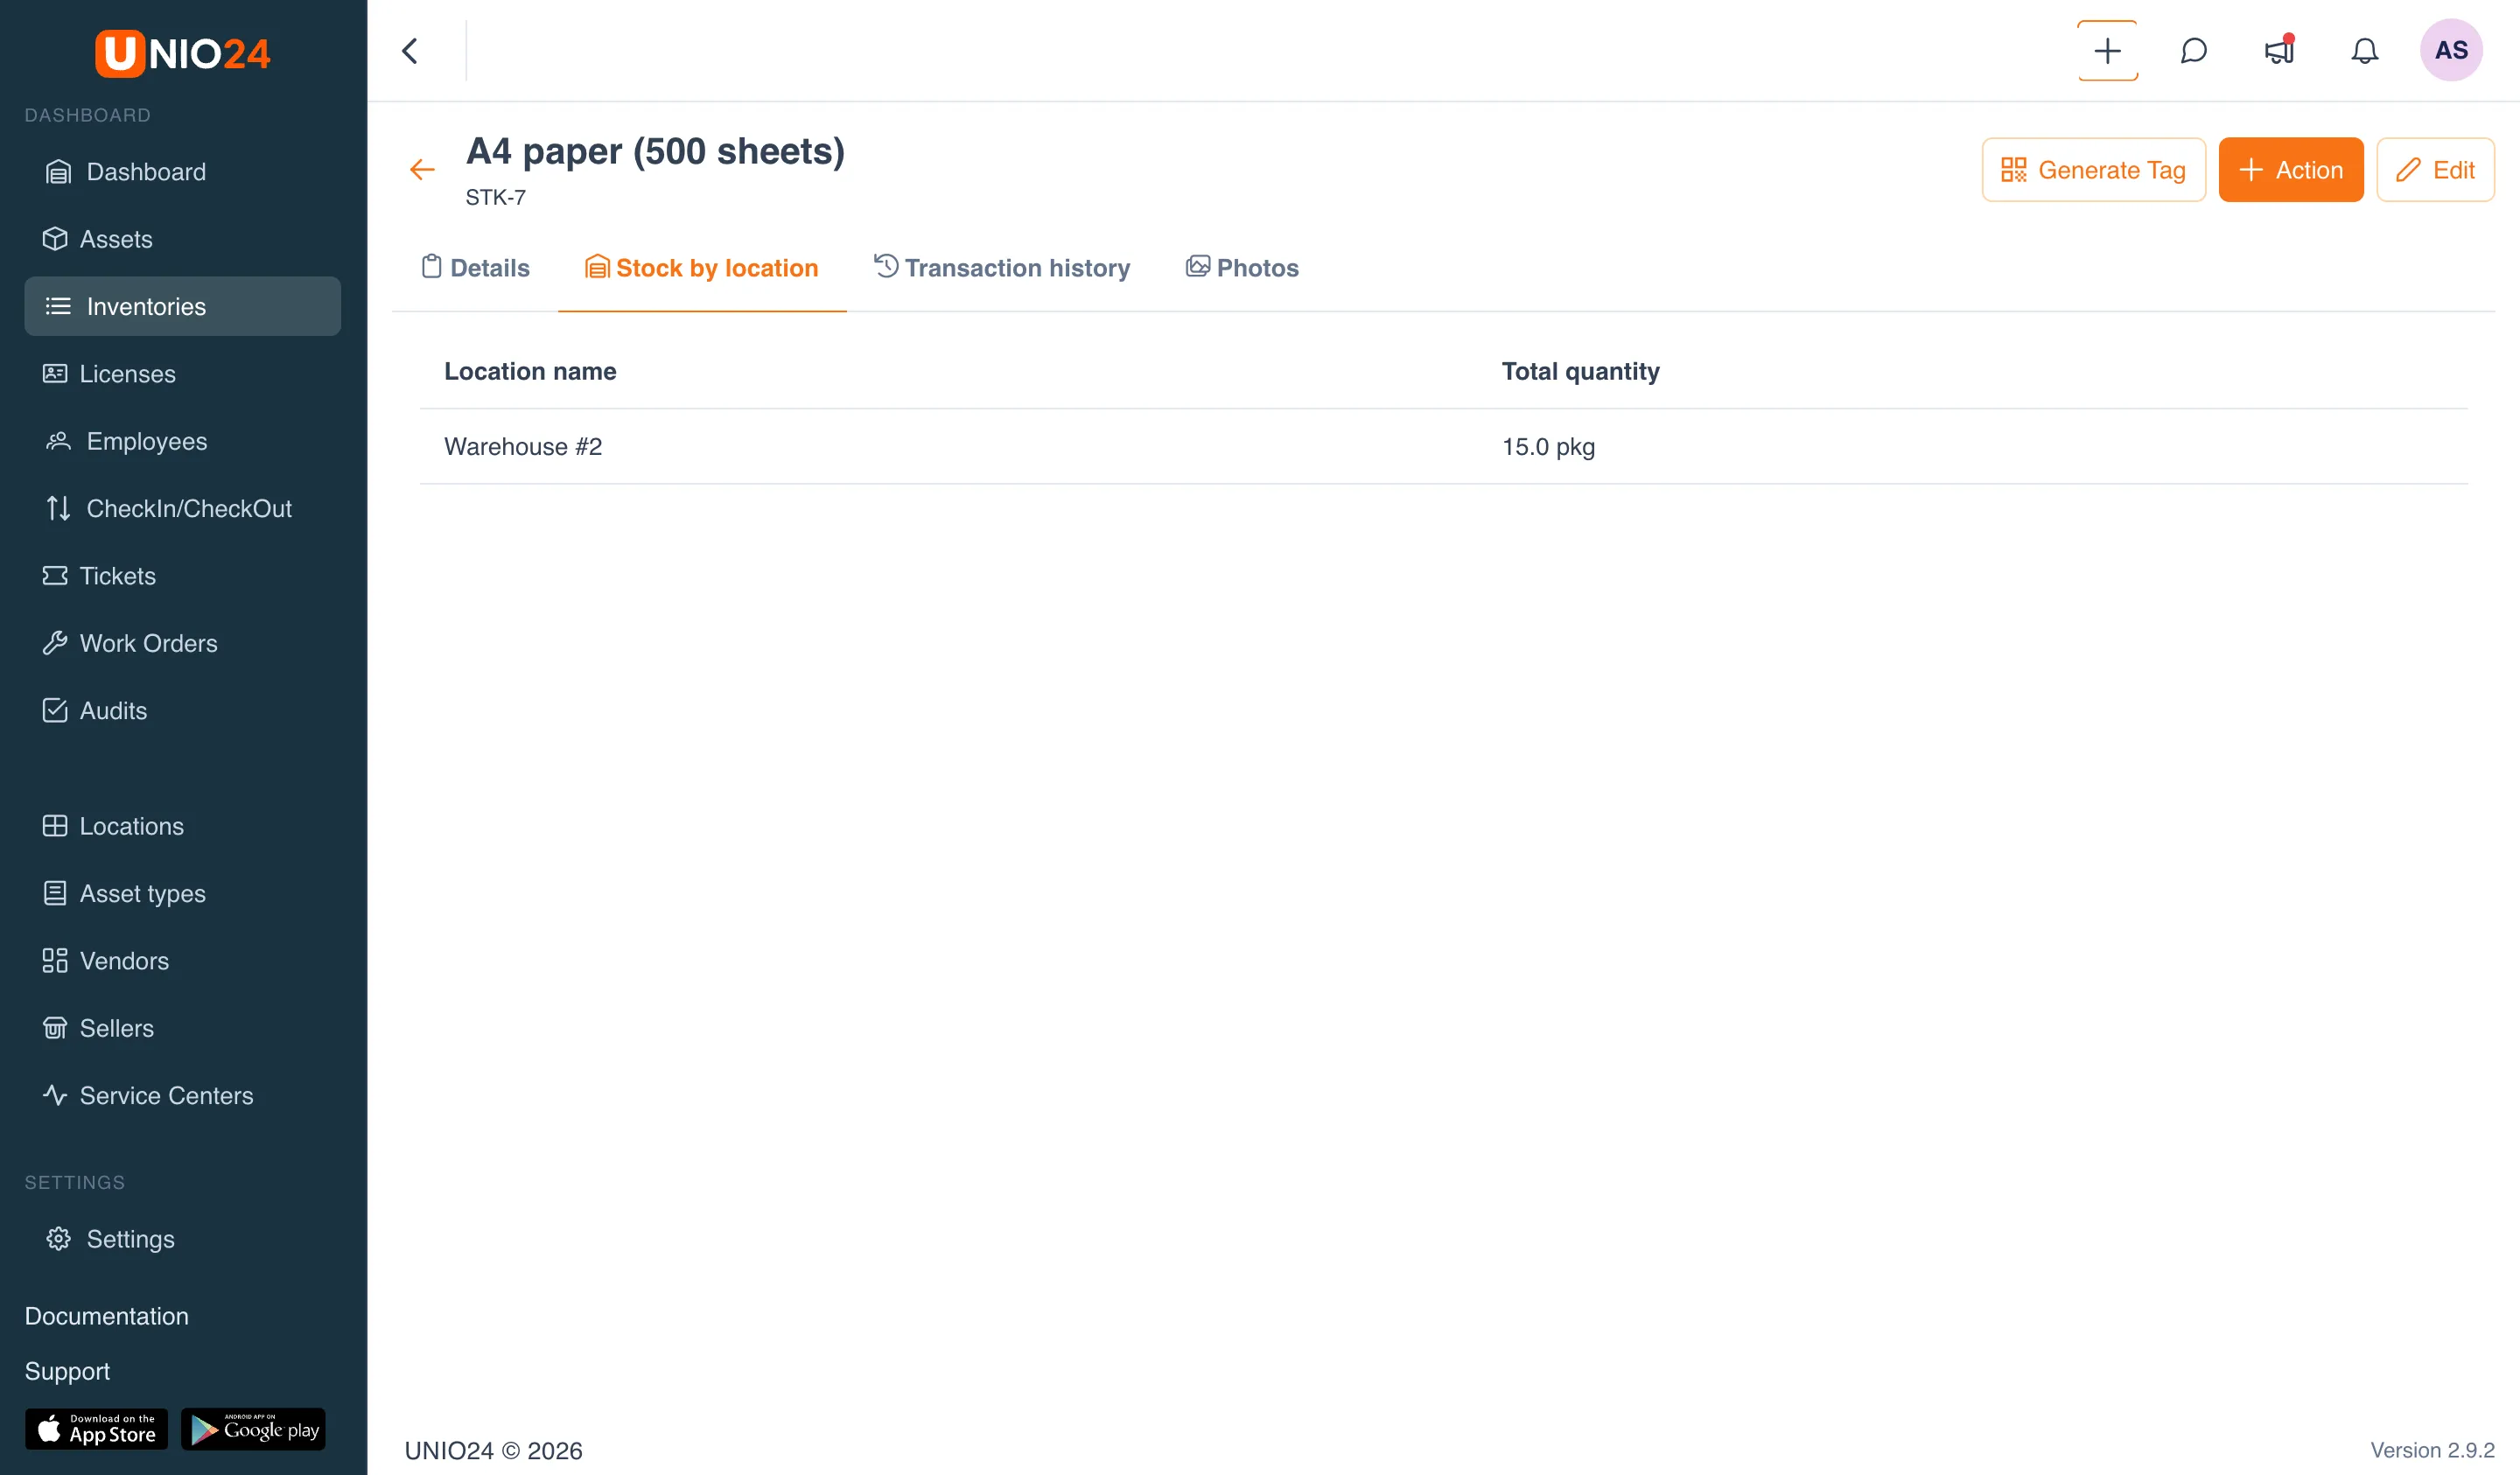
- Go to the Stock by location tab.
- The table shows how many units are stored at each location. The total quantity across all warehouses is shown on the details tab and in the item header.
For the full movement history of the item, see the Transaction history tab.
Enable the low stock filter
Section titled “Enable the low stock filter”- Open the Inventories section.
- In the row above the table, click the Low stock button.
- The list then shows only items whose total quantity is at or below the low stock threshold. Click the button again to clear the filter.