

Working with licenses
This page collects the common tasks of working with licenses. For what a license, a seat, and statuses are, see Licenses: how it works. For a description of all fields and states, see the Licenses reference.
Licenses are an additional module. If there is no such section in the menu, enable it under Settings → Modules (see Modules).
Create a license
Section titled “Create a license”- In the left menu, open the Licenses section.
- Click New License.
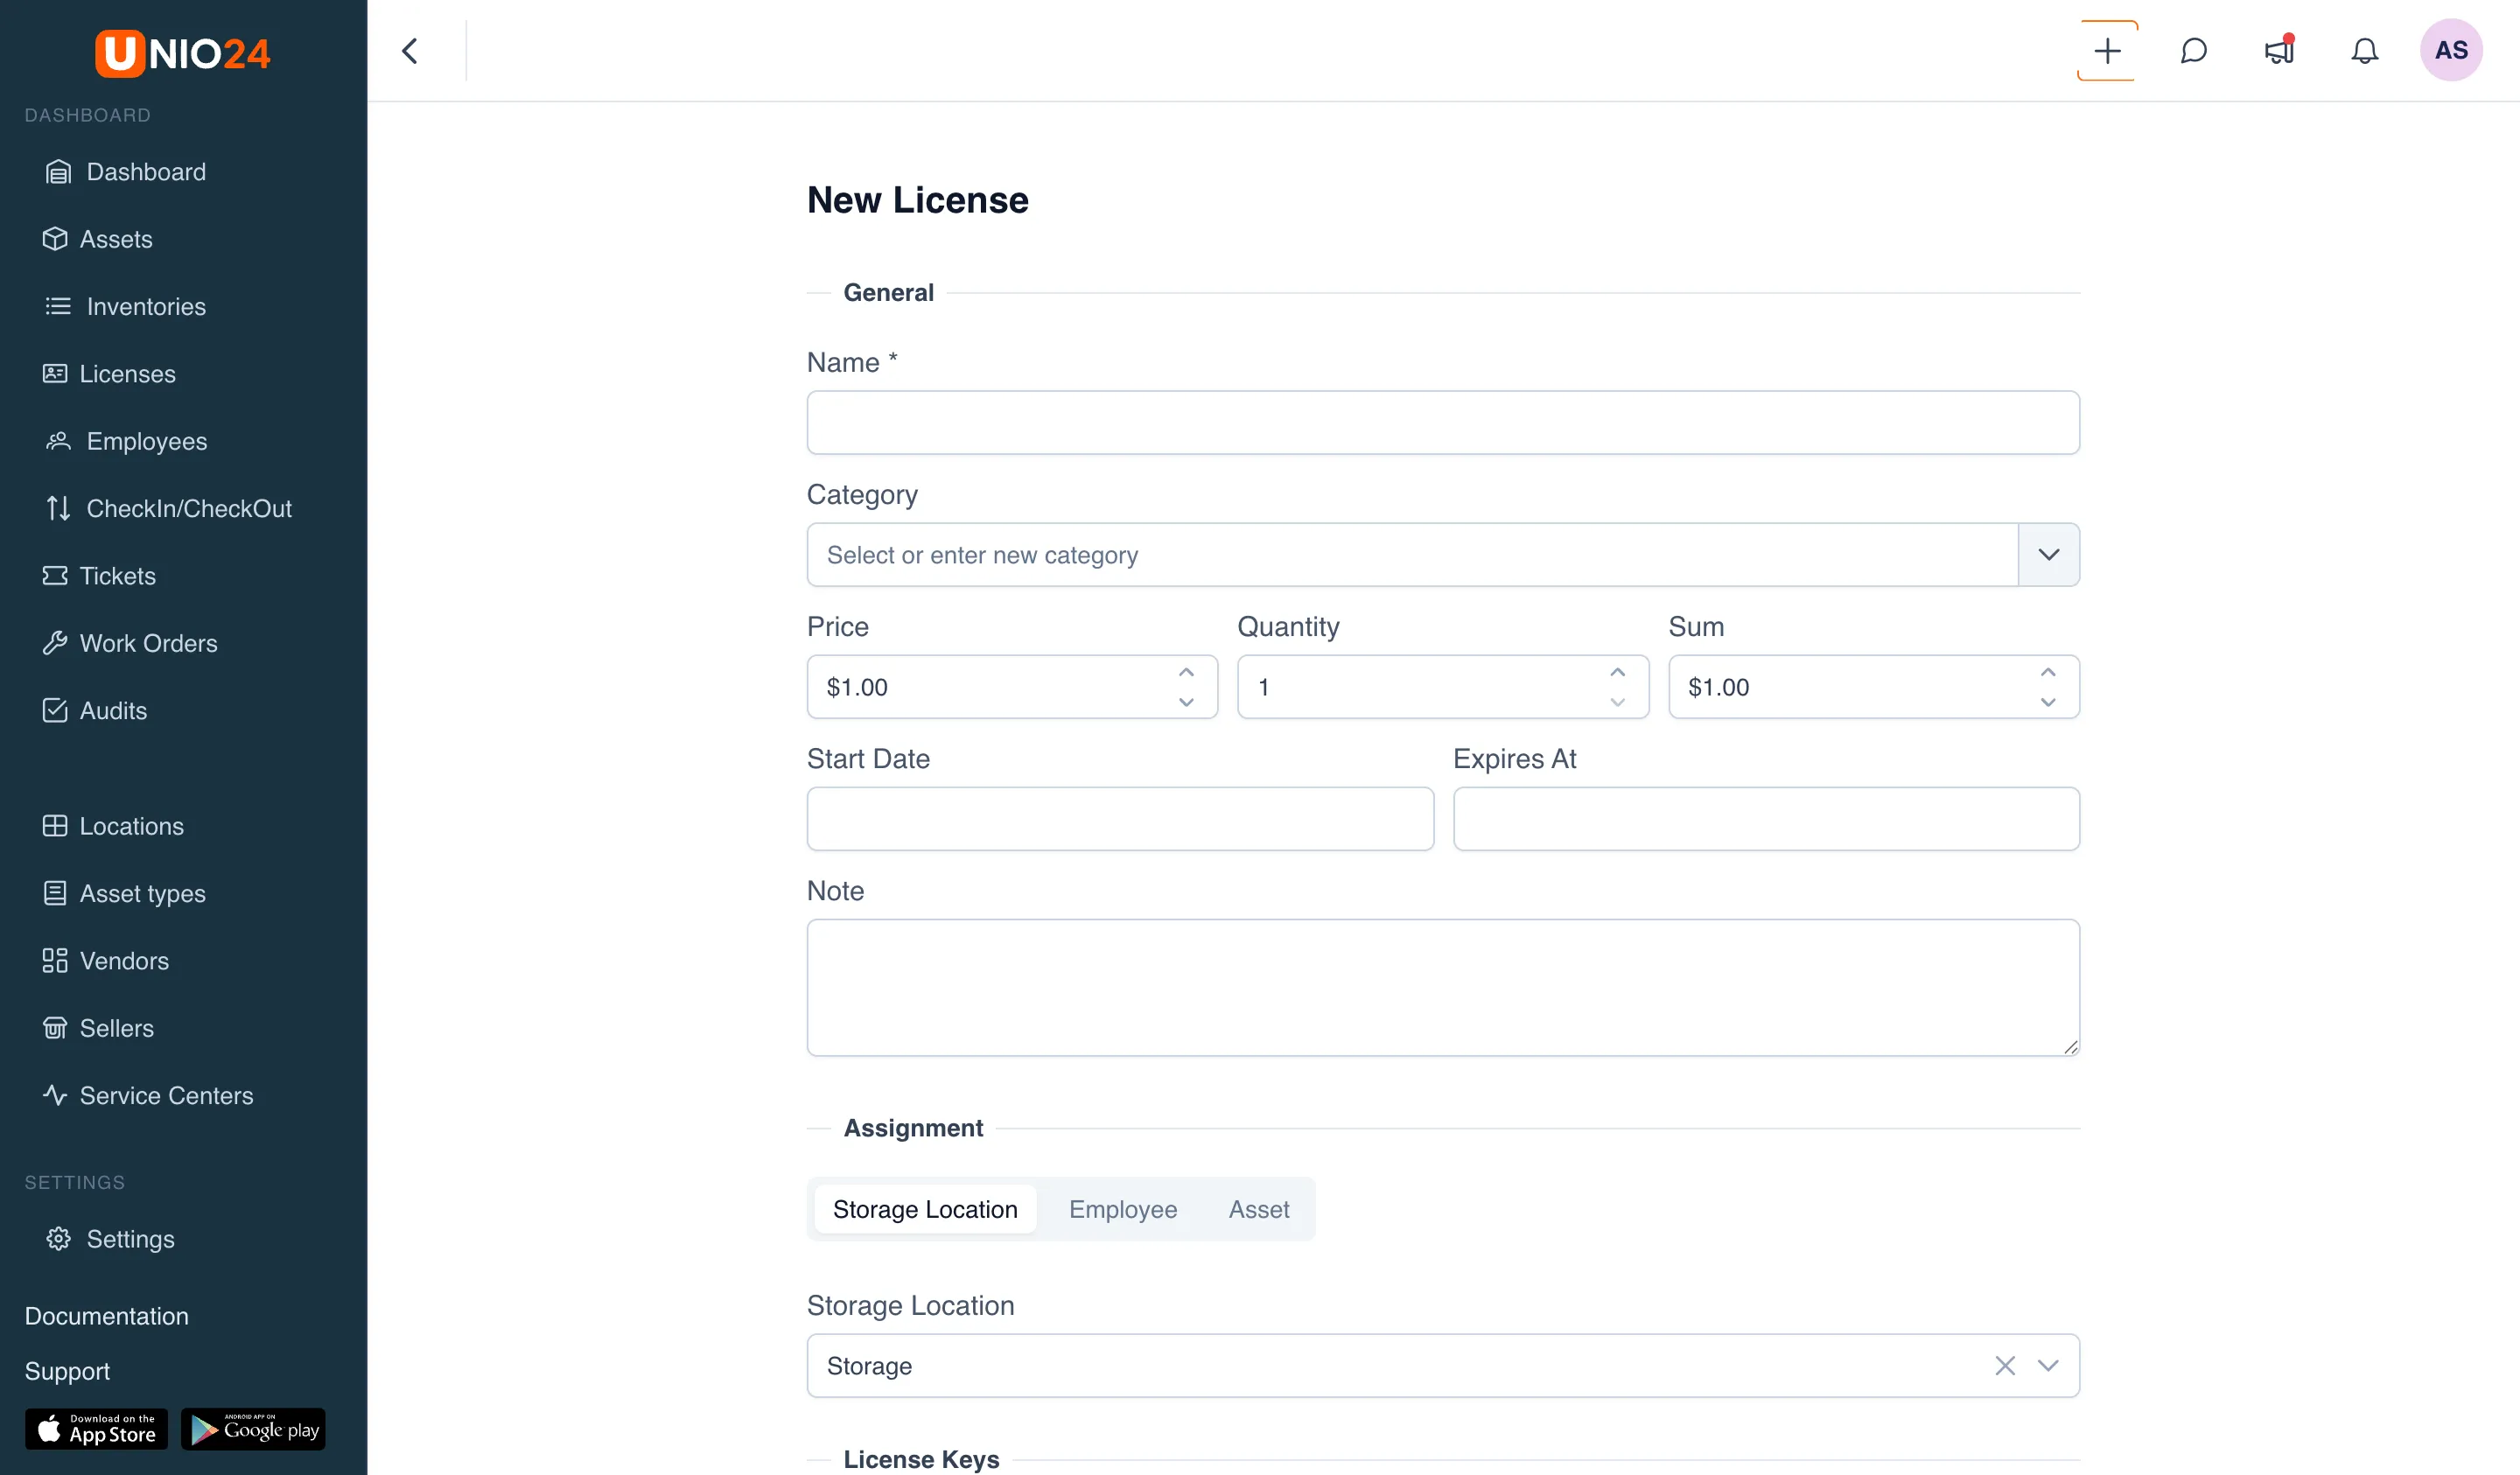
- Fill in the General block:
- Name — a required field.
- Category — choose a category from the list or enter a new name to create it on the fly (see Create a category on the fly).
- Price — the price per seat.
- Quantity — how many seats the license contains (minimum 1).
- Sum — the total cost. The Price, Quantity, and Sum fields are linked: when the price or quantity changes, the sum is recalculated, and when the sum changes, the price is recalculated.
- Start Date and Expires At. To make the license perpetual, leave the Expires At field empty.
- Note — free text.
- If needed, fill in the Assignment block and the License Keys block (see below).
- Click Save.
Create a category on the fly
Section titled “Create a category on the fly”The Category field also serves as a directory of license types. In the field with the Select or enter new category hint:
- start typing a name — if such a category already exists, choose it from the dropdown;
- if there is no such category, type the name in full — it will be created when the license is saved.
Assign a license when creating it
Section titled “Assign a license when creating it”The Assignment block exists only on the license create form (it is not there when editing).
- In the Assignment block, choose whom to assign the license to: Storage Location, Employee, or Asset.
- In the field that appears, choose the specific storage location, employee, or asset.
- Save the license.
If Storage Location is chosen, the seats remain free and stay in that location. If Employee or Asset is chosen, the license is issued right away to the chosen recipient.
Enter license keys
Section titled “Enter license keys”- In the License Keys block, turn on the Enter license numbers/keys toggle.
- In the field that appears, enter the keys — one per line. A counter of entered keys is visible below the field.
- Save the license.
If the number of keys does not match the Quantity field, the system shows a Quantity mismatch window with three options:
- Cancel — return to the form and fix the keys or the quantity;
- One key for all — use the first key as a shared key for all seats;
- Save N licenses — create exactly as many seats as keys were entered.
Assign a seat
Section titled “Assign a seat”You can assign only a free seat. This can be done from the license itself.
- Open the Licenses section and select the license you need.
- Go to the License List tab — this is the list of all the license’s seats.
- At a free seat (the Free badge), click the assign button.
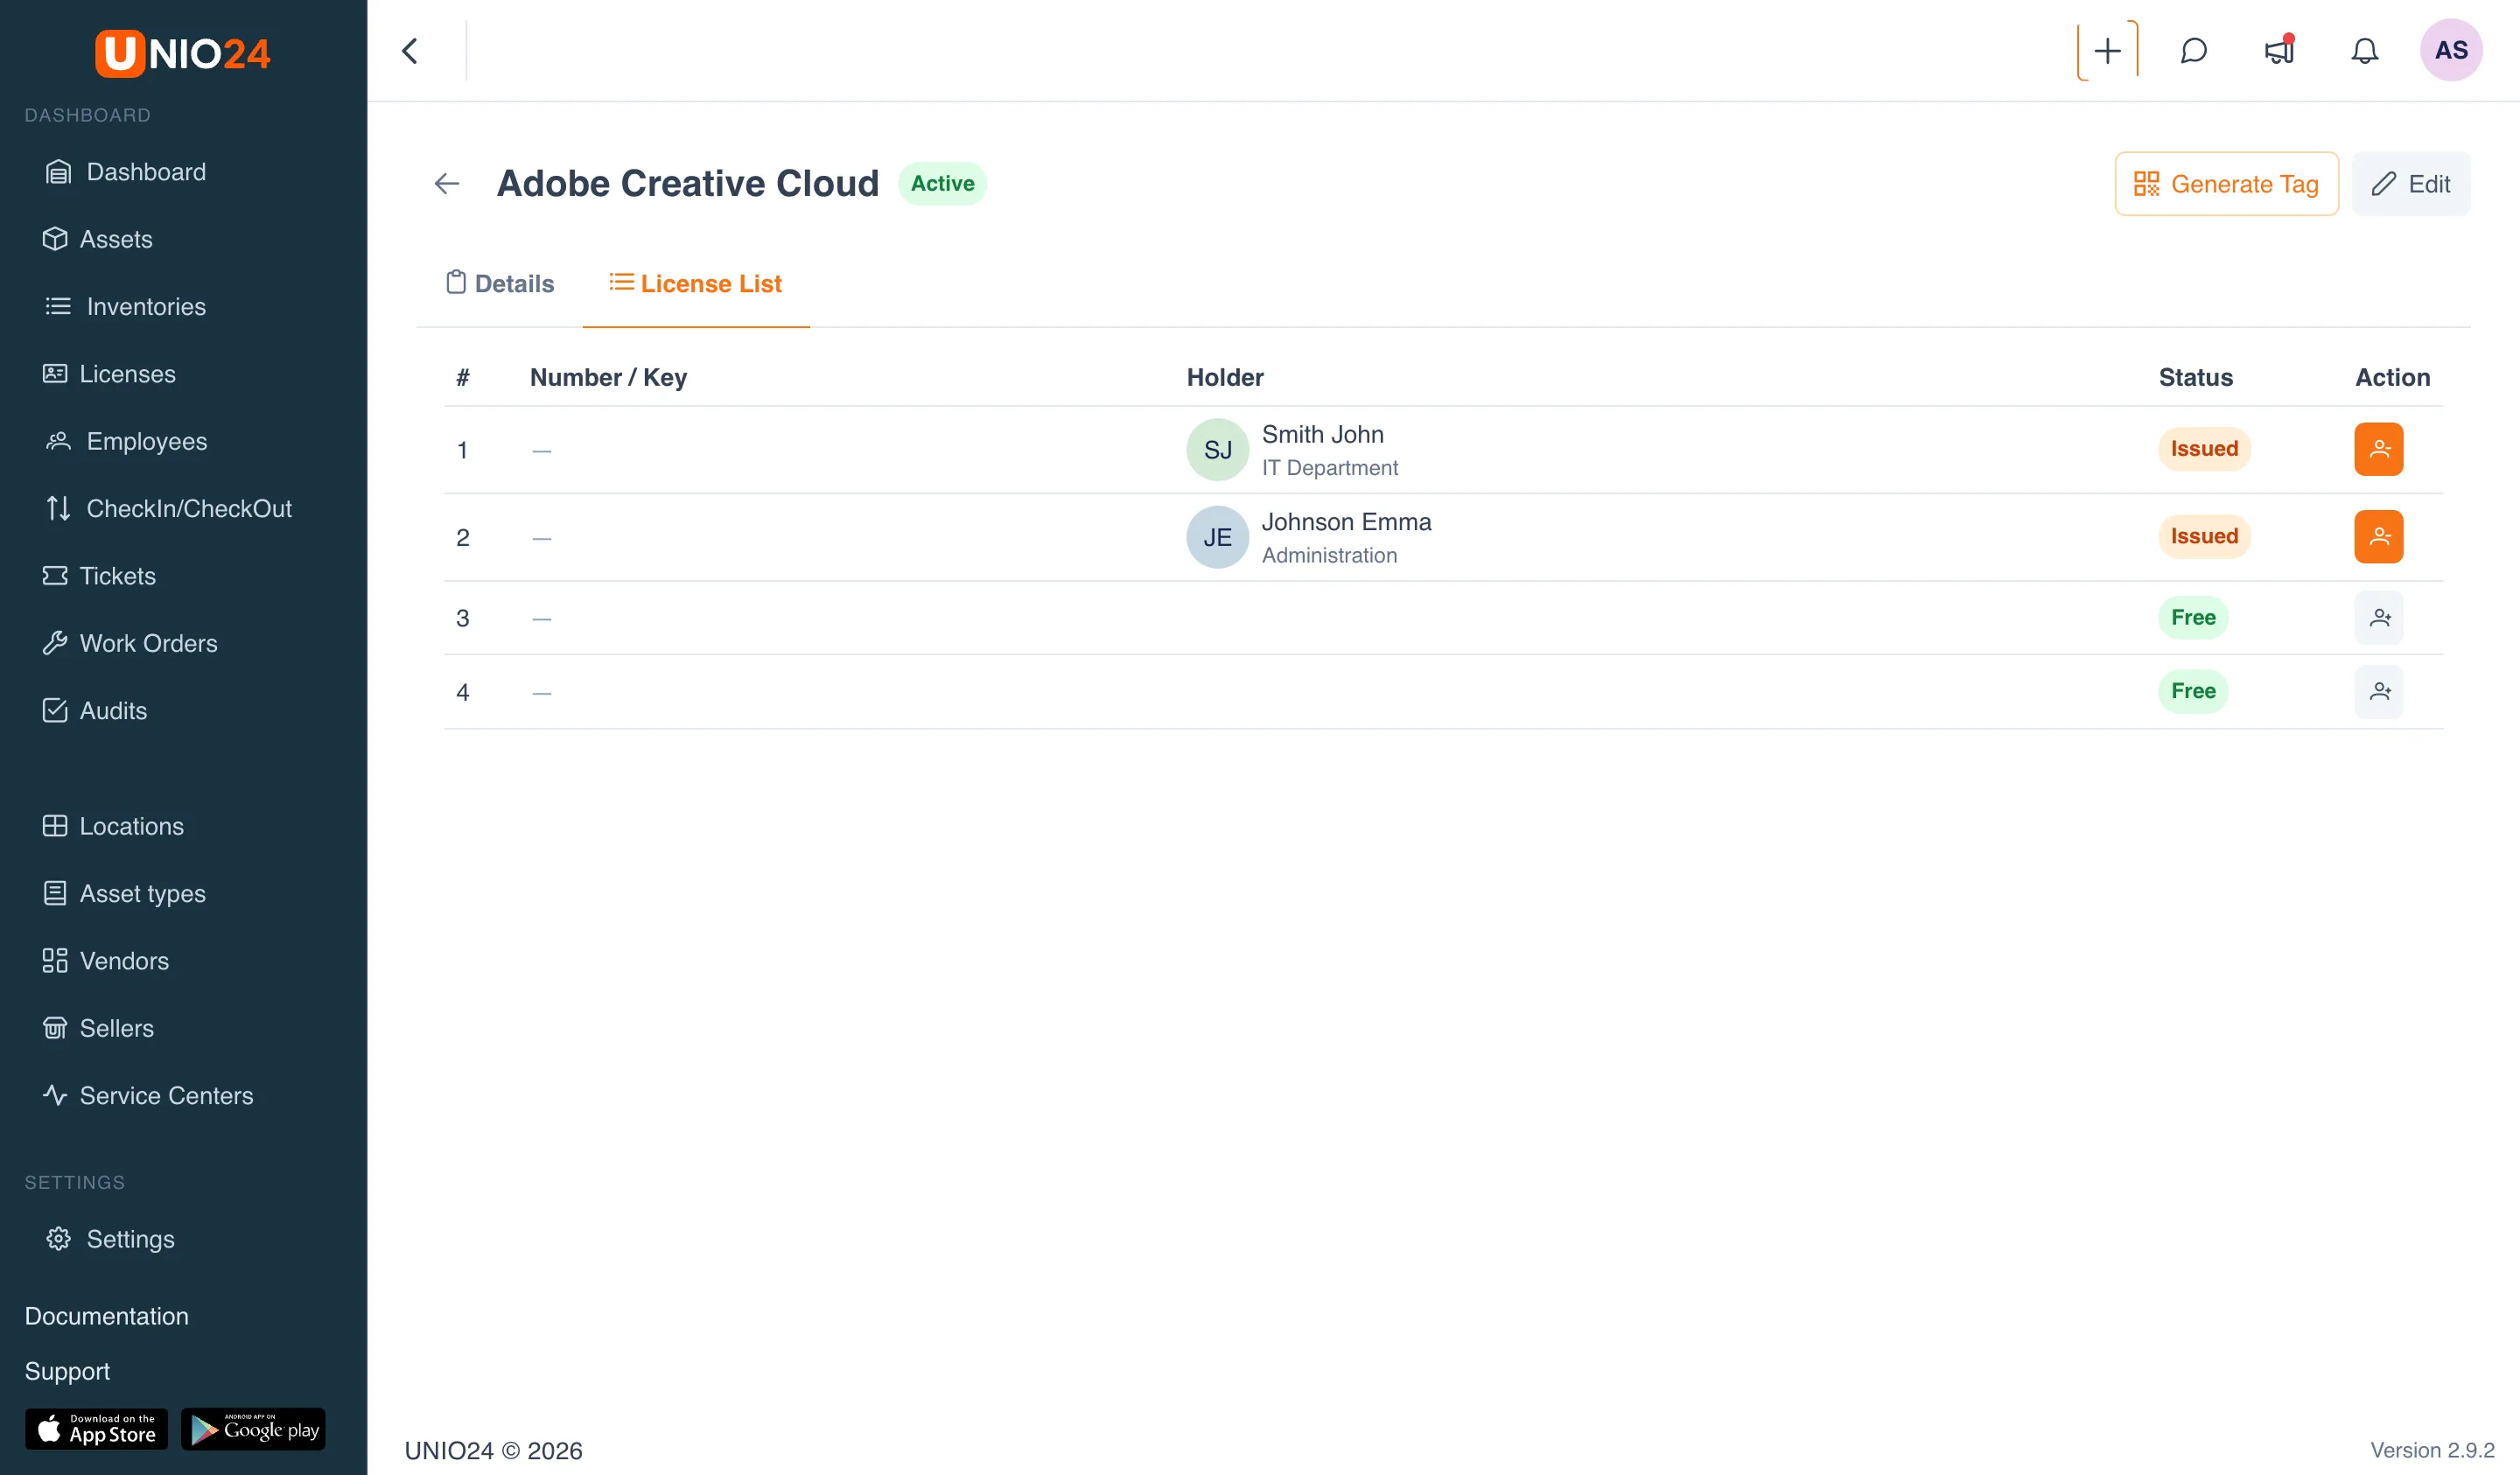
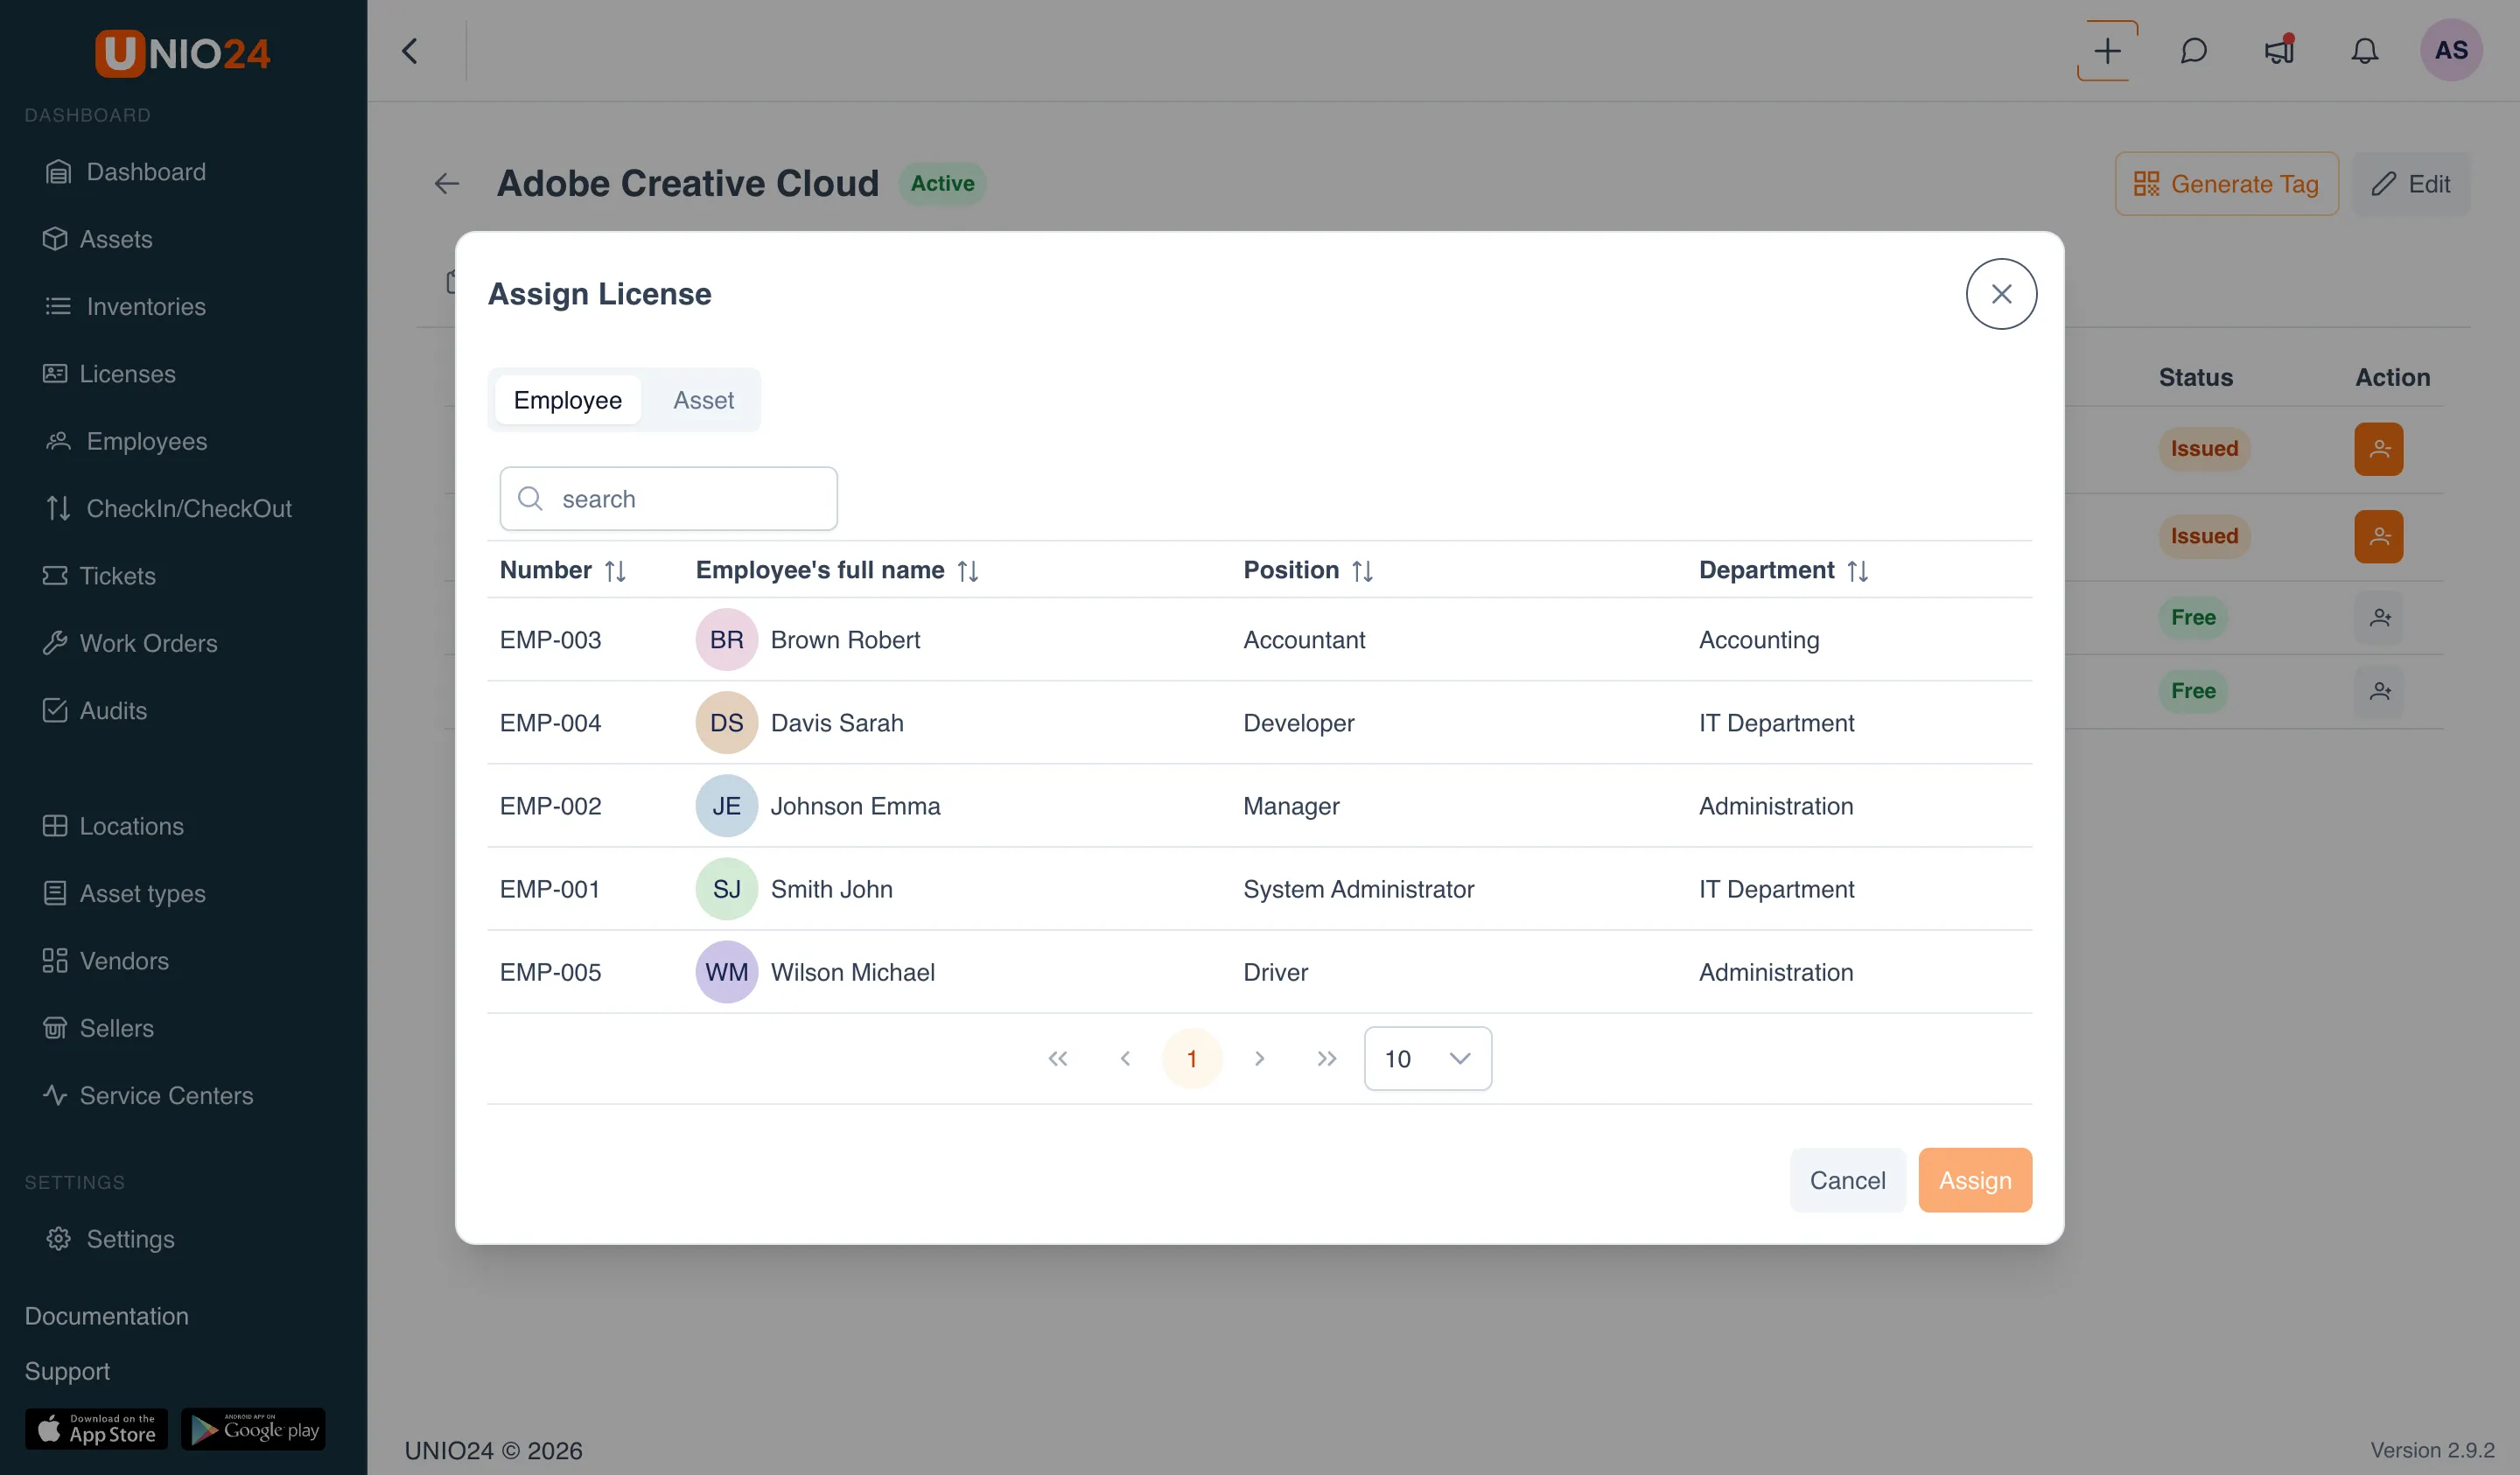
The seat gets the Issued badge, and the Used counter on the license increases.
Assign a license from an employee or asset record
Section titled “Assign a license from an employee or asset record”- Open an employee or asset record.
- Go to the Licenses tab.
- Through the record’s actions menu, choose Assign License.
- In the window, choose a license from the list (only licenses with free seats are shown).
- Choose a specific free seat.
- Click Assign.
Return a seat
Section titled “Return a seat”A return frees the seat and makes it available for assignment again.
- Open the license and go to the License List tab.
- At an issued seat (the Issued badge), click the return button.
- In the Return Seat window, choose the Storage Location the seat is returned to.
- Click Return.
The seat becomes Free again, and the Used counter decreases. A seat can also be returned from an employee or asset record: on the Licenses tab, at the row you need, click the delete icon and choose the storage location.
Find expiring licenses
Section titled “Find expiring licenses”There are two ways.
- In Analytics. Open the Analytics section — the Expiring Licenses widget lists licenses with an upcoming or past due date and shows how many days are left.
- In the license list. Open the Licenses section. For licenses with an upcoming or past due date, the date in the Valid Until column and the status badge are shown in red (Expiring Soon or Expired).