

Managing locations
This page collects the common tasks for working with locations. For how the default location, the write-off location, and the status on check-in work, see Locations: how it works. For a description of all columns, fields, and permissions, see the Locations reference.
Create a location
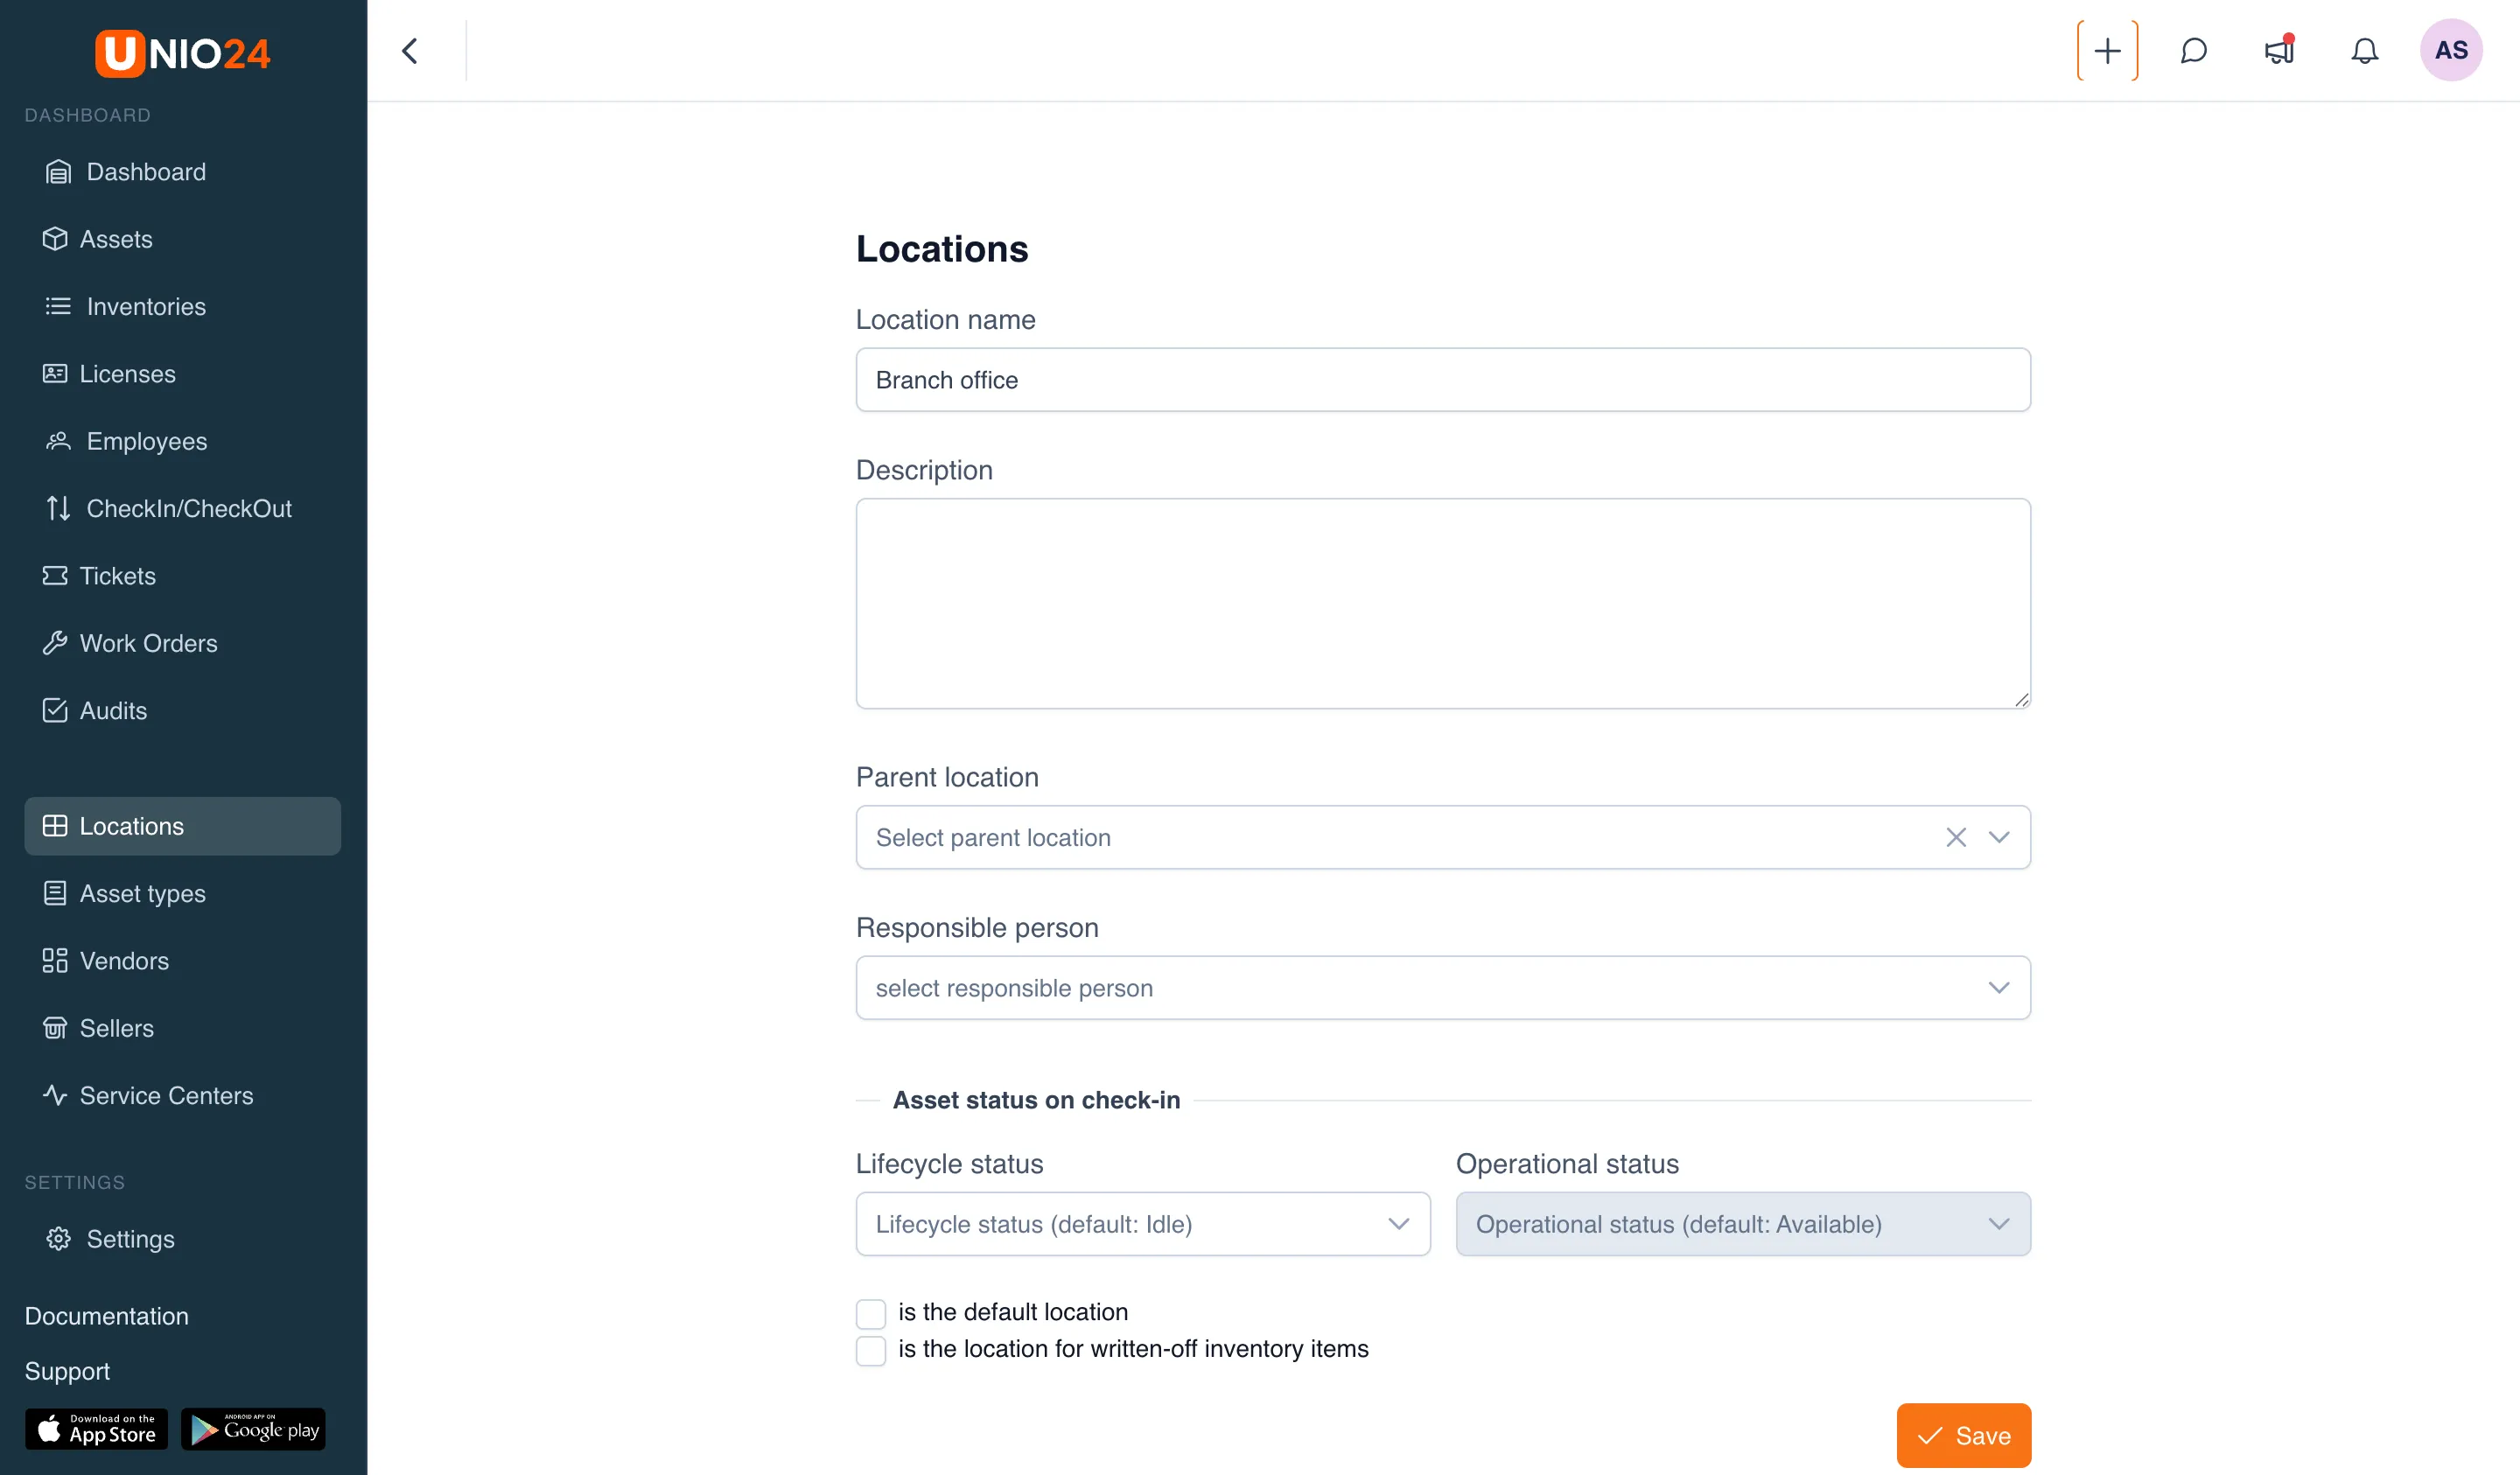
Section titled “Create a location”- Select Locations from the menu.
- Click New location.
- Fill in the Location name — this is the only required field.
- Fill in the Description if needed.
- To nest the location in the hierarchy, choose a parent location in the Parent location field. The field is optional.
- In the Responsible person field, choose the employee accountable for this location. The field is optional; to leave the location without a responsible person, choose nothing.
- In the Asset status on check-in block, set default values for incoming assets if needed:
- Lifecycle status — the lifecycle status.
- Operational status — becomes available only after a lifecycle status is selected.
- If this is the main storage location, check the is the default location box.
- If the location is used for written-off assets, check the is the location for written-off inventory items box.
- Click Save.
Edit a location
Section titled “Edit a location”- Select Locations from the menu.
- In the row of the location you need, open the actions menu and choose Edit. You can also open the location card and click the pencil icon next to the name.
- Change the fields you need.
- Click Save.
Move a location in the hierarchy
Section titled “Move a location in the hierarchy”Locations are arranged as a tree — see Location hierarchy. To change the parent, open the location for editing and choose a new parent location in the Parent location field. To move the location to the top level, clear this field. Click Save.
Assign or change the responsible person
Section titled “Assign or change the responsible person”- Open the location for editing (see Edit a location).
- In the Responsible person field, choose an employee.
- To remove the responsible person, clear the selection.
- Click Save.
Make a location the default or the write-off location
Section titled “Make a location the default or the write-off location”- Open the location for editing (see Edit a location).
- Check the is the default location or is the location for written-off inventory items box (or clear it).
- Click Save.
After saving, a green default tag or a red for write-off tag appears in the location list.
Delete a location
Section titled “Delete a location”A location can be deleted only if it holds no assets. If the location has at least one asset, the delete action is unavailable.
- Select Locations from the menu.
- In the row of the location you need, open the actions menu and choose Delete.
- Confirm the deletion in the window that appears.
Move assets between locations
Section titled “Move assets between locations”To move an asset from one location to another without changing the responsible employee, use the Transfer operation. For step-by-step instructions, see Transferring an asset to another location.