

Running an audit
This page collects the common tasks for working with audits. For how scope and condition assessment work, see Audits. For the full list of fields and values, see the Audit reference.
Creating an audit
Section titled “Creating an audit”- Open the Audit section in the left menu.
- Click Create audit. A form opens with the heading Audit information.
- Fill in Audit name — a required field.
- Specify the Start date and End date. The end date must be later than the start date.
- Choose the Audit source — the scope:
- All — all of the organization’s assets.
- By location — then specify one or more locations in the Select the location field.
- By subdivision — then specify one or more subdivisions in the Select the division field.
- By employee — then specify one or more employees in the Select an employee field.
- If needed, enable the toggles (see Toggles).
- Click Save.
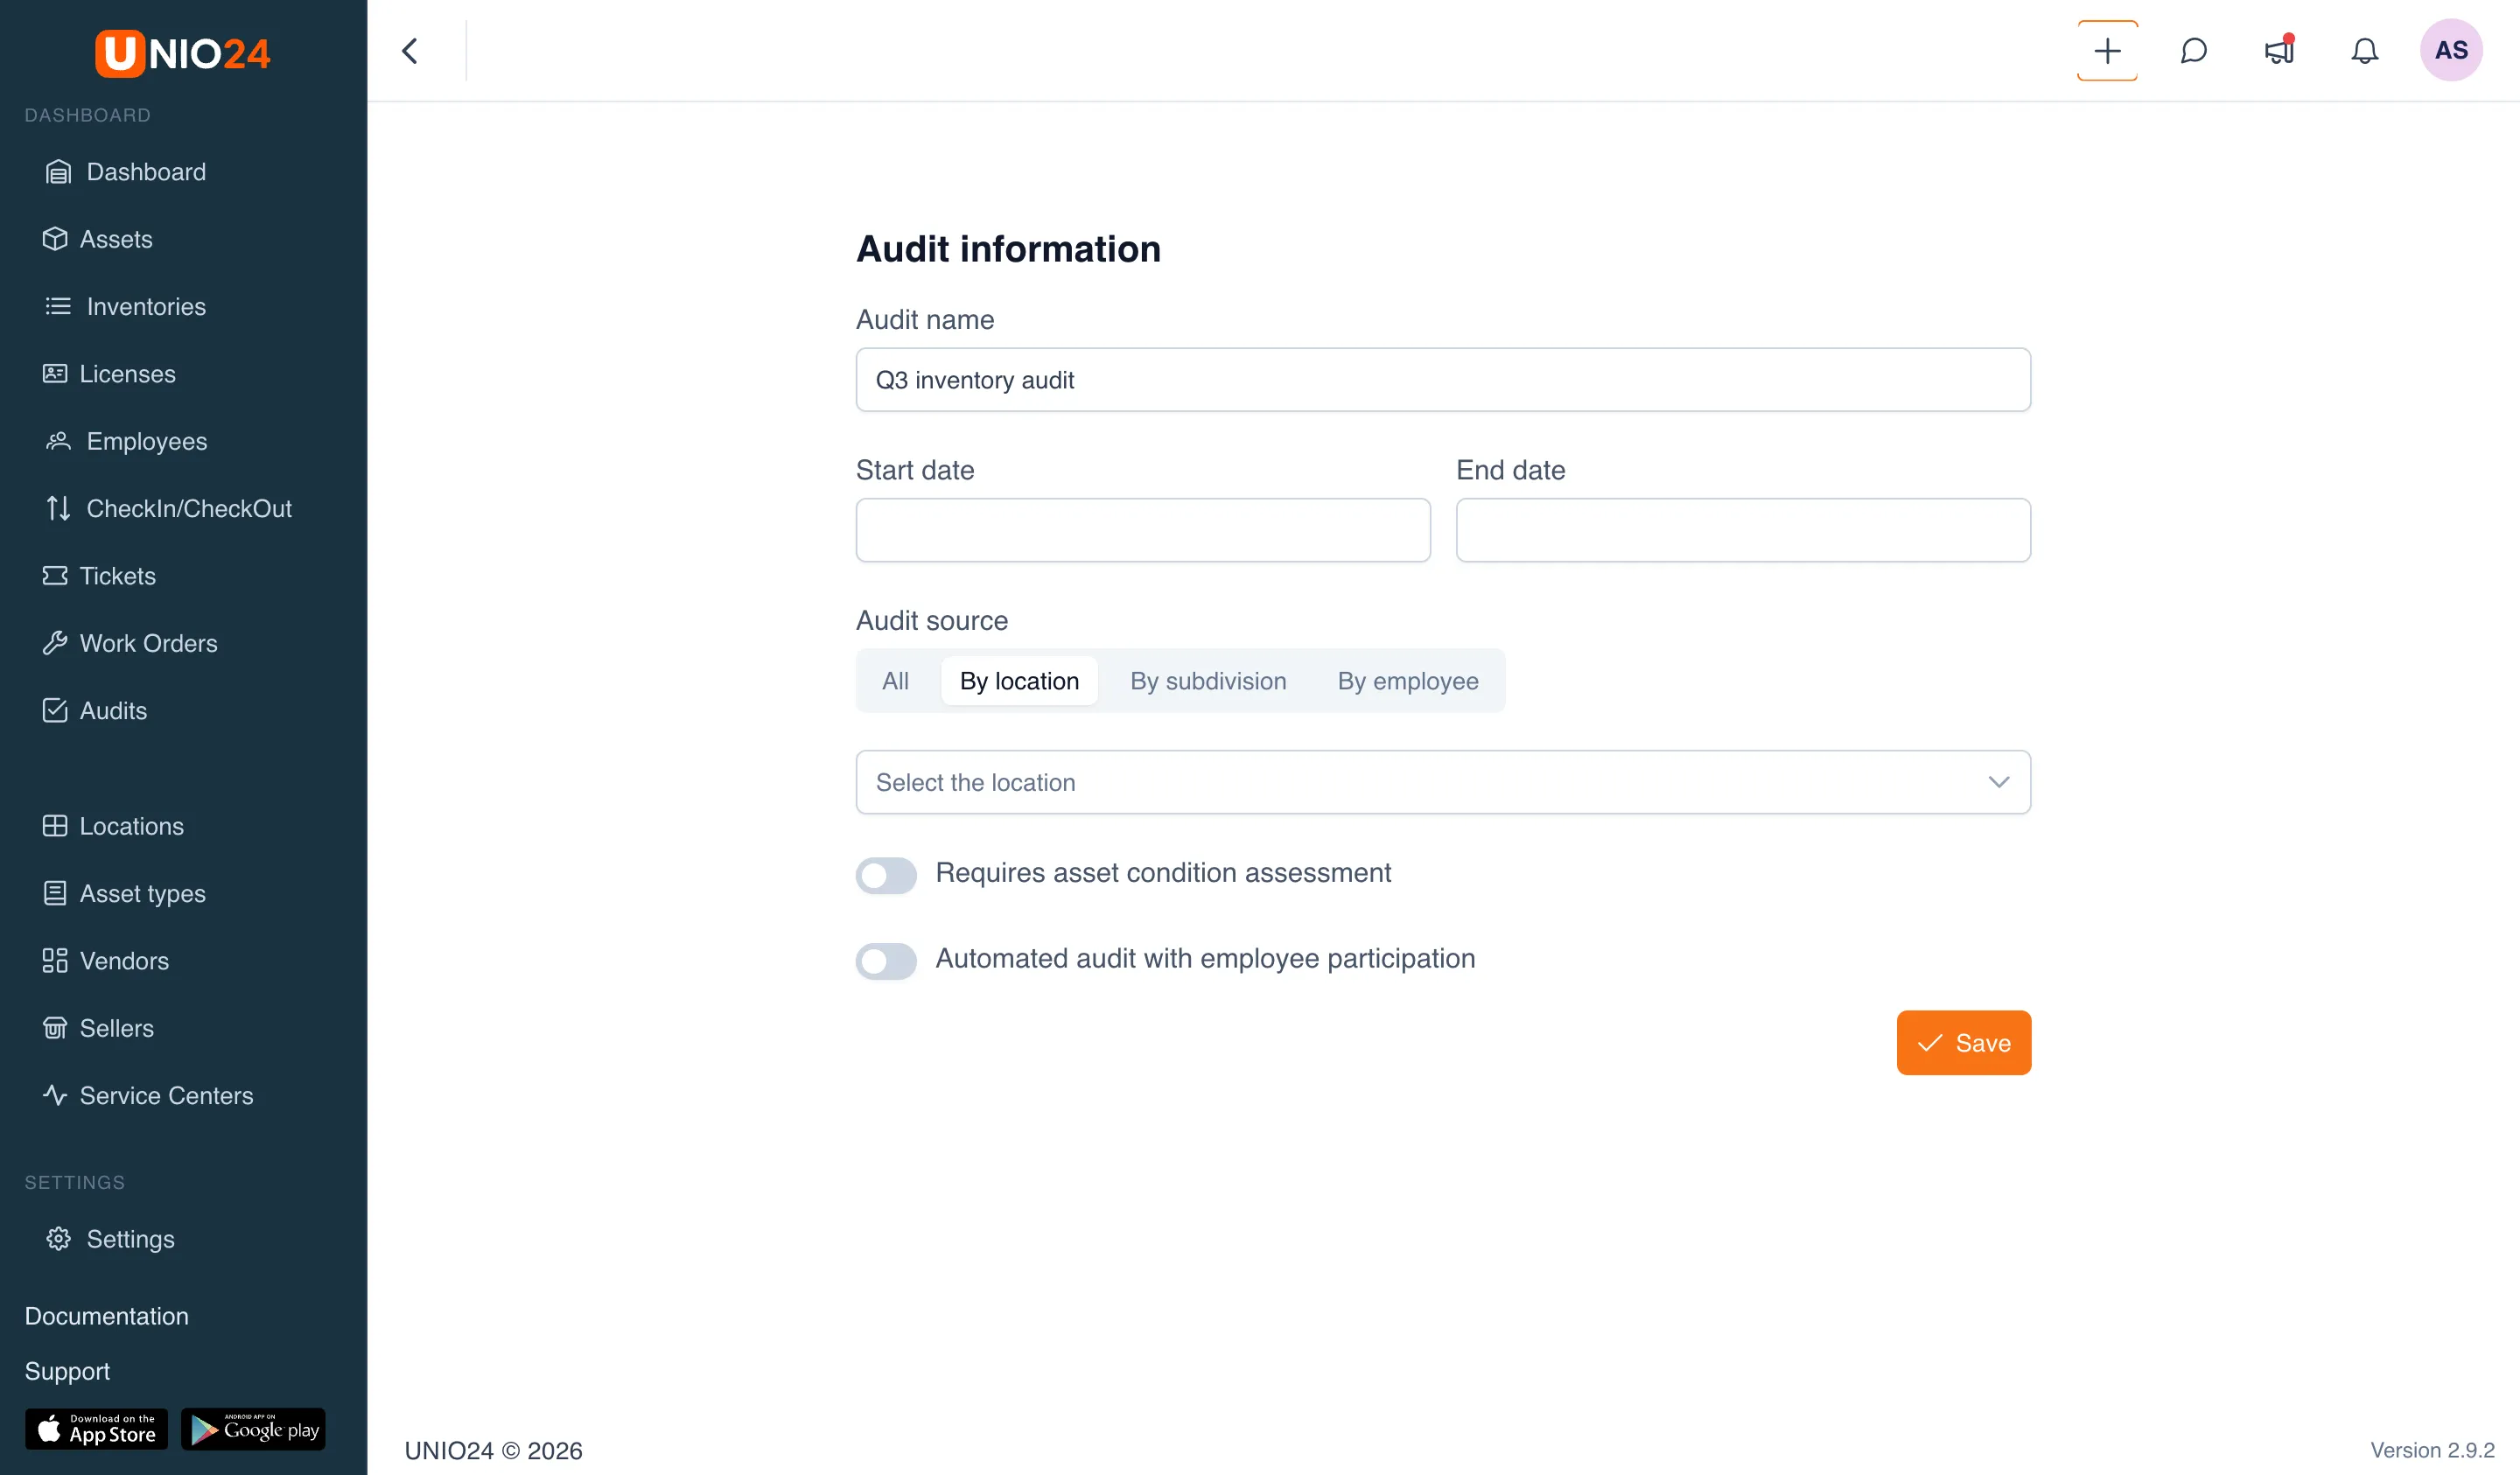
After saving, the audit appears in the list, and a list of assets to check is built from the selected scope.
Toggles
Section titled “Toggles”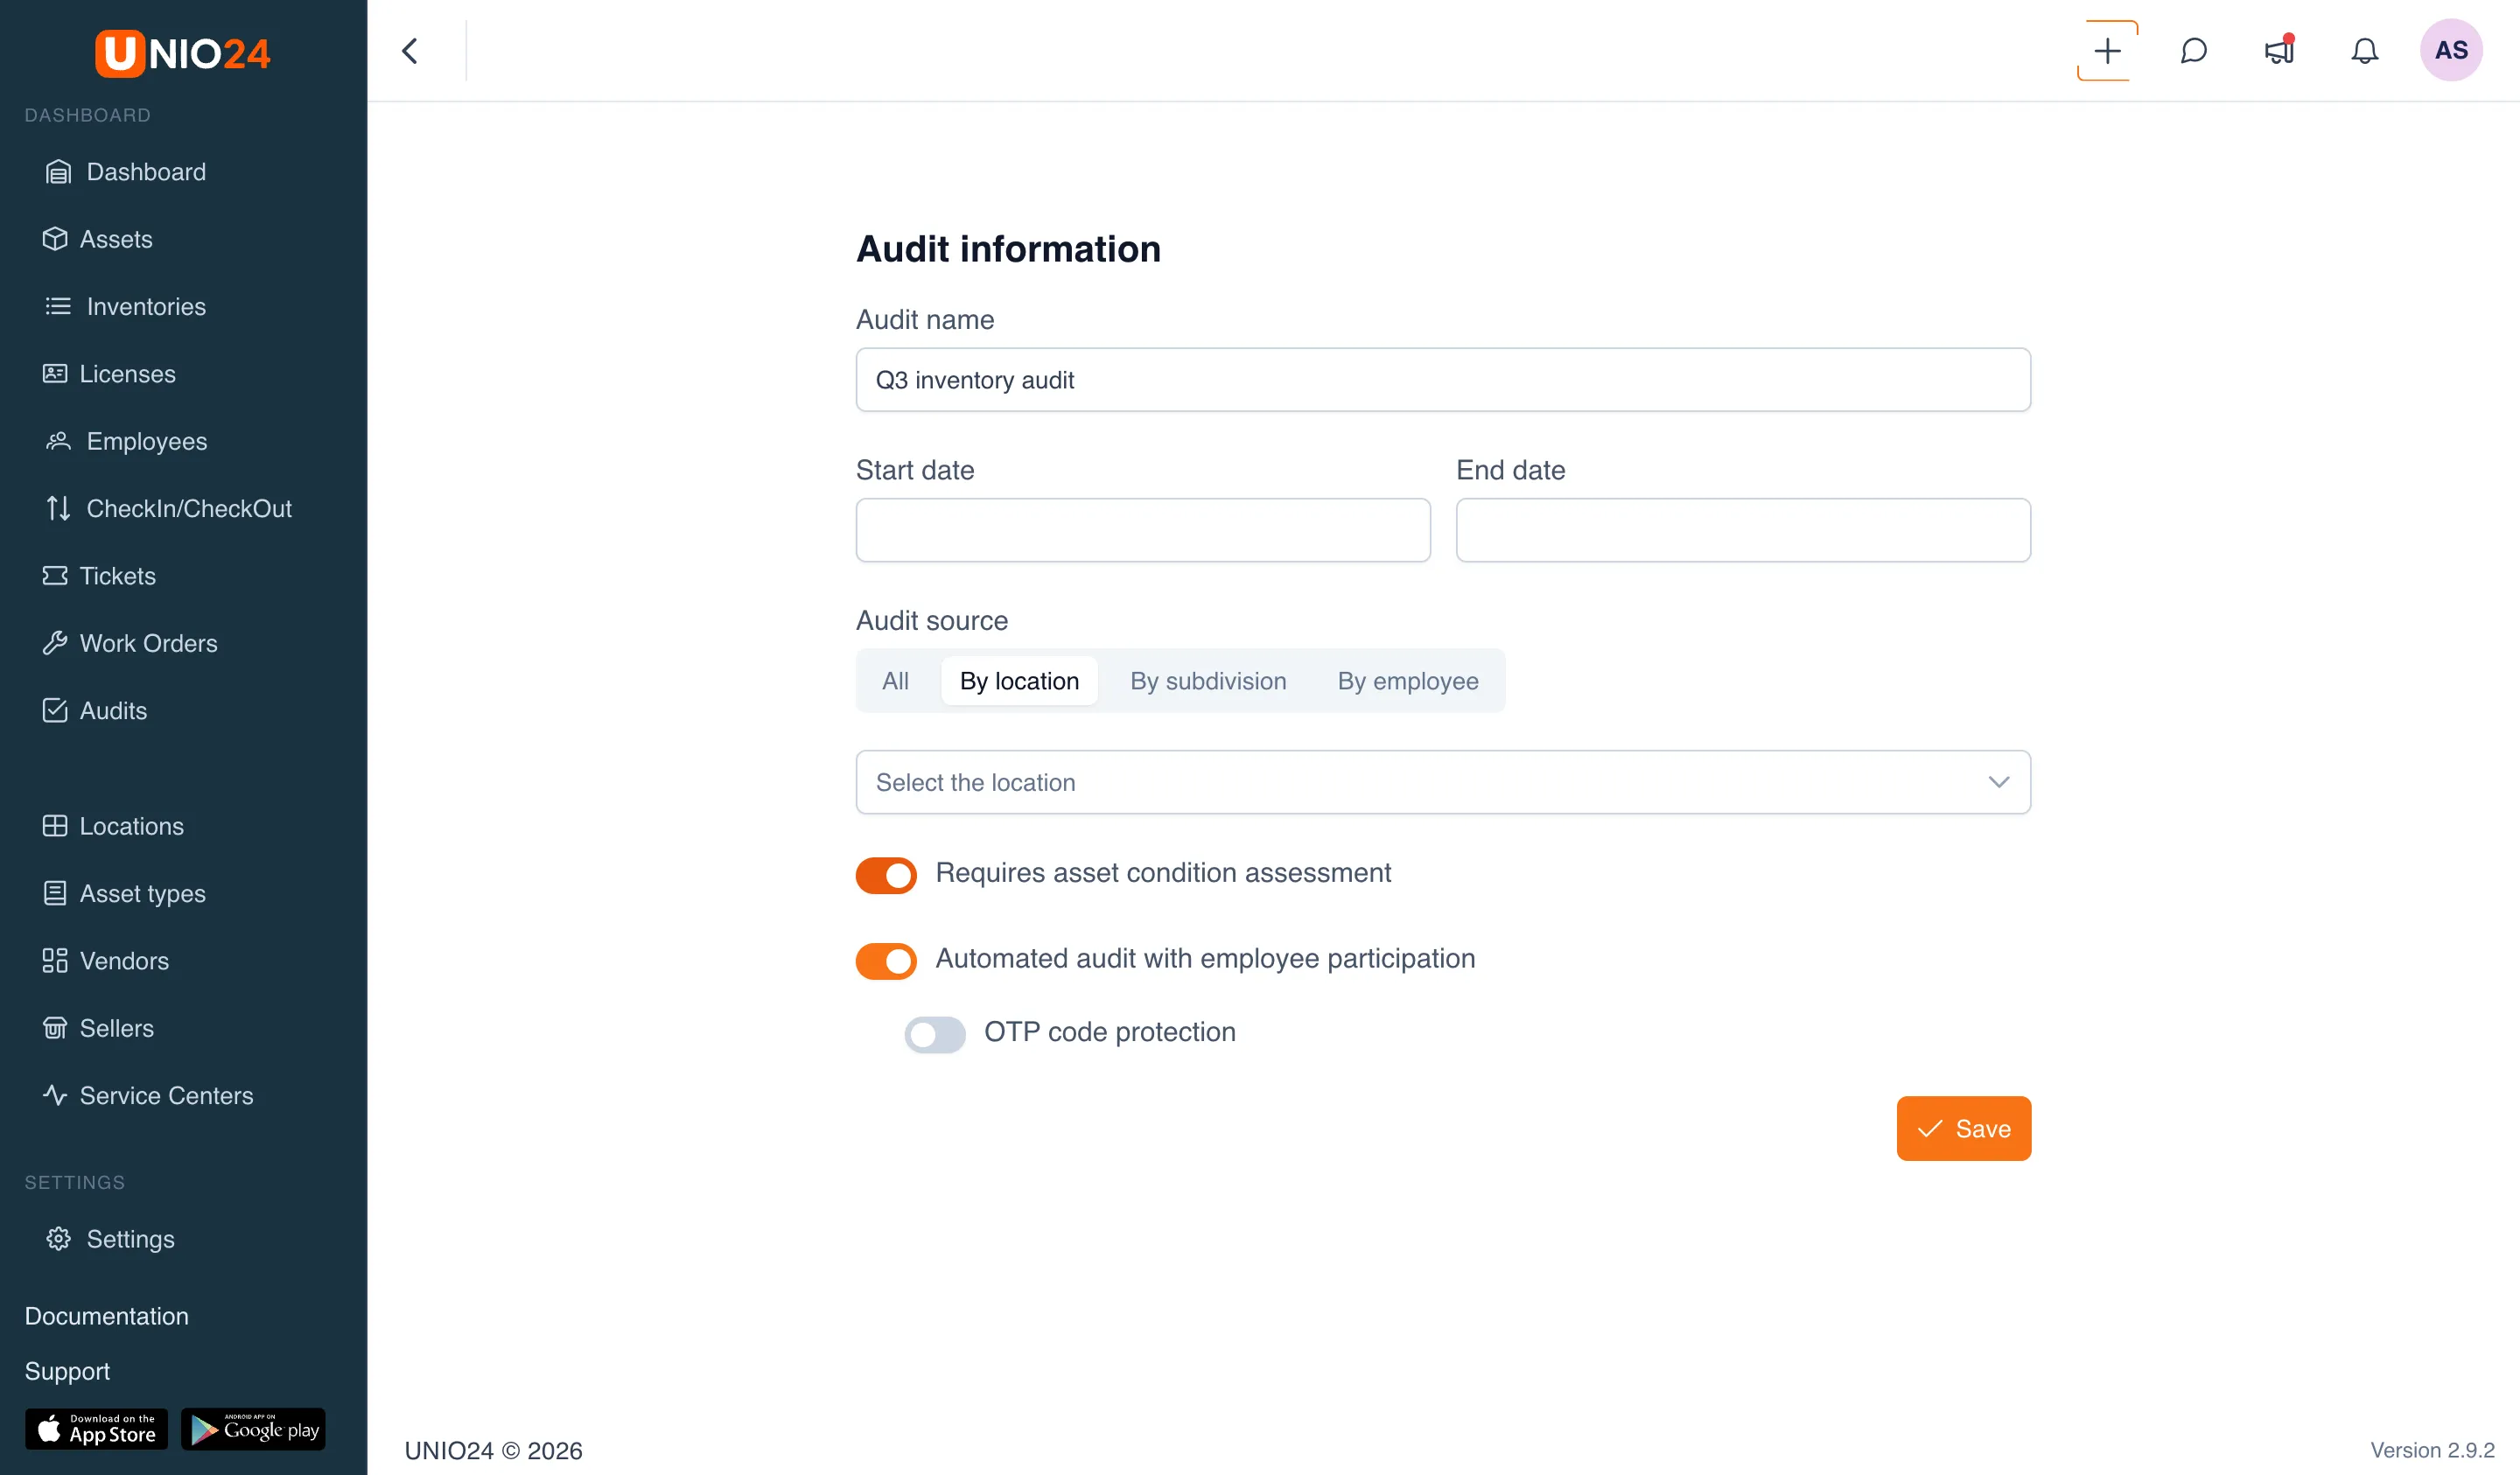
Three toggles are available in the create form:
- Requires asset condition assessment — the checker must specify a condition for every asset. With this setting on, an asset cannot be marked present without choosing a condition.
- Automated audit with employee participation — enables self-service audits (see Setting up a self-service audit).
- OTP code protection — adds a one-time confirmation code for self-service audit members. The toggle is available only when automated audit is enabled.
The source, automated audit, and OTP code protection are set at creation and cannot be edited after saving.
Running an audit
Section titled “Running an audit”- In the Audit section, open the record you need from the list.
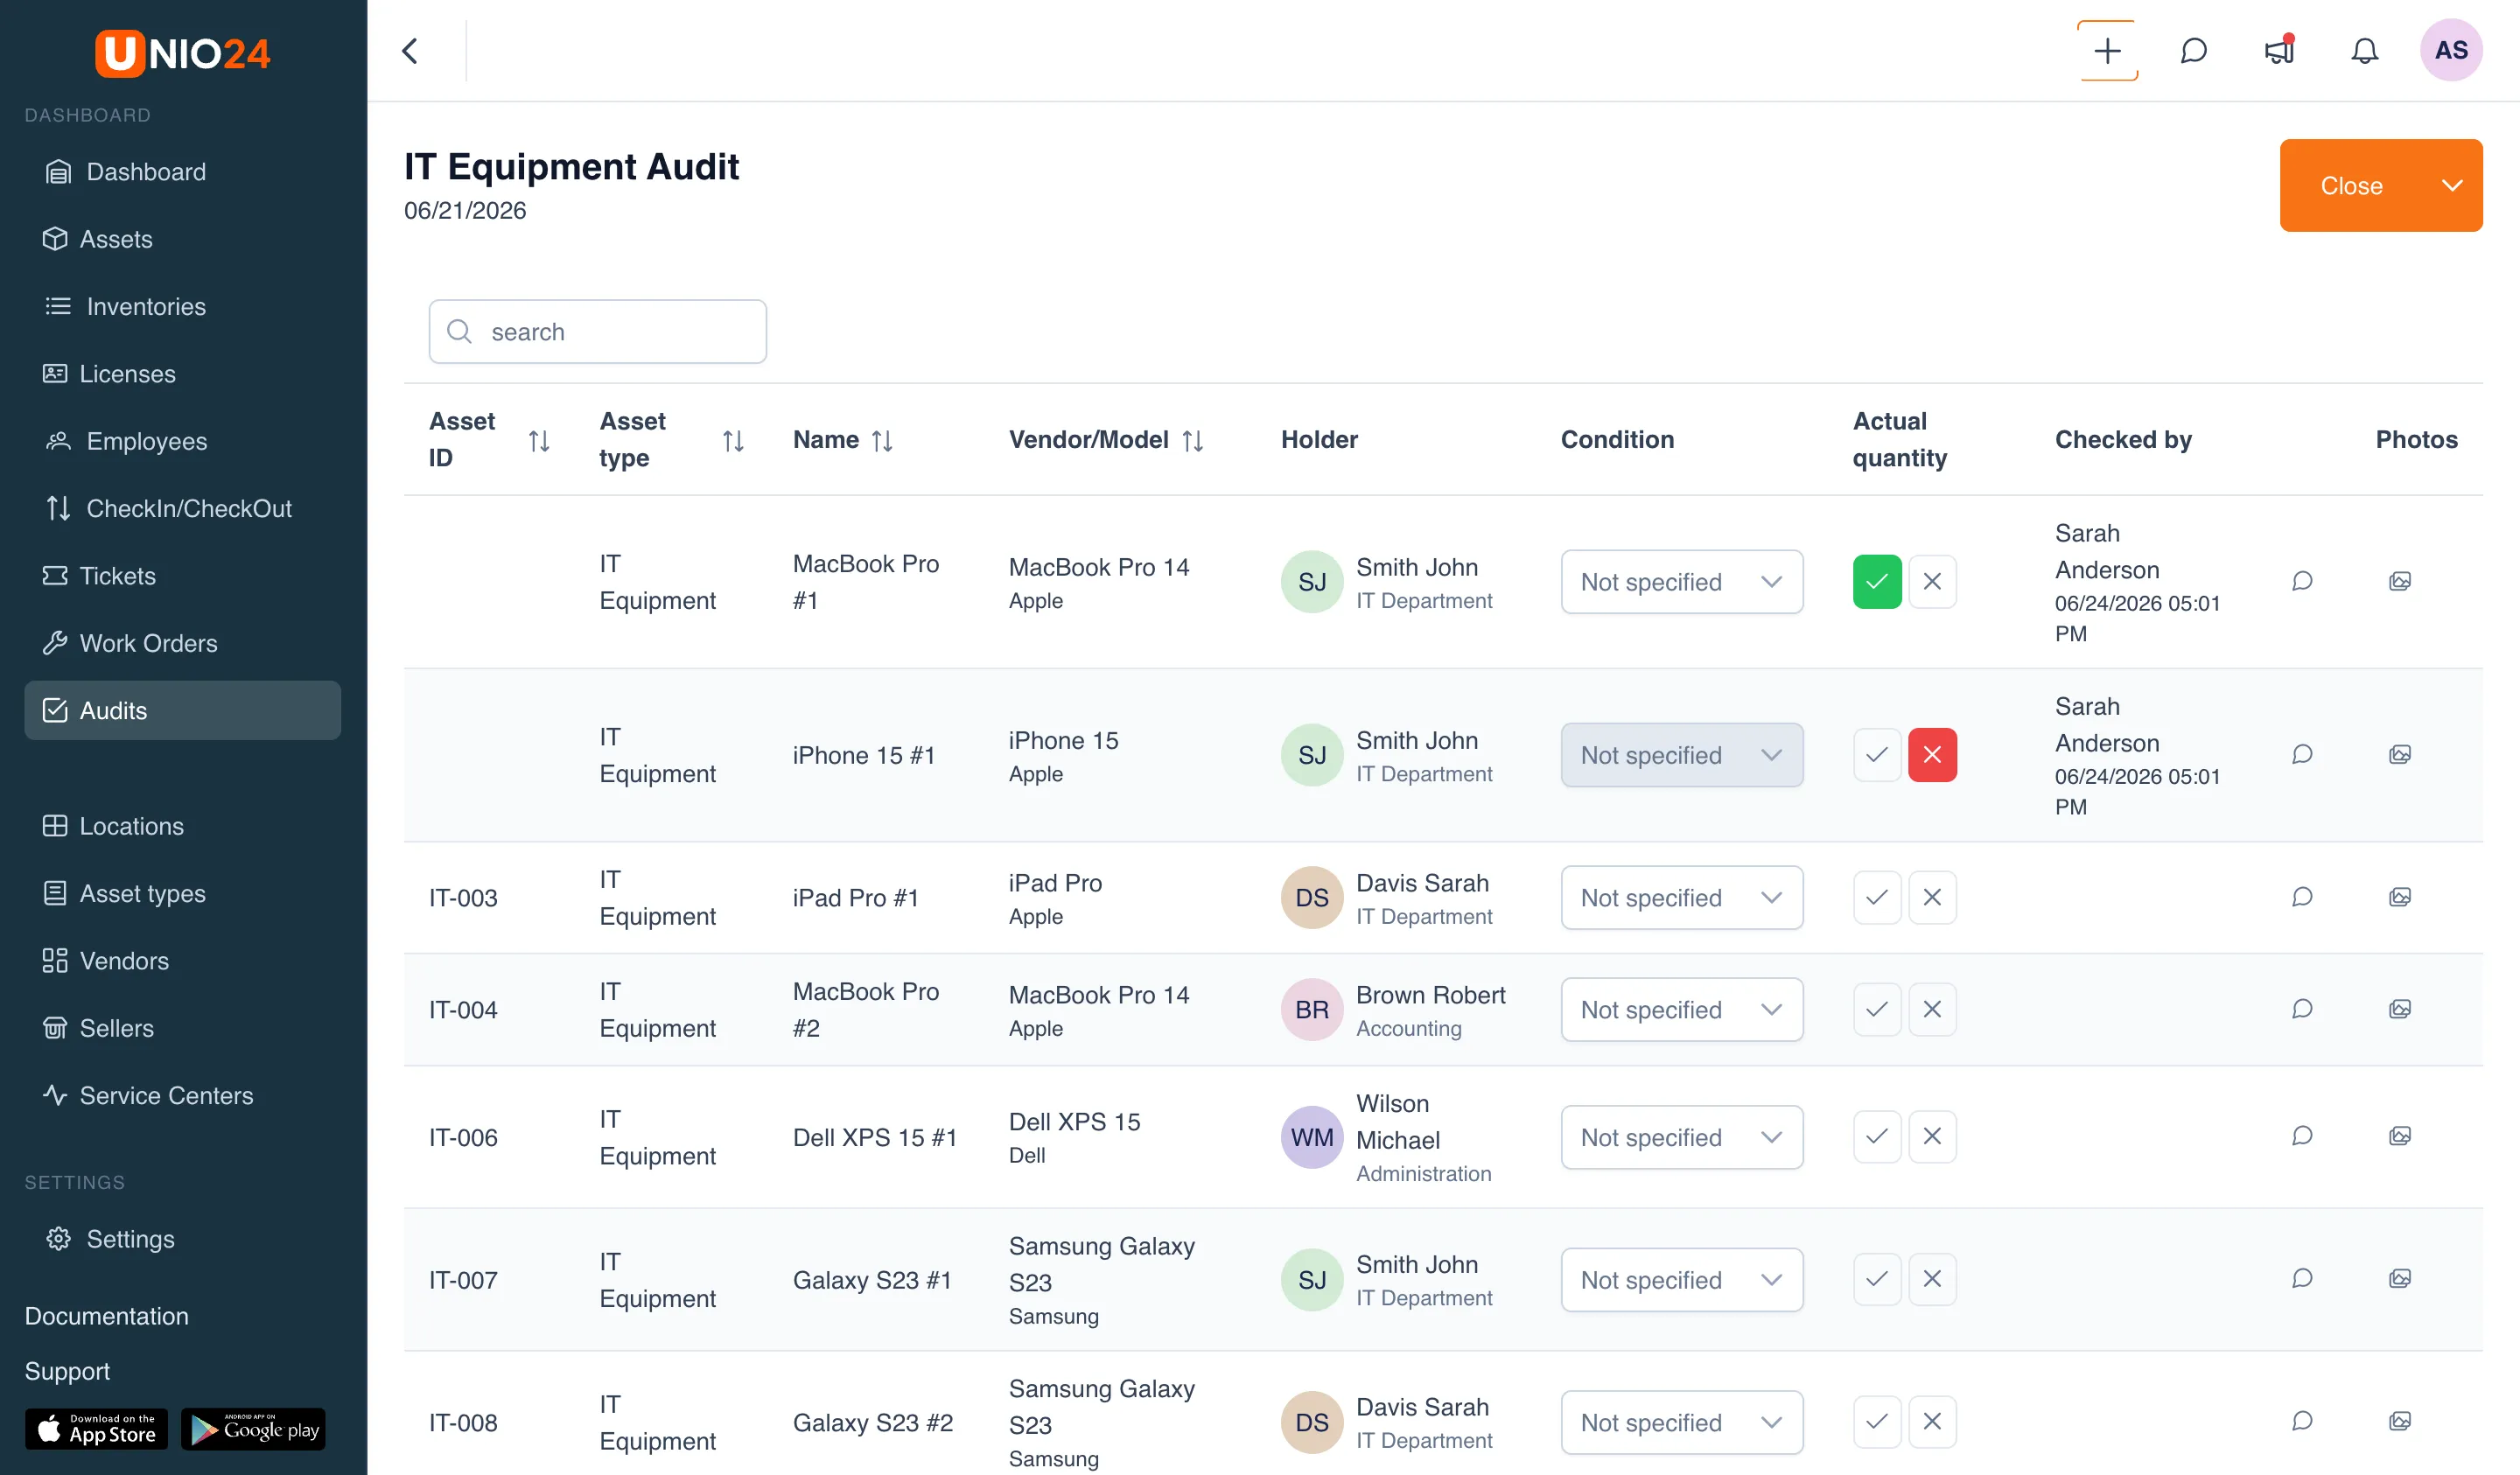
- A list of the assets that fall within the scope opens. For each asset, in the presence-buttons column:
- click the checkmark button (tooltip Present) — the asset is highlighted green;
- click the cross button (tooltip Absent) — the asset is highlighted red.
- If condition assessment is enabled, choose the asset’s condition in the Condition column. If a condition is required, the asset cannot be marked present without it.
- To add a note to an asset, click the comment icon in the row, enter text in the Note for this asset… field, and click Save.
- Check progress in the audit list in the Verified column (how many assets are verified out of the total).
An audit can also be run from the UNIO24 Mobile app by scanning the QR codes and NFC tags of assets. See the mobile app overview.
Closing and reopening an audit
Section titled “Closing and reopening an audit”- Open the audit.
- In the top-right corner, click the status button. For an active audit it is labeled Close.
- To return to a closed audit, open it and click Open.
In the audit list the status is shown as active or closed.
Exporting results
Section titled “Exporting results”- Open the audit.
- Next to the status button, open the menu and choose Export.
A file with the check results is downloaded in XLSX format.
Setting up a self-service audit
Section titled “Setting up a self-service audit”To have employees confirm the assets assigned to them themselves:
- When creating an audit, enable the Automated audit with employee participation toggle.
- If needed, enable OTP code protection so that link access requires a one-time code.
- Click Save. The system sends each employee in the scope a personal link by email.
What a member does
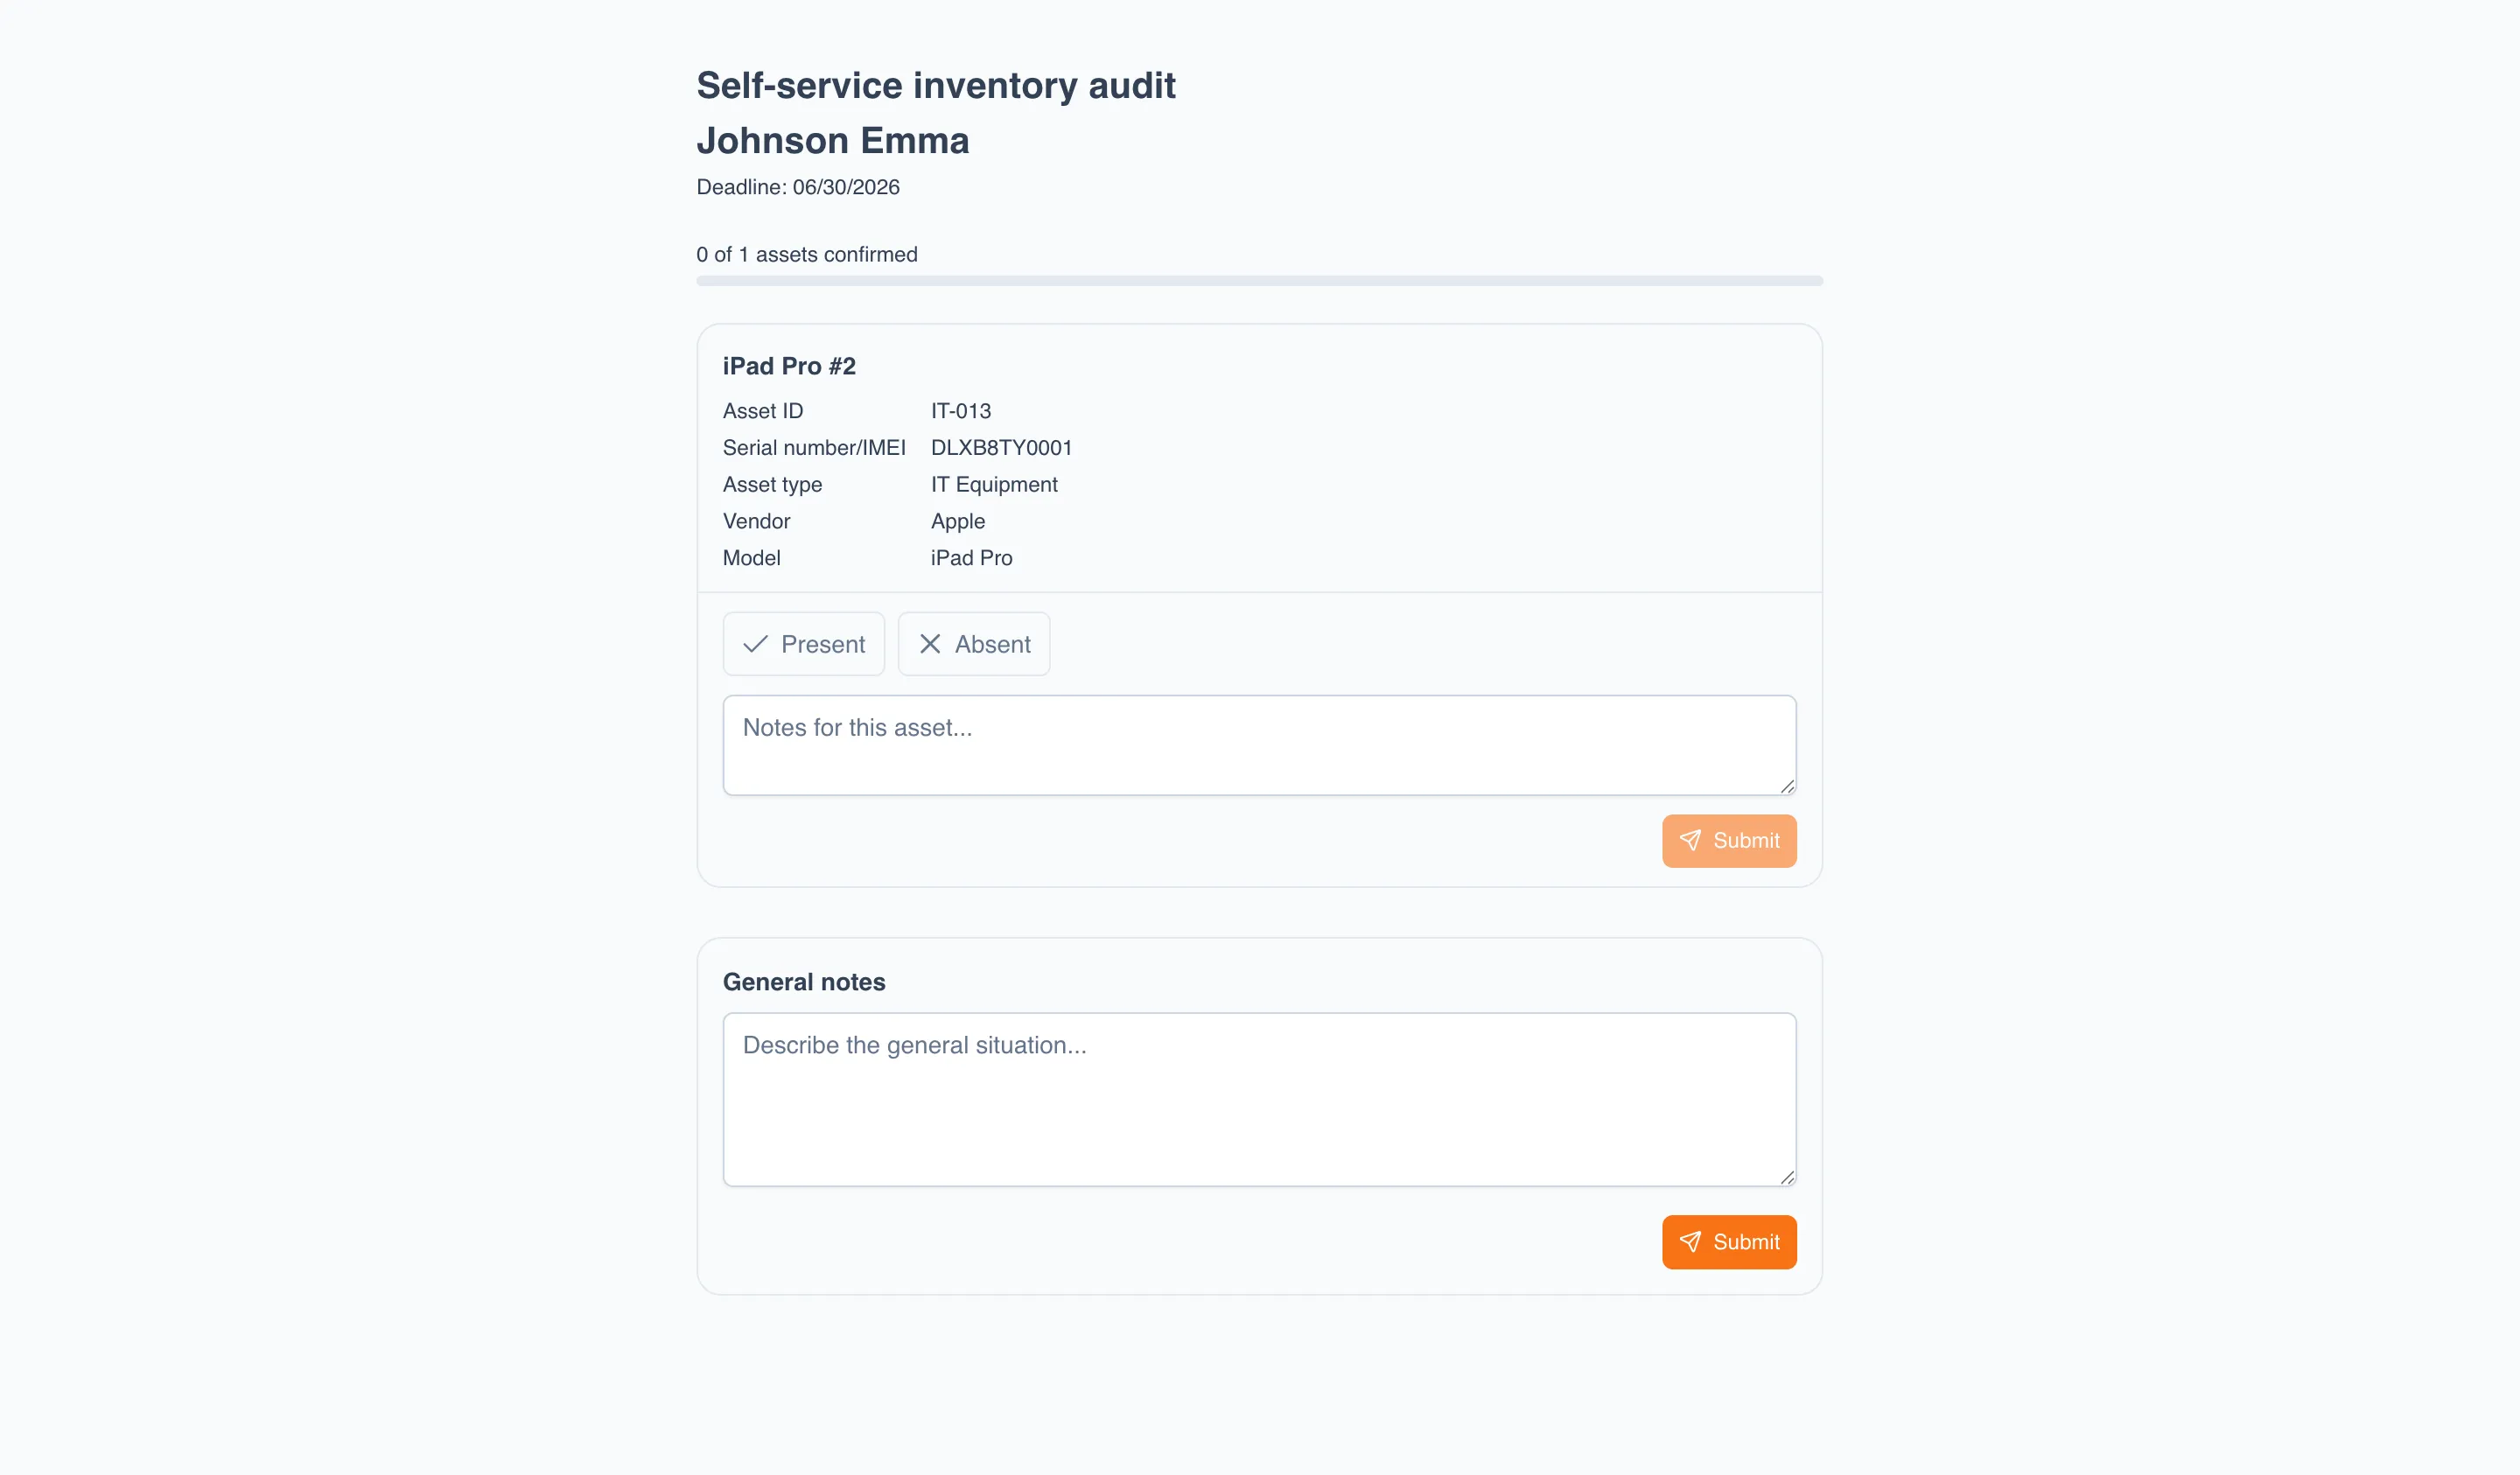
Section titled “What a member does”- Opens the link from the email.
- If OTP code protection is enabled, enters the confirmation code sent to their email and clicks Verify.
- For each assigned asset, clicks Present or Absent, specifies the Condition and a note if needed, then clicks Send.
- A progress indicator shows how many of the total assets have been confirmed.
If the audit period has expired or the audit is closed, the member sees the message Audit completed and can no longer enter data.
Tracking members
Section titled “Tracking members”- Open the self-service audit.
- Go to the Members tab.
- For each member the table shows their email, the Email status (Not sent, Sent, Failed, No email), the Last activity, and Confirmed (how many assets are confirmed out of the total).
- To send the email again, click Resend. To copy a member’s personal link, click the link icon (tooltip Copy link).