

Configure fleet
These tasks are done by an administrator or by an employee with the Settings permission in the “Fleet” group.
Turn on the module
Section titled “Turn on the module”The module is turned on under Settings → Modules, on the Fleet card. After that:
- the Fleet group appears in the menu, and the Fleet page (Fleet settings) appears in the settings;
- document types are added to the document types list for vehicles (Vehicle registration, Liability insurance, Comprehensive insurance, Roadworthiness test, Tachograph calibration, Lease agreement) and for drivers (Driver’s license, Driver medical certificate, Driver qualification card, ADR certificate, Driver safety briefing). Vehicle registration, liability insurance, and the roadworthiness test are blocking documents: when one has expired, checking out the vehicle warns or is blocked, according to the document settings;
- system expense types appear: parking, tolls, car wash, insurance, and others;
- if Inspections is on, the “Daily vehicle check” and “Vehicle check-out and check-in” templates are added. If Inspections is turned on later, the templates appear then.
The module uses Booking and Inspections when they are on, but works without them.
To get started, do this in order:
- Mark the vehicle types.
- Check the general settings: the driver check mode and the fleet managers.
- If needed, set up vehicle groups.
- Grant permissions to dispatchers and drivers.
- Add vehicles and drivers.
General settings
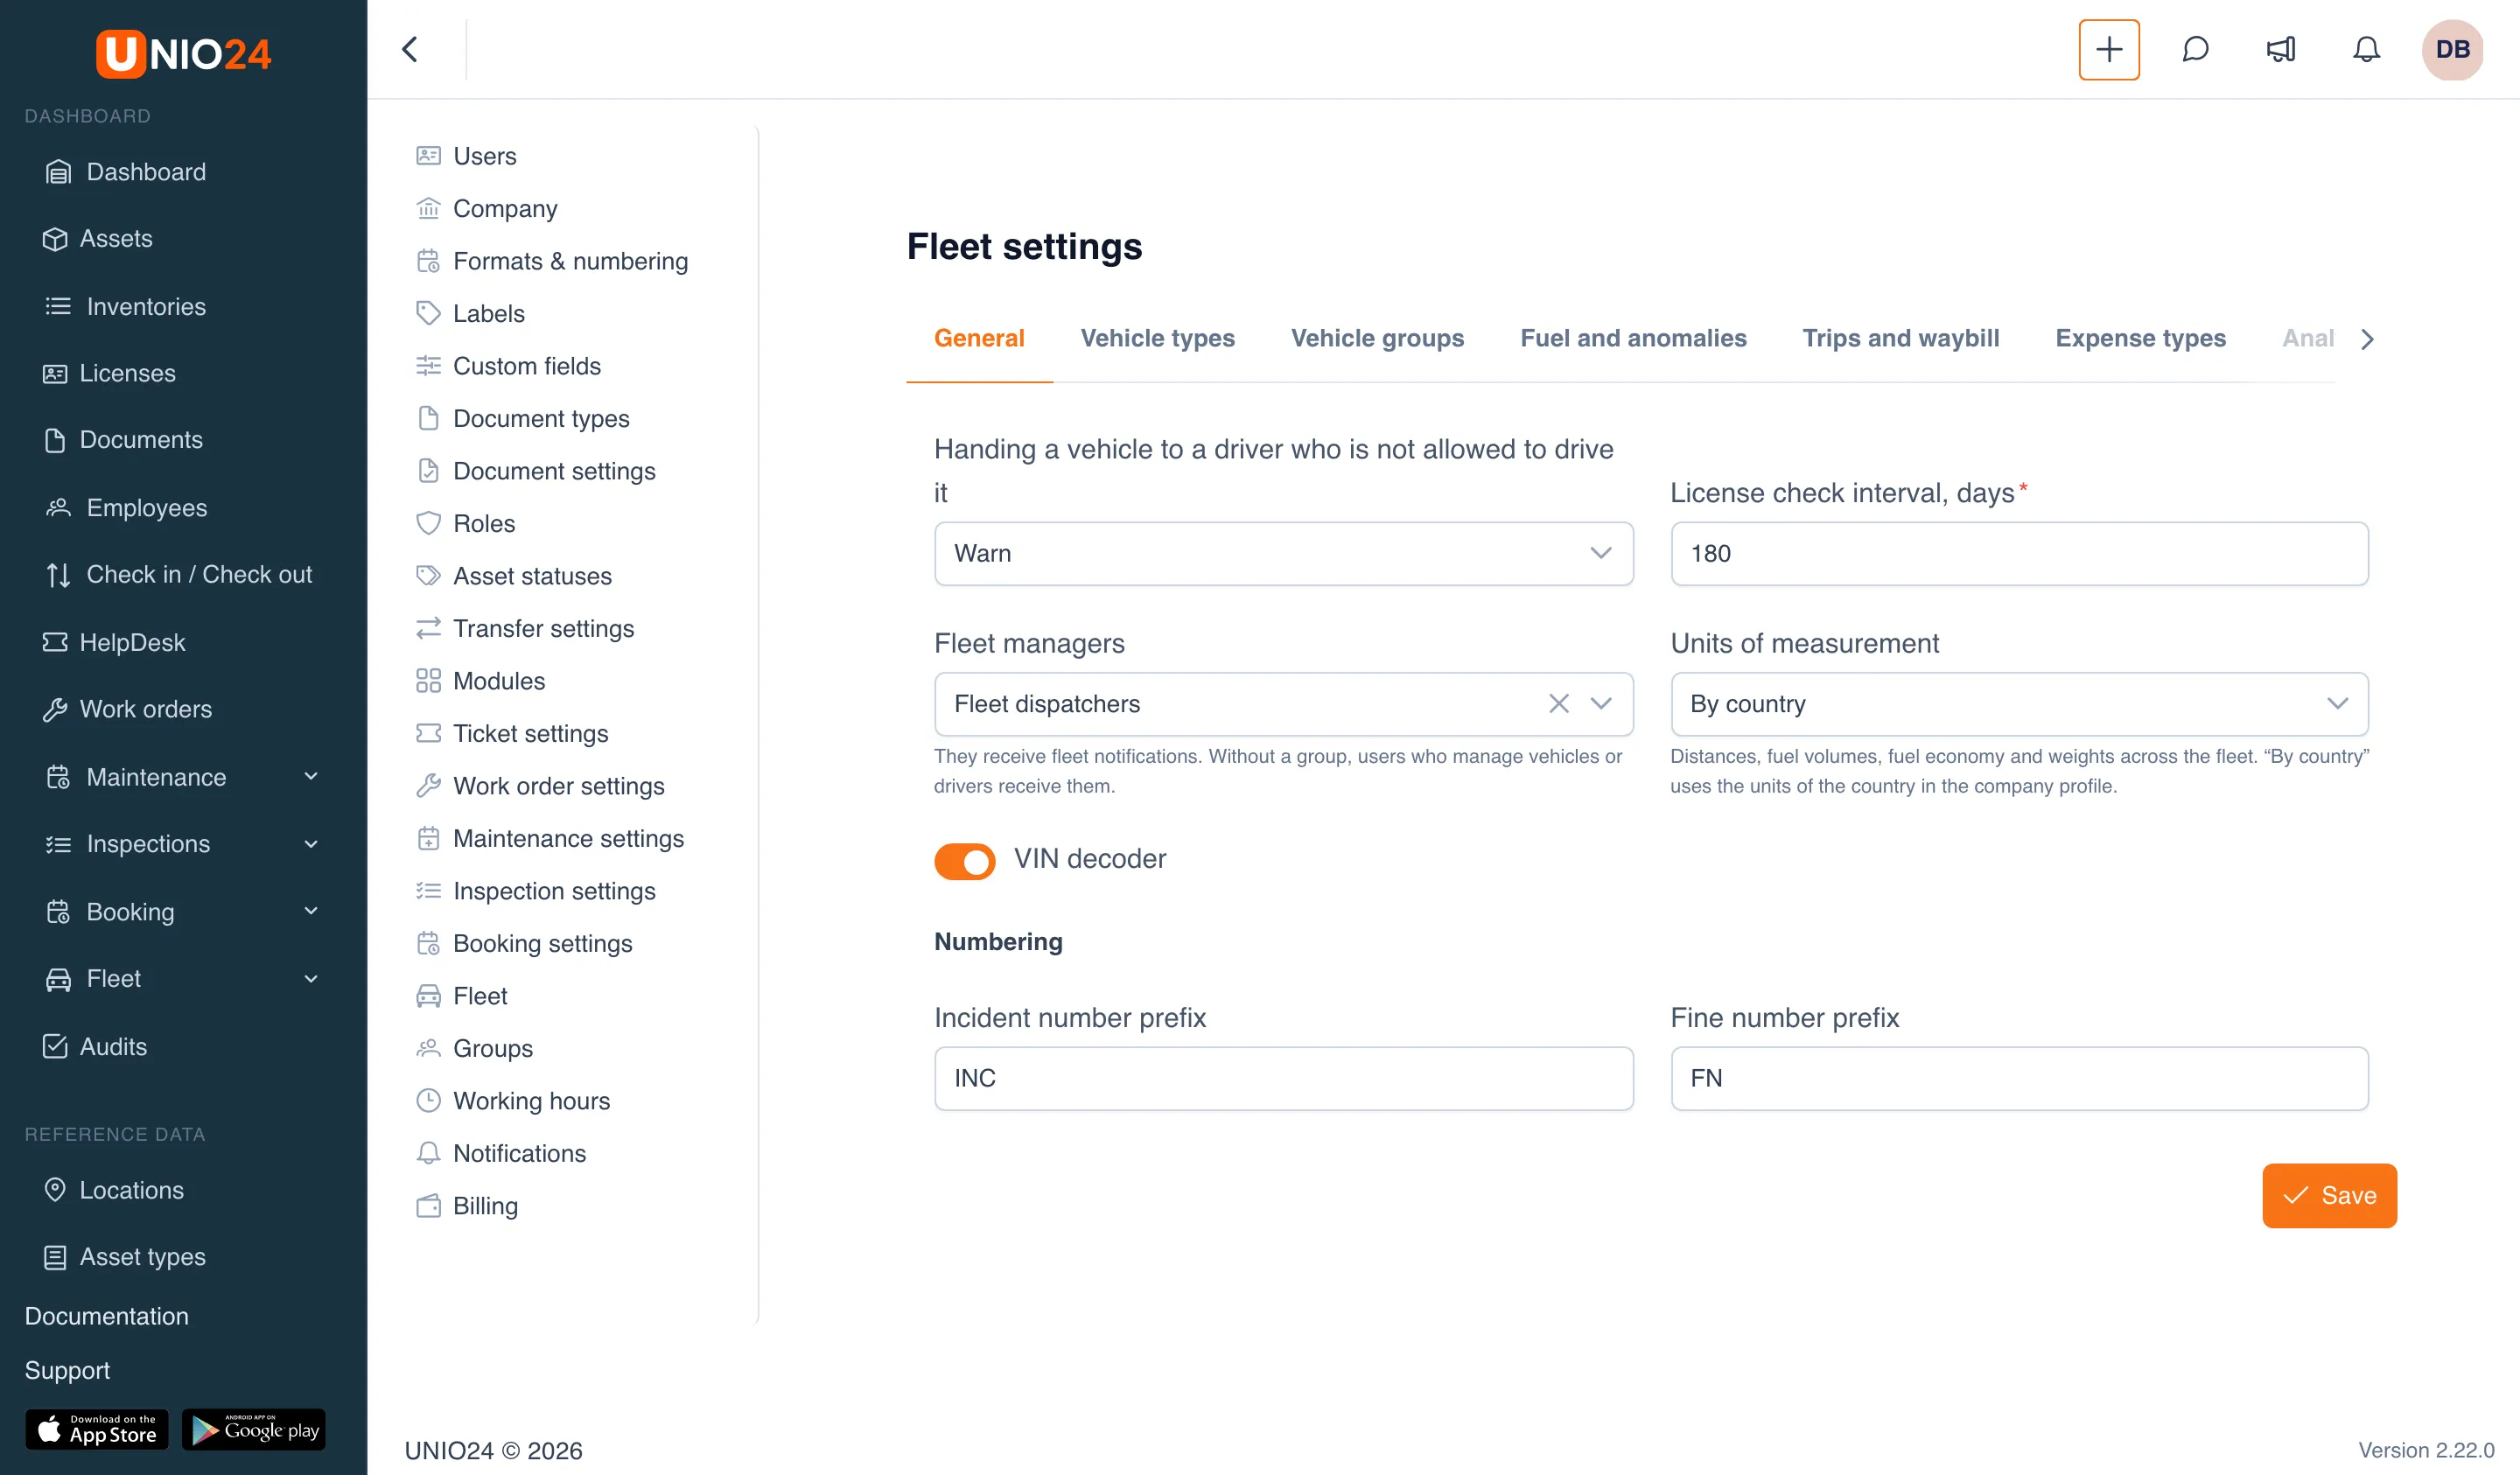
Section titled “General settings”- Open Settings → Fleet → the General tab.
- In Handing a vehicle to a driver who is not allowed to drive it, choose:
- Warn: the checkout form shows why the driver isn’t allowed, but the checkout can be saved; the fleet managers get a notification;
- Block: a vehicle can’t be checked out to a driver who isn’t allowed to drive it.
- In License check interval, days, enter how often drivers’ licenses are checked (180 days by default). The date of the next check is calculated from it.
- In Fleet managers, choose a user group. Its members get fleet notifications. If no group is chosen, the notifications go to users who manage vehicles or drivers.
- In Units of measurement, choose the units of distance, fuel, fuel economy, and weight for the whole fleet: By country (from the country in the company profile), Metric (km, l, l/100 km, kg), US (mi, gal, mpg, lb), or UK (mi, l, mpg, kg). A company in the United States gets US units with By country.
- The VIN decoder switch turns on the Fill in from VIN button in the vehicle form.
- In the Numbering section, change the Incident number prefix (
INCby default) and the Fine number prefix (FN) if needed. - Click Save.
Mark vehicle types
Section titled “Mark vehicle types”Only an asset of a type marked as a vehicle type can become a vehicle. The asset types themselves are created under Reference data → Asset types in the main menu.
- Open Settings → Fleet → the Vehicle types tab.
- In the Mark an asset type list, choose a type, for example “Truck”.
- Choose the default class (Car, Truck, Special vehicle, and so on) and the main meter: Odometer or Engine hours.
- Click Add.
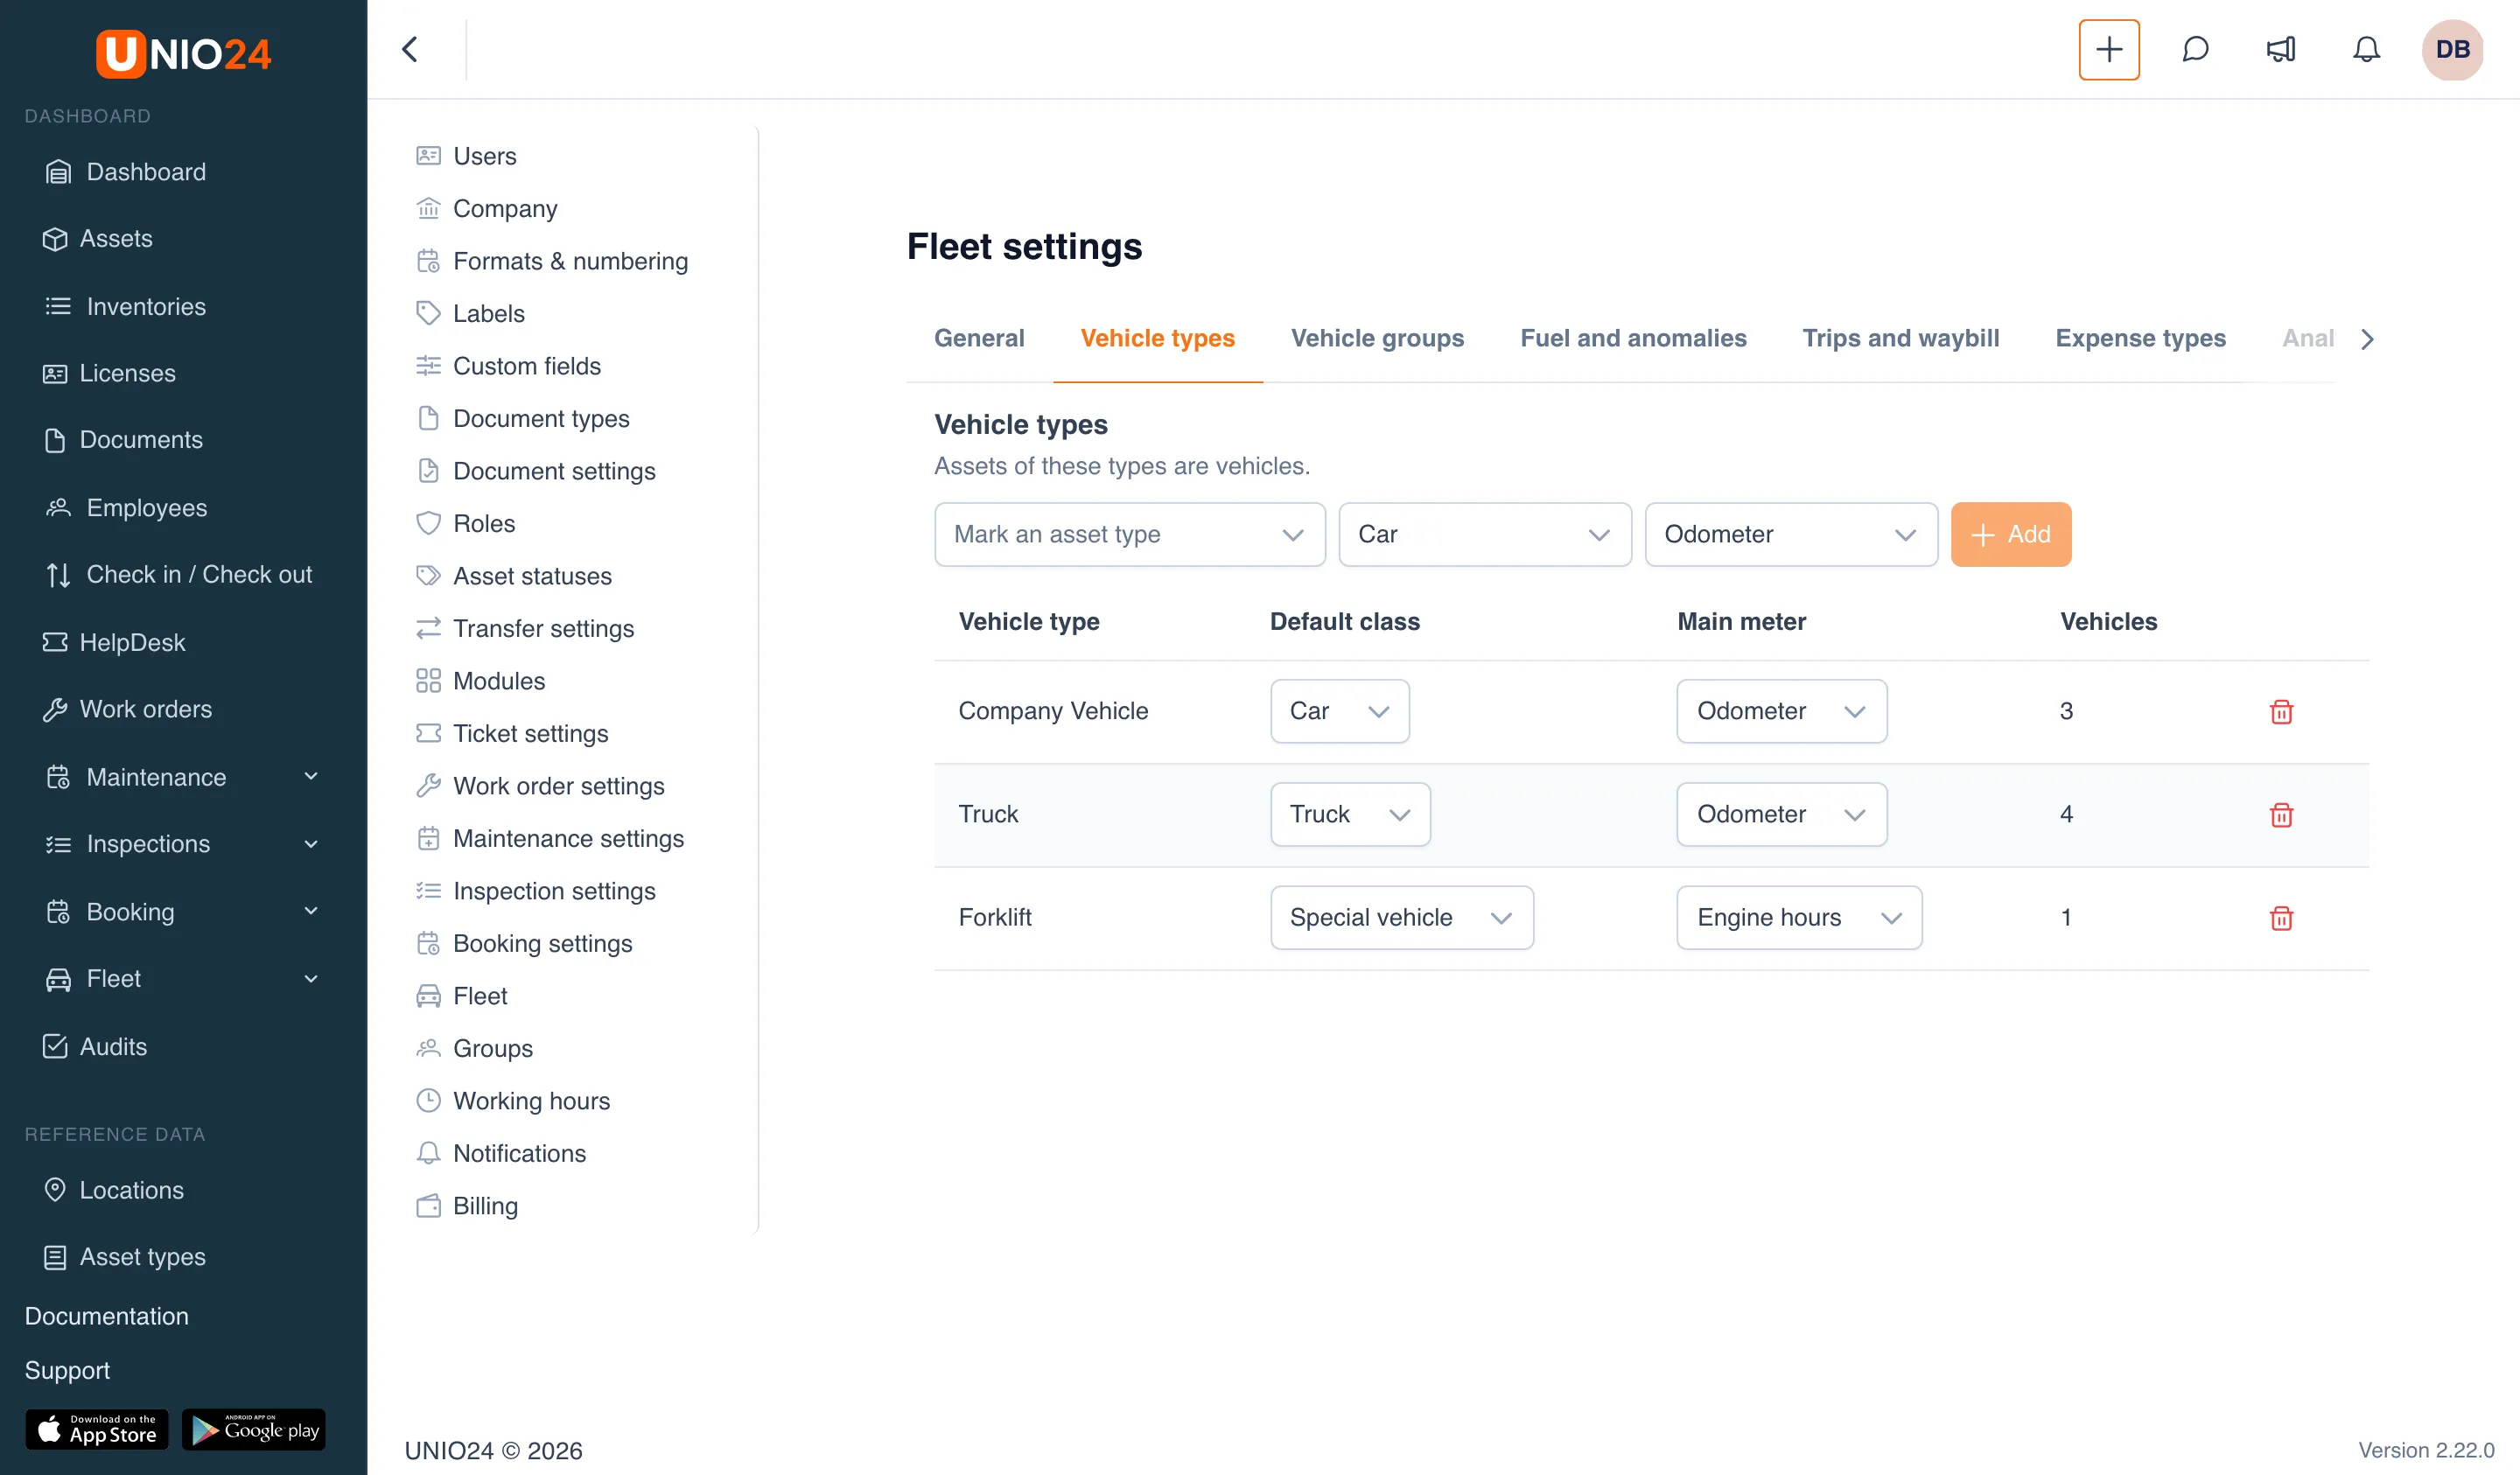
You can change the class and meter right in the table row; they are filled in for new vehicles of that type. You can also mark a type straight from the vehicle form: choose Add vehicle type in the type list.
To stop treating a type as vehicles, click Delete in its row and confirm. If the type already has vehicles, UNIO24 asks again: their data is kept, but the vehicles leave the fleet lists.
Vehicle groups
Section titled “Vehicle groups”Groups split the fleet by site, department, or purpose, for example “Austin”, “Denver”, “Houston”. Lists, deadlines, and analytics filter by group, and a group can have its own managers: they get notifications about the vehicles in their group along with the general fleet managers.
- Open Settings → Fleet → the Vehicle groups tab.
- Click Add group.
- Enter the Name and, if needed, choose the Parent group (groups can be nested) and the Group managers, a user group.
- Click Save.
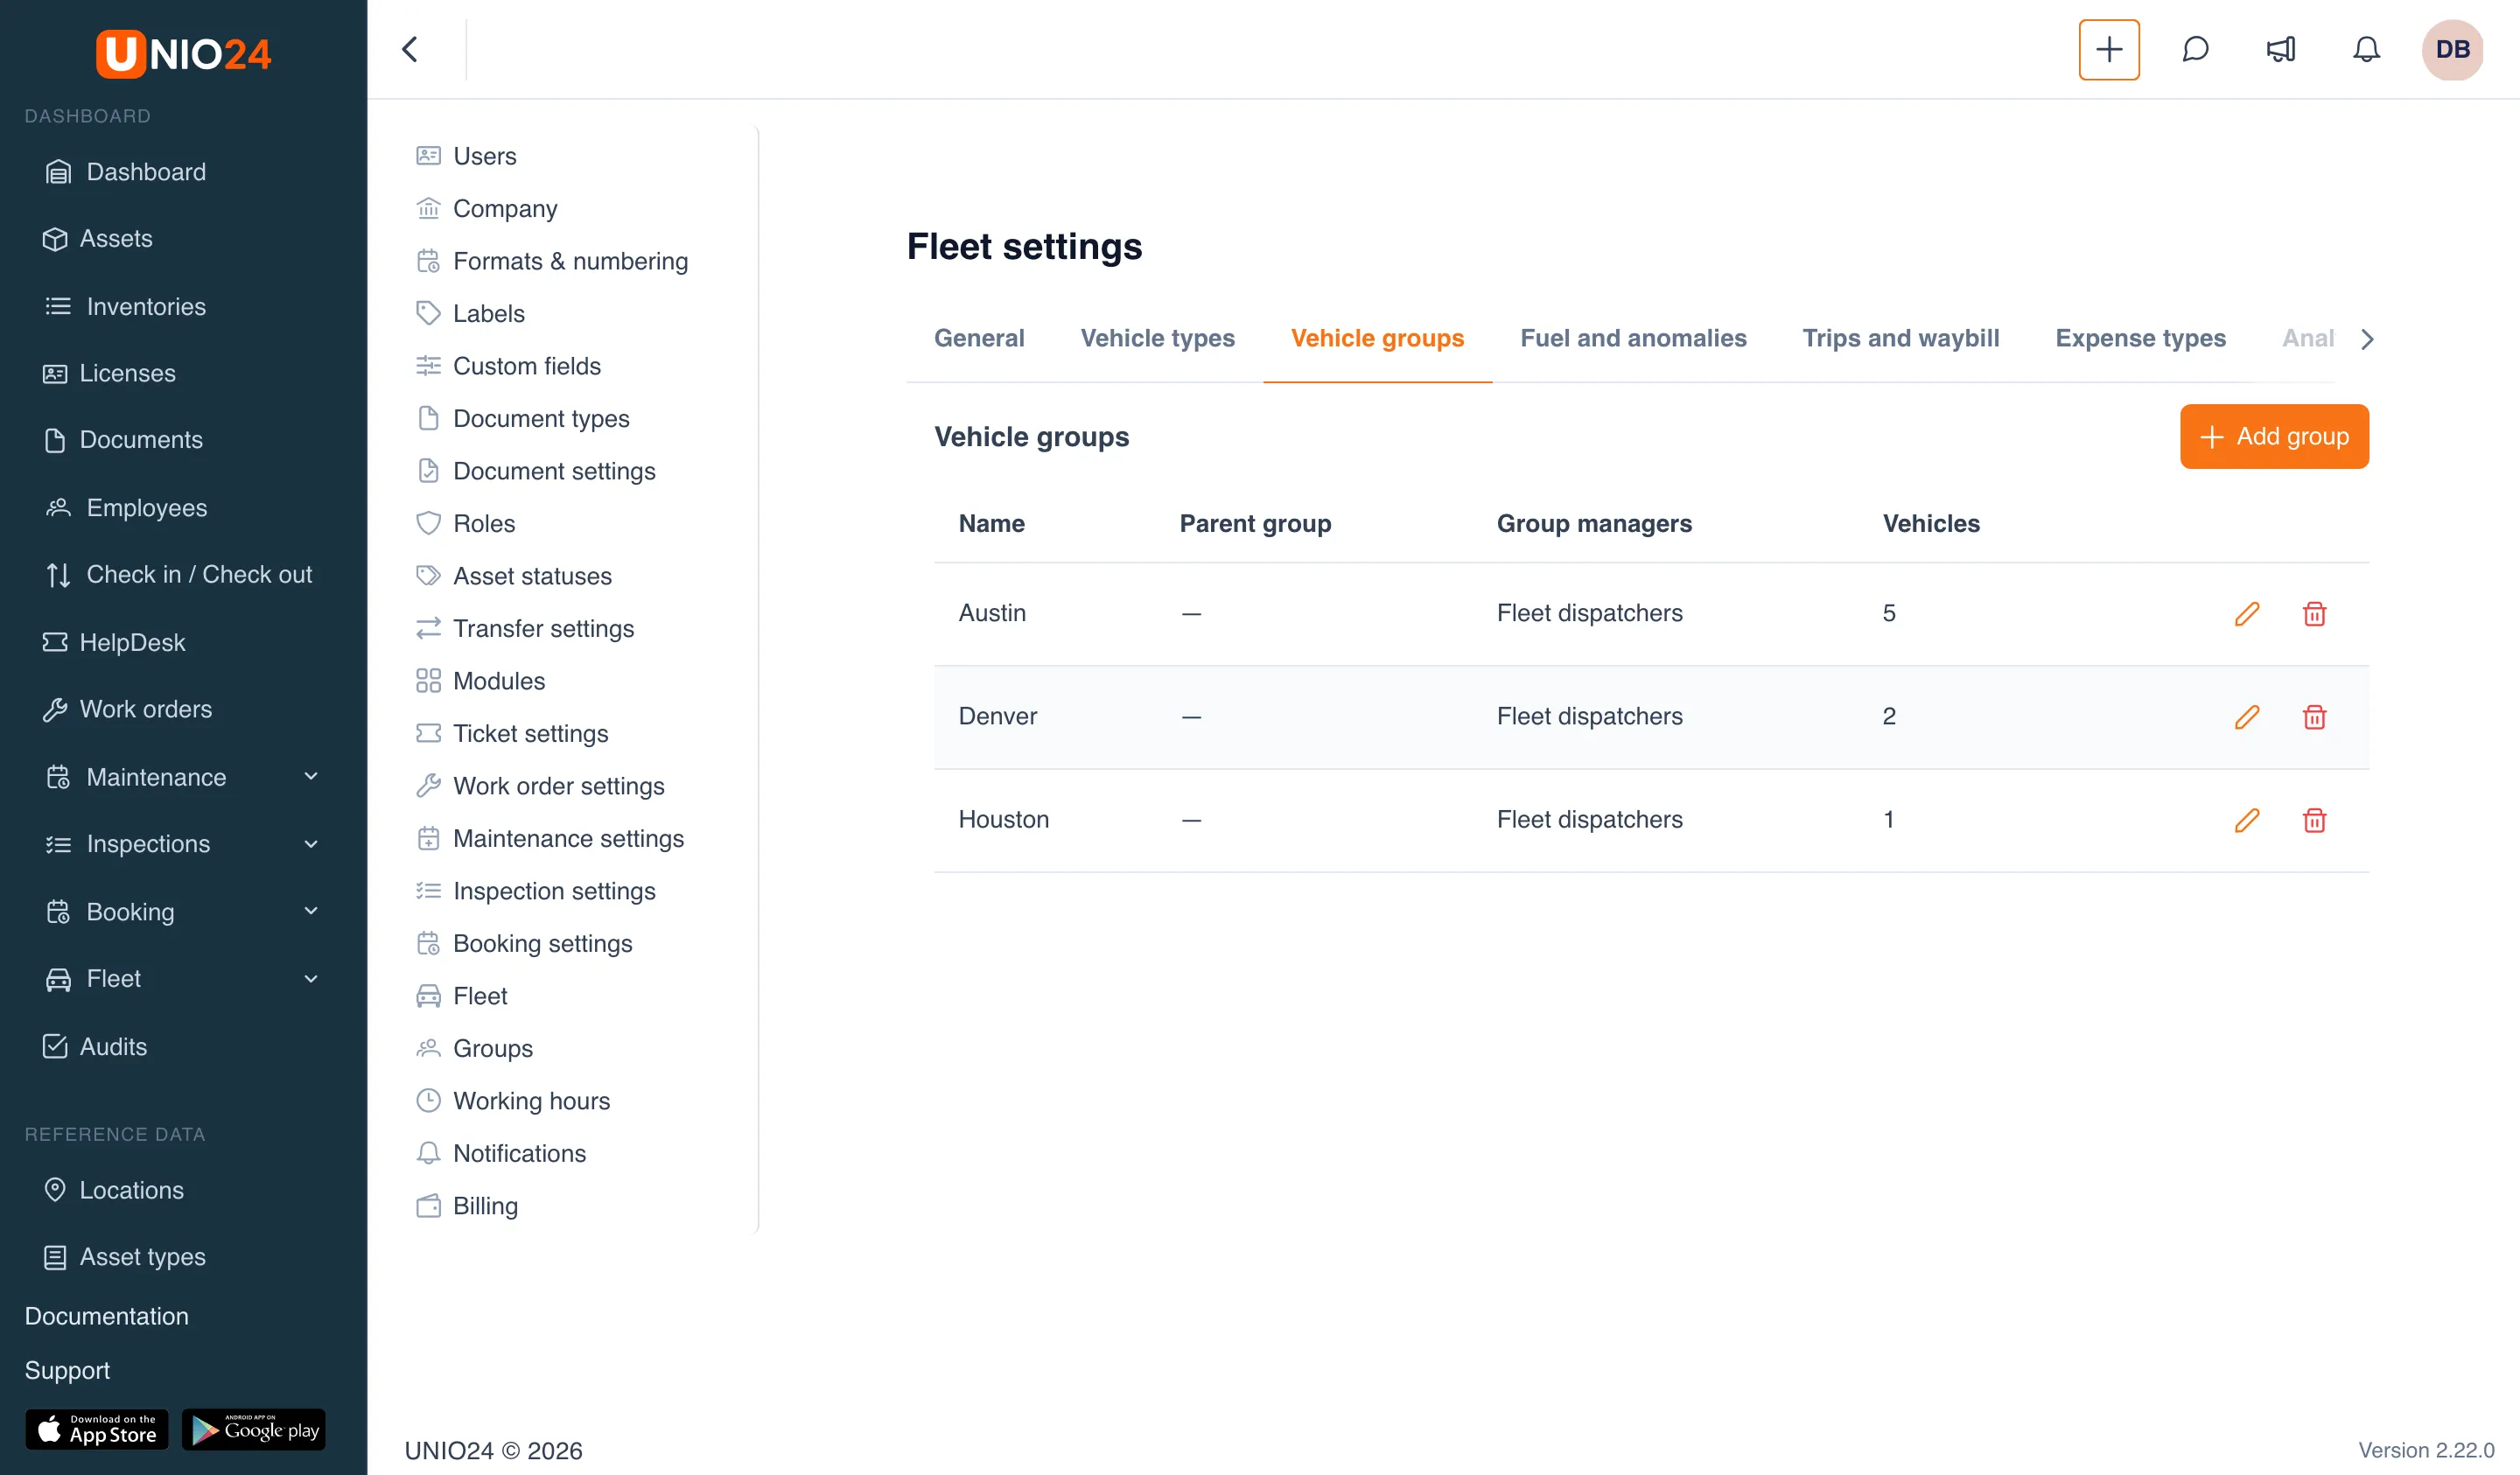
A vehicle’s group is chosen in its form, in the Vehicle group field. To change or delete a group, use Edit and Delete in its row.
Fuel and anomalies
Section titled “Fuel and anomalies”On the Fuel and anomalies tab:
- Consumption flag threshold (× nominal): how many times the consumption between two full fill-ups has to exceed the vehicle’s nominal consumption for the fuel entry to get a high consumption flag. The default is 1.3, that is 30% over nominal; allowed values are from 1.01 to 10;
- Flag refueling outside working hours: fuel entries outside the company’s working hours get a flag too.
Click Save. The other fuel entry flags are described in Fuel, trips and expenses and the Fleet reference.
Trips and waybill
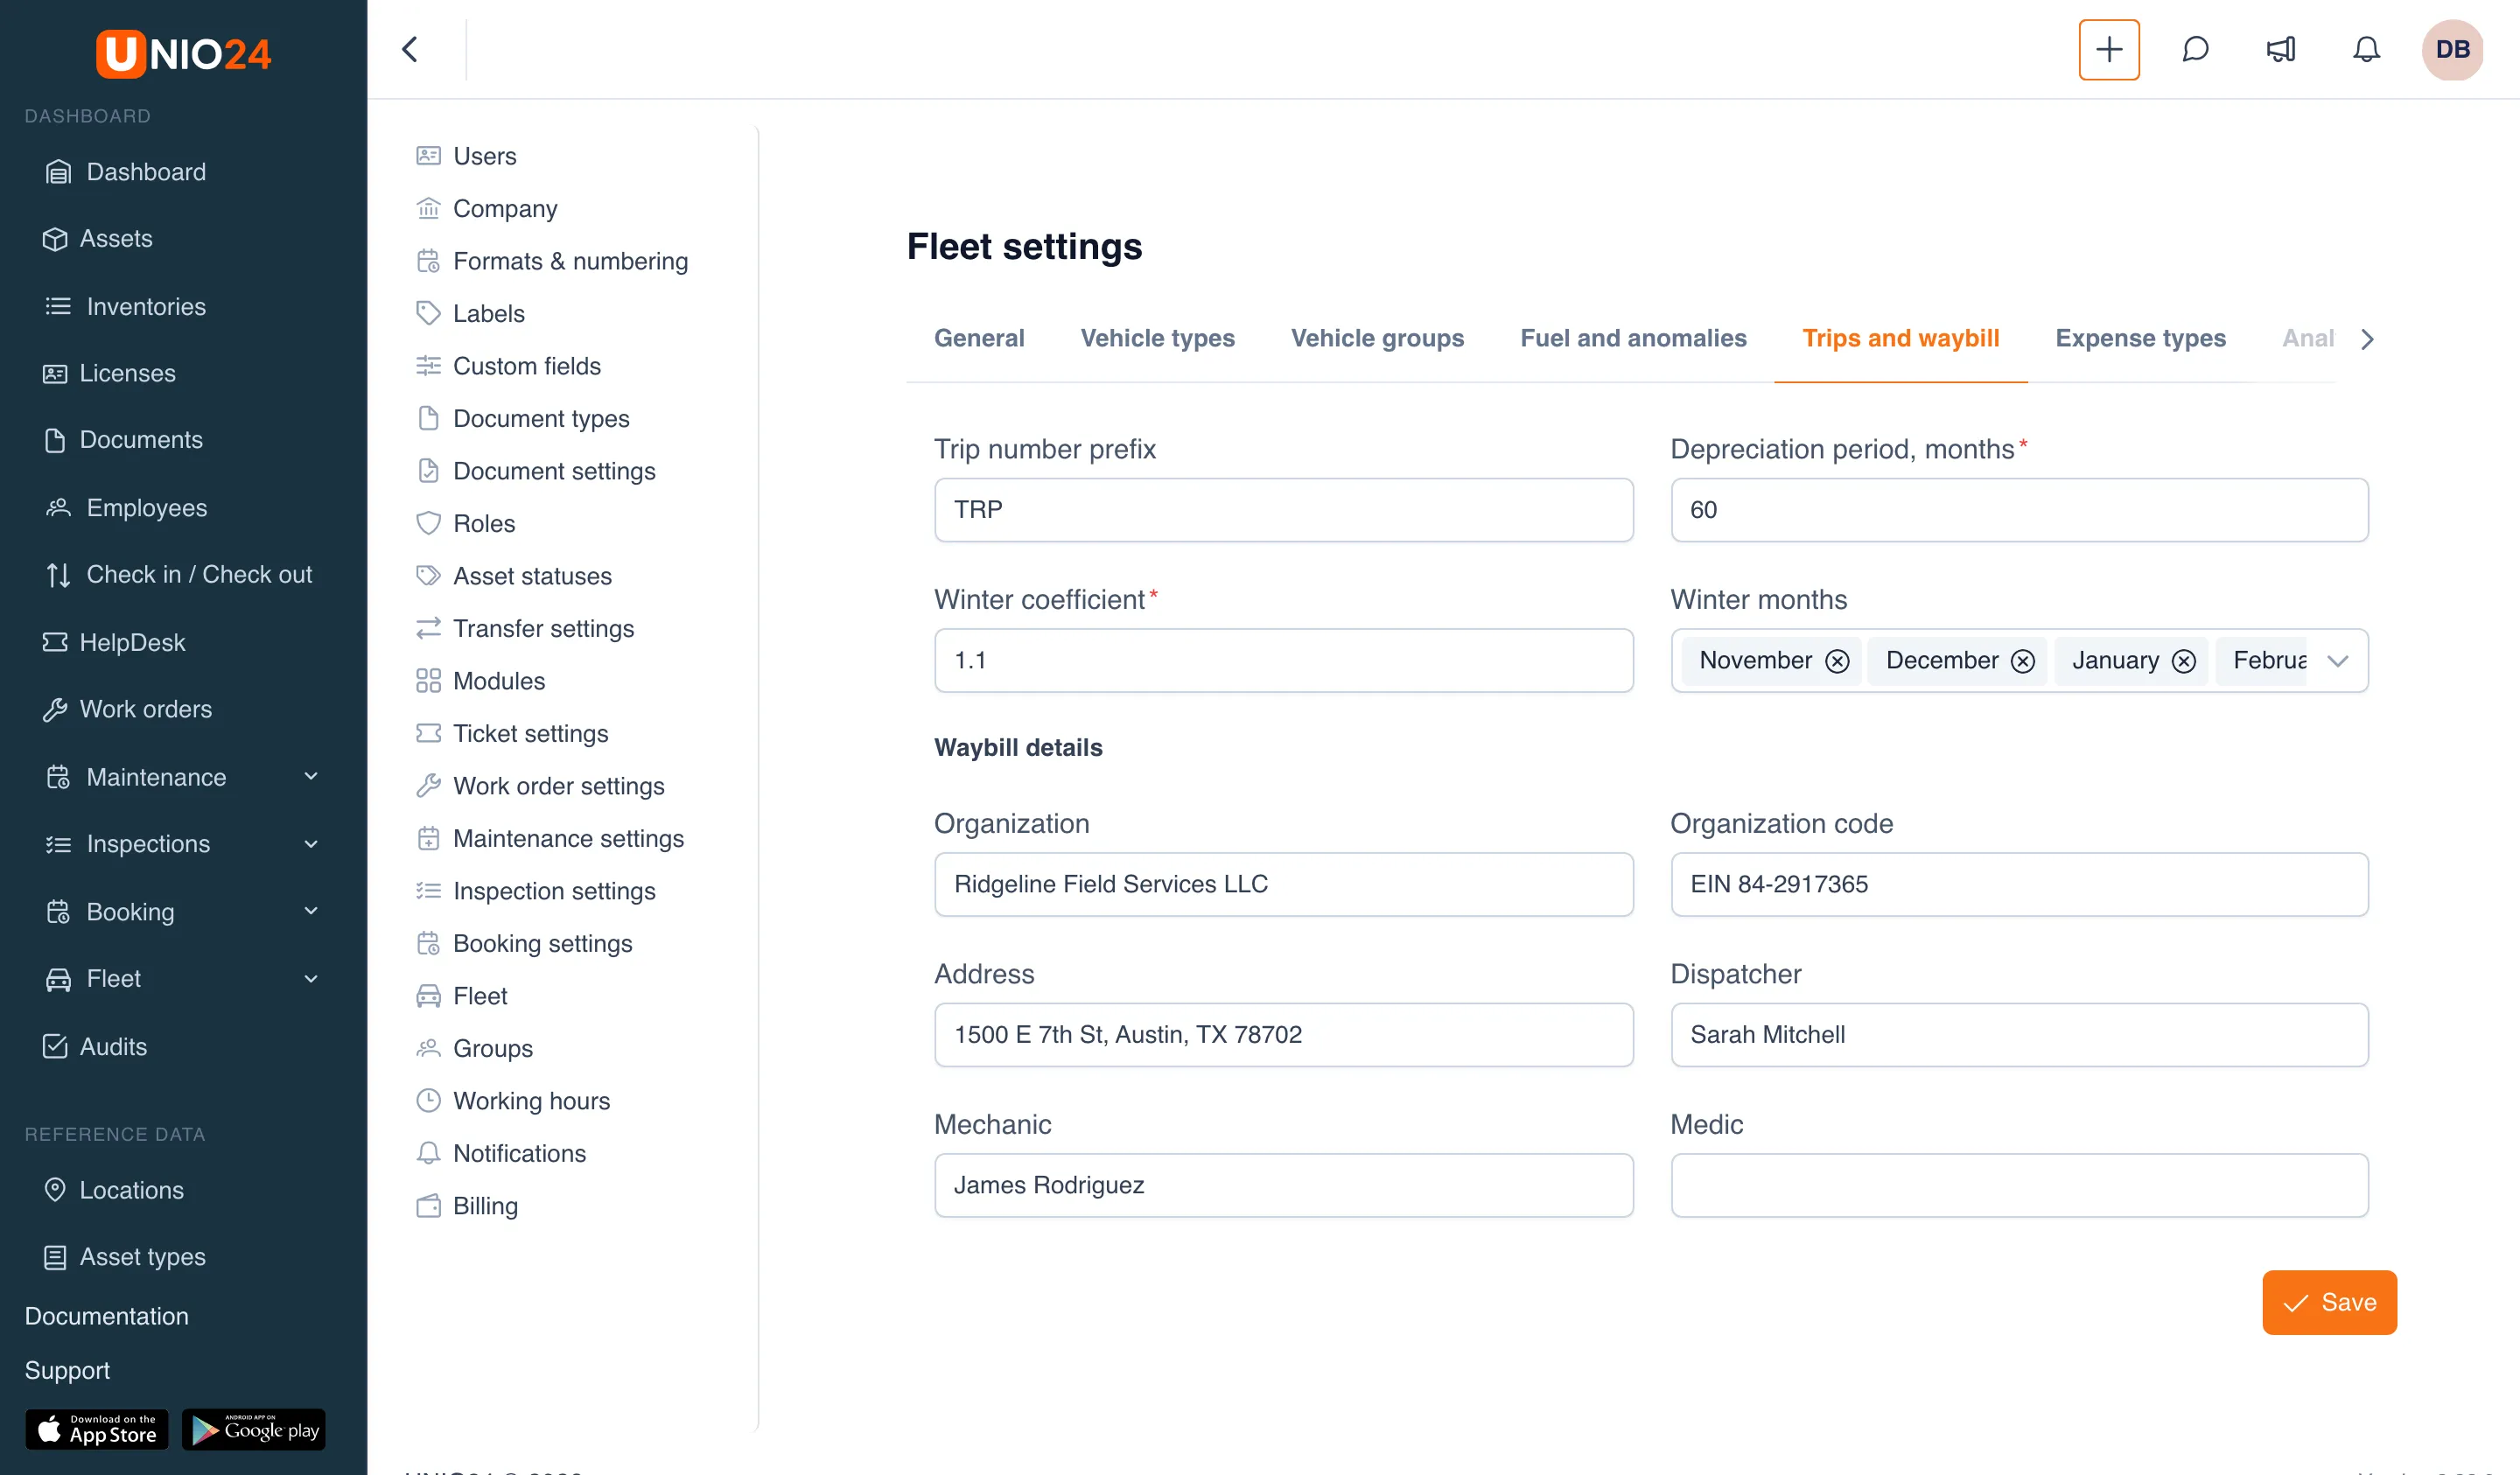
Section titled “Trips and waybill”- Open Settings → Fleet → the Trips and waybill tab.
- Trip number prefix:
TRPby default. - Depreciation period, months: over how many months the vehicle’s price is spread evenly into the cost of ownership (60 by default).
- Winter coefficient and Winter months: how many times higher the nominal consumption is in winter (1.1 by default, November through March). The coefficient is used in the norm vs actual comparison.
- In the Waybill details section, fill in the Organization, Organization code, Address, Dispatcher, Mechanic, and Medic. They are printed on the waybill.
- Click Save.
Expense types
Section titled “Expense types”Expense types sort what vehicles cost besides fuel: parking, tolls, insurance, repairs.
- Open Settings → Fleet → the Expense types tab.
- To add a type, click Add type, enter the Code and Name, and click Save.
- To rename a type, click Edit in its row.
- To stop offering a type in forms, turn off its In use switch.
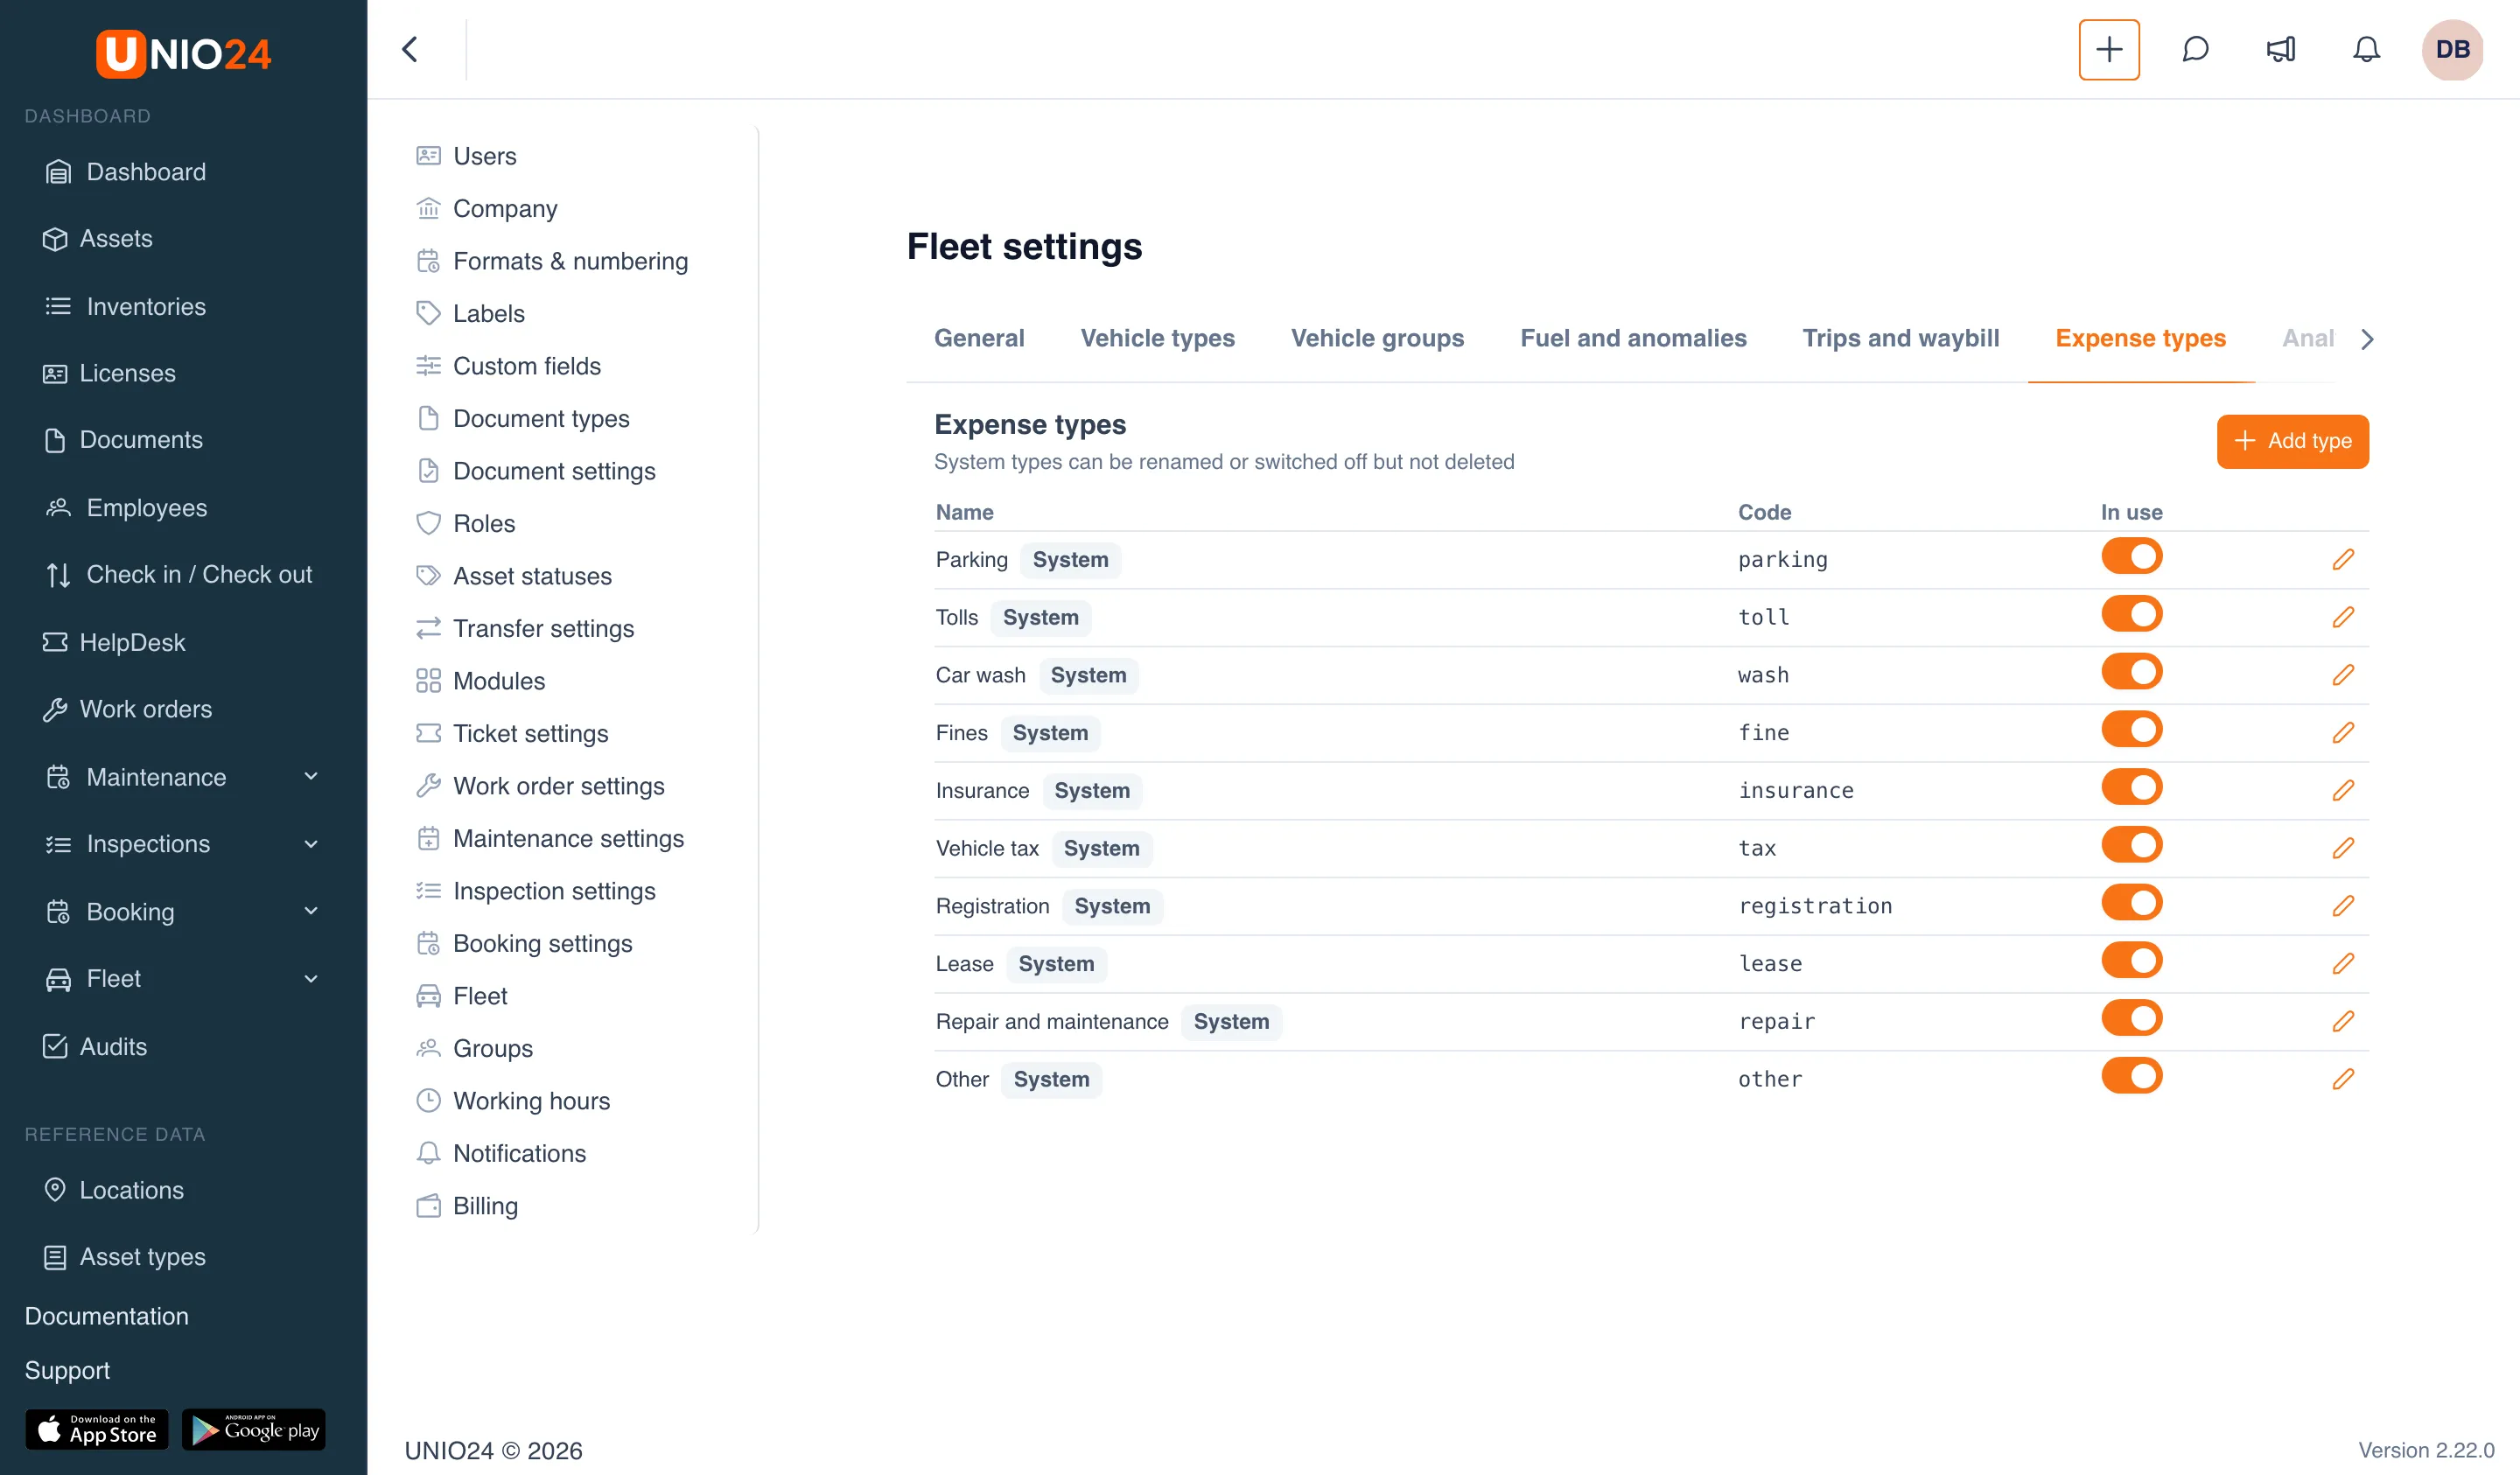
System types (with the System label) can be renamed or switched off but not deleted. You can delete a type of your own with Delete; expenses already recorded under it stay.
Analytics
Section titled “Analytics”On the Analytics tab:
- Replacement age, years: analytics shows vehicles older than this as replacement candidates (8 years by default);
- Low utilization threshold, %: analytics shows vehicles with utilization below this as underused (30% by default).
Click Save. How to read the analytics is in Fleet deadlines and analytics.
Grant permissions
Section titled “Grant permissions”Fleet permissions are granted in Roles and permissions, in the Fleet group. The “Manager” role usually has the fleet permissions checked already; other roles get them by hand.
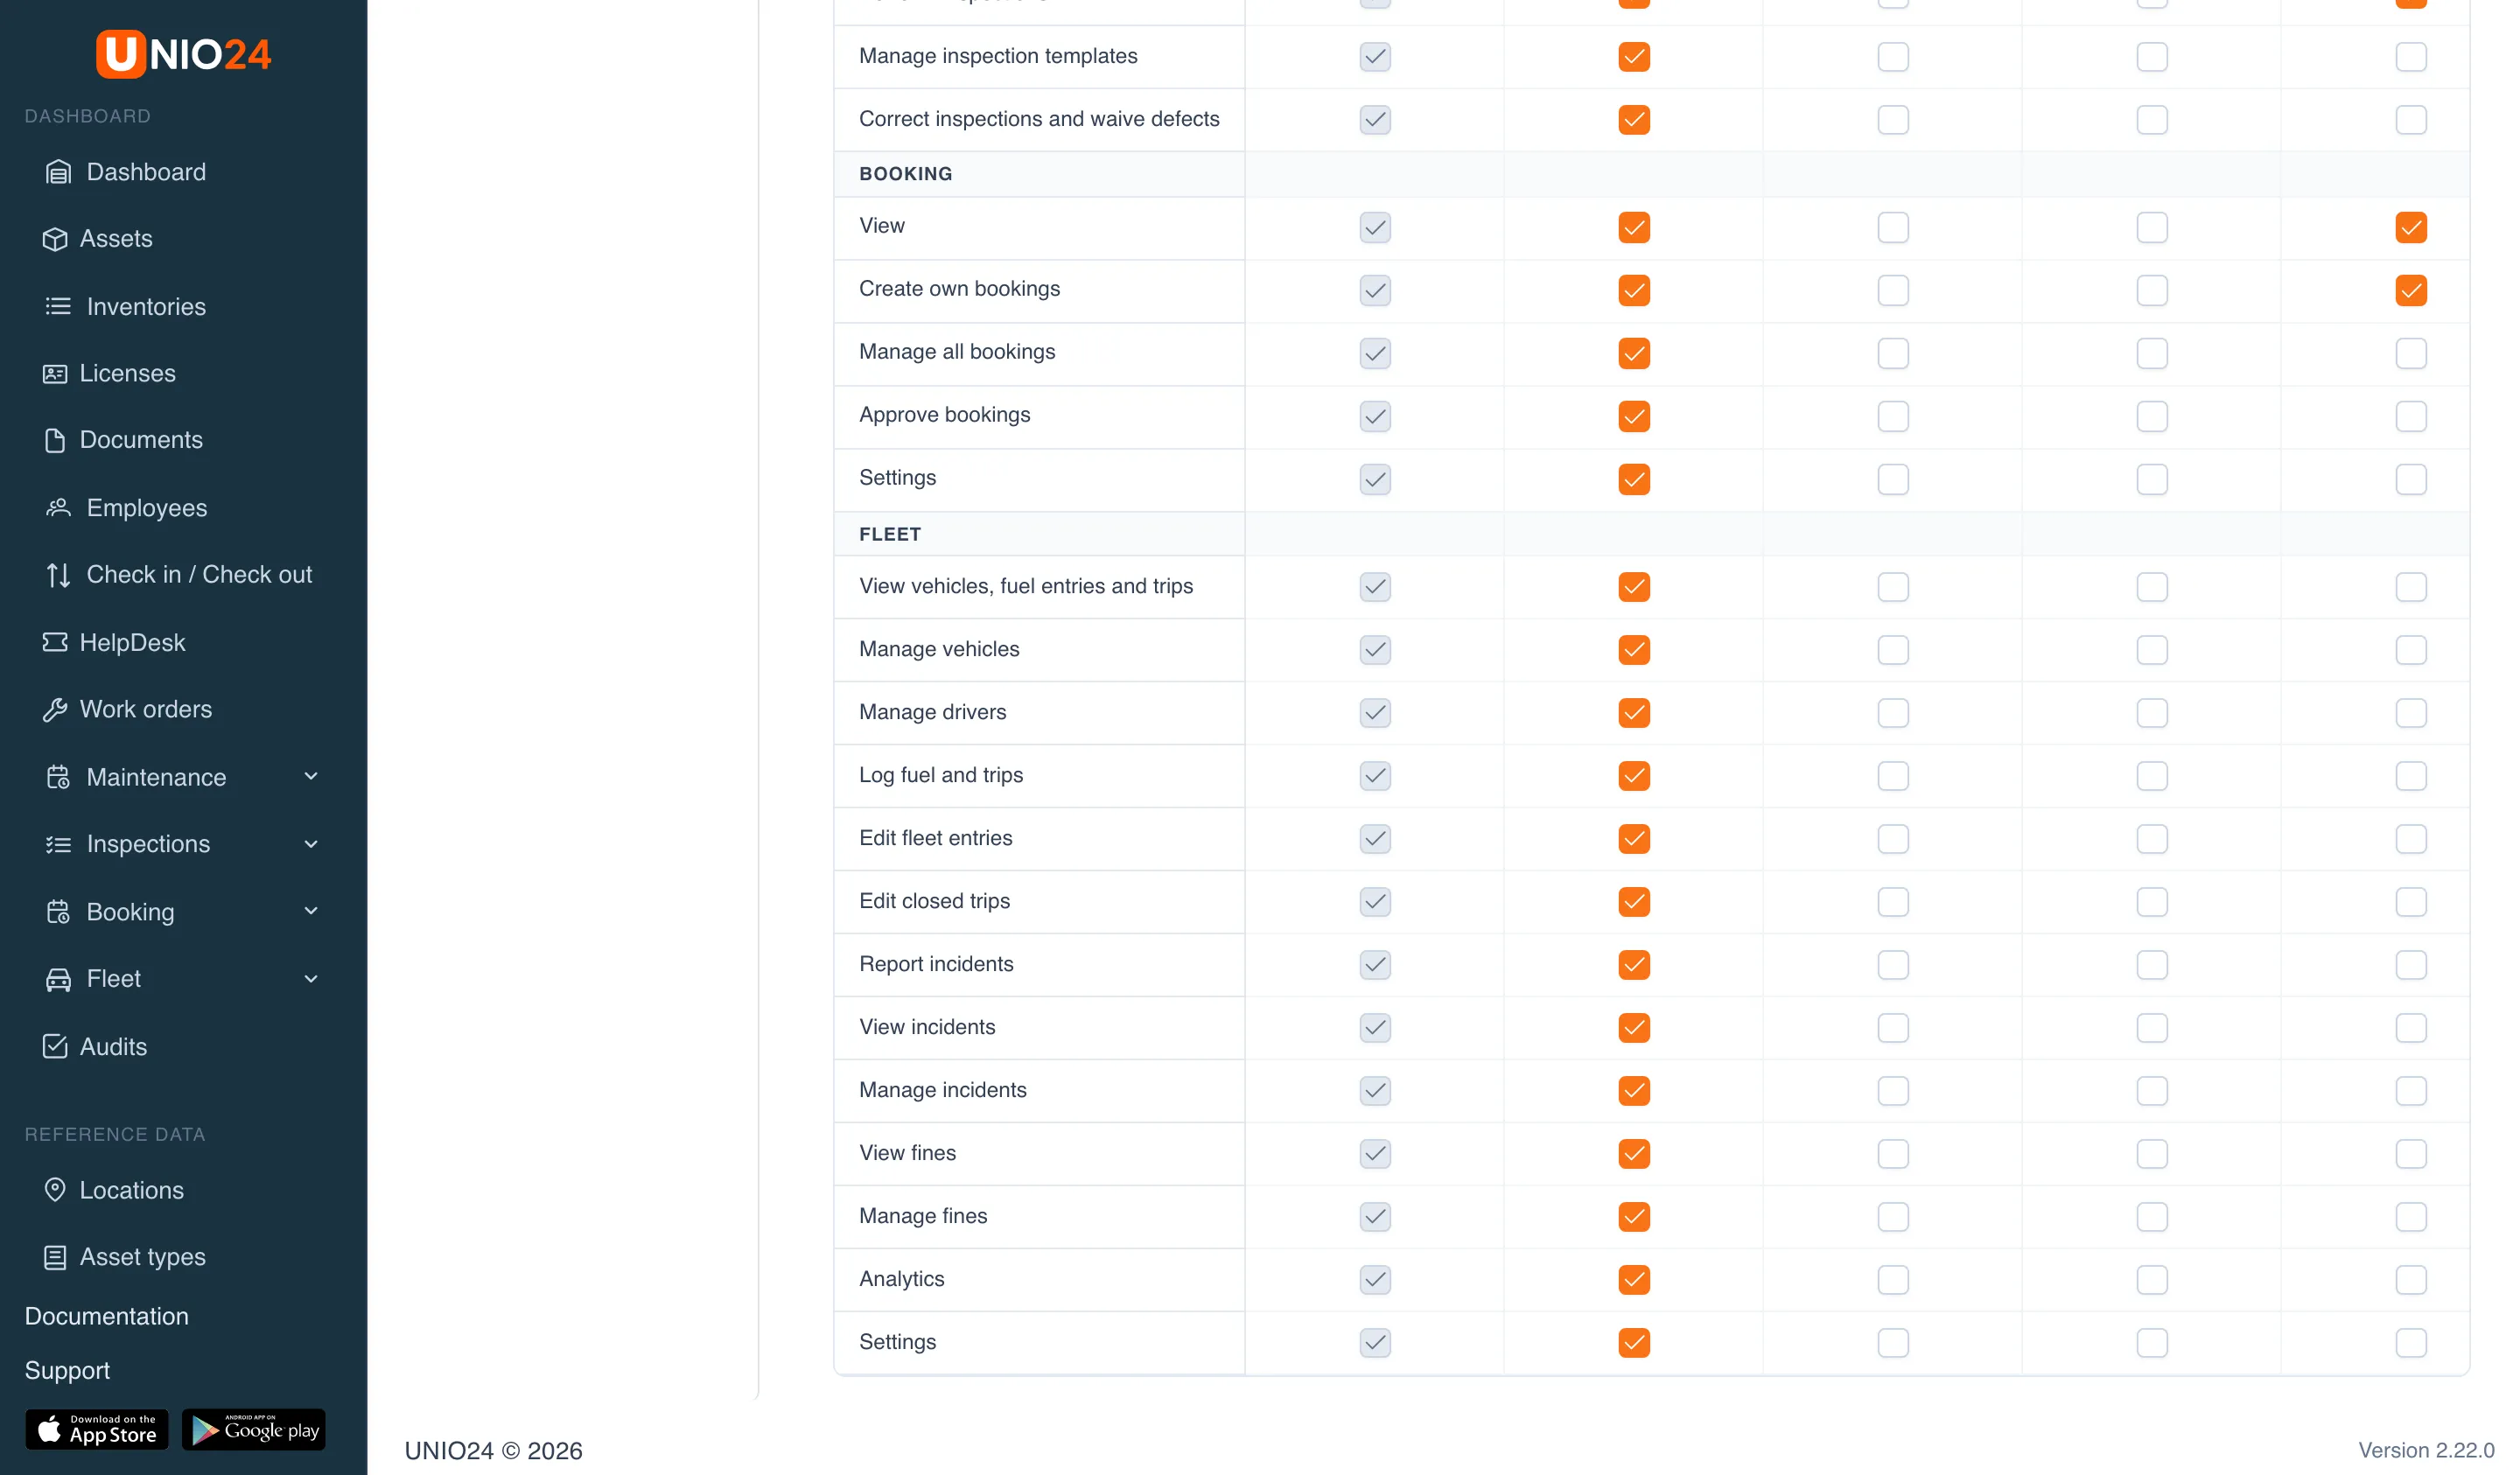
Typically:
- a dispatcher or fleet manager gets View vehicles, fuel entries and trips, Manage vehicles, Manage drivers, Log fuel and trips, Edit fleet entries, Manage incidents, Manage fines, and Analytics; the module administrator also gets Settings;
- a driver gets Log fuel and trips and Report incidents. A driver sees only their own vehicles, entries, incidents, and fines, logs fuel and trips only on their own vehicle, and can edit their own entry within 24 hours;
- an accountant gets View vehicles, fuel entries and trips (fuel entries, expenses, and cost of ownership), Manage fines (paying fines and charging them back), and Analytics; if the accountant imports fuel card statements, also Edit fleet entries.
The Edit closed trips permission is for whoever corrects trips that are already closed. Creating a work order or sending a vehicle for repair from an incident also takes work order permissions or permission to edit assets. The full table of permissions is in the Fleet reference.
Useful links
Section titled “Useful links”- Fleet — how vehicles, statuses, and the driver check work
- Vehicles and drivers — how to add vehicles and drivers
- Fleet reference — all permissions and notifications
- Roles and permissions — how to grant permissions to roles
- Documents — expiry dates of vehicle and driver documents